I wish I had a pet pig or a pet pug. They’re both so cute, and I’ve heard they both make great pets. Nevertheless, I have neither, although I do have a cat…but this post is about making a puggy bank. No, you didn’t hear it wrong. I said puggy, not piggy. Using the bottom of a plastic soda bottle, which I though would mimic the jowls of a pug dog, I followed Martha Stewart most adorable piggy bank project tutorial. She turned re-purposed plastic soda bottle into a piggy bank which you can see here. In addition, I needed a project for the Hometalk Thrift Benefit for Sheltered Animals Blog Tour, and I thought this project would be perfect.

I’m very excited to be part of this amazing blog tour which will benefit the care of sheltered animals. So I decided to make up a pack of puggy banks to donate to the local animal shelter where I found my pet Kitty.
To make the puggy banks, I followed most of Martha’s instructions, which you can find here. I made a few changes as well, to turn the plastic soda bottle from a pig to a pug. Come along, I’ll show you. I’ve included free printable instructions and a puggy bank face template at the bottom of this post, as well.
How to Make a Re-Purposed Soda Bottle Puggy Bank:
Supplies
2 Liter Soda Bottle – cleaned and dried
4 Empty spools of thread
Hot glue gun
Masking tape
Torn newspaper strips (make sure 1/3 of the strips have black writing only)
Flour and water at 1:1 ratio mixture
Craft paint ( I used Martha Stewart’s Multi-Surface Craft Paint in colors: Wedding Cake, Acorn and Black)
Decoupage ( I used Mod Podge Matte)
Brown paper bags or craft paper
Black and red construction paper
Black felt
Cork – large enough for coins (I purchased mine at the local hardware store)
Thin tipped craft paint brush (for the face details)
Sanding block
Craft knife
Black marker
Hand held hole punch (optional)
File folder or thin card board (for the puggy ears #8 on template)
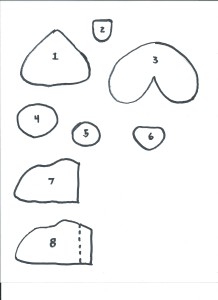
Puggy Bank face and ears template (see below)
Steps
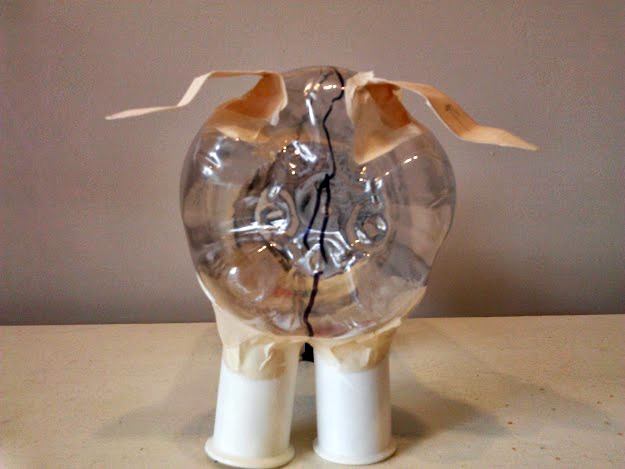
1-With a marker draw a line down the center of the bottle, making the top of the puggy head line up with one of the bumps at the bottom of the bottle.
2-Hot glue the empty spools to the bottom of the bottle for legs; and then tape them down to secure.
3-Cut out all of the pieces on the Puggy Bank face template.
4-Using the template piece #8, trace cut out the ears from a file folder or thin card board.
5-Using template pieces #1, 5, 6, and 7 trace and cut out from the black construction paper.
6-Using template pieces #4 and 8 trace and cut out from paper bag or brown craft paper.
7-Fold ear template on dotted line and tape the ears to the bottle.
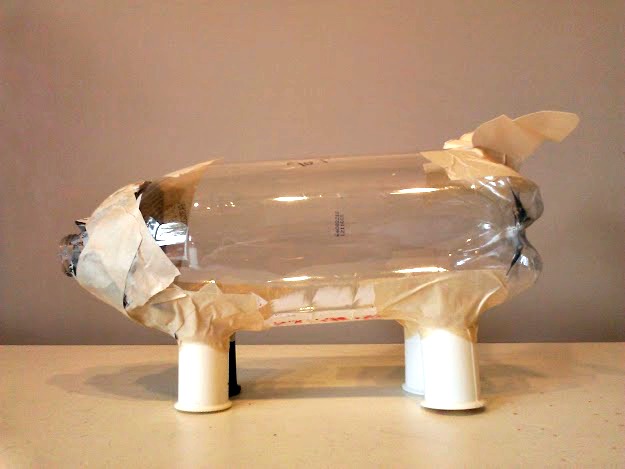
8-Remove the soda bottle cap, scrunch up a piece of newspaper and tape it around the soda bottle nozzle to create the puggy bottom.
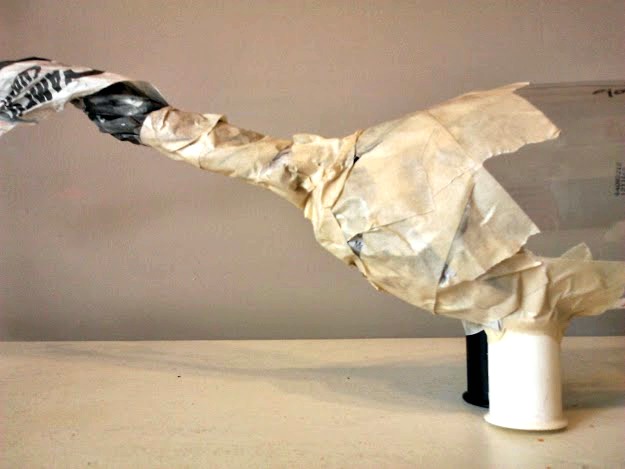
9-Twist 1-1/2 pieces of news paper together to create a tail that starts thicker and gets thinner; and then tape the thicker portion the the back- top side of the puggy bottom. Add more tape, making sure to cover the bottle opening.
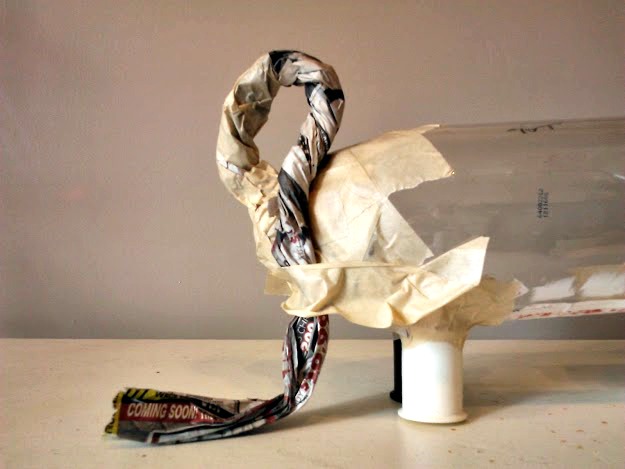
10-Continue to twist the tail and wrap with masking tape until you have a tail shape. Cut off excess.
11-Mix up a flour and water mixture until no lumps.
12-Dip newspaper strips into mixture and start applying. Apply one coat and let dry overnight.
13-Apply second coat and let dry again.
14-Apply the third coat using the black print-only newspaper strips. Let dry. To speed up drying I used a hair dryer, but you can also use a fan like Martha suggests.
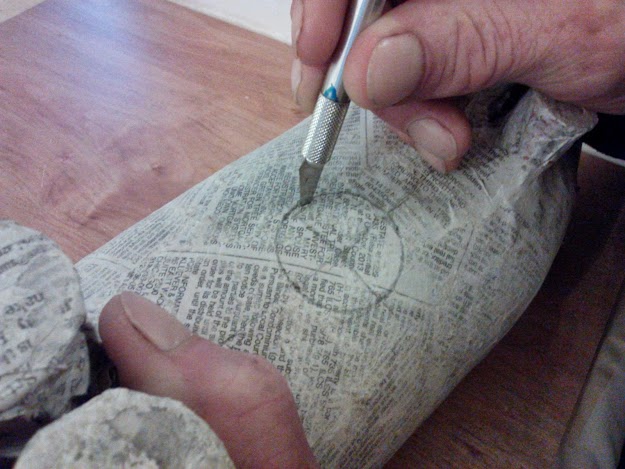
15-Cut out circular hole in bottom of puggy for the cork, making sure hole is smaller than the largest portion of the cork; and cut slit in the top of the puggy for inserting money.
16-Mix paint 2:1 Wedding Cake and Acorn; add 1 part decoupage and a few drops of water and apply with paint brush, two light coats. Let dry.
17-Apply a coat of decoupage only.
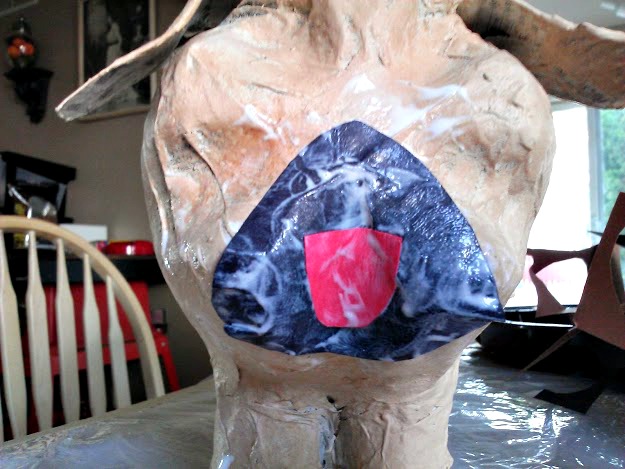
18-For the nose (piece#6) fold width-wise and punch a hole using hole punch to make nostrils, or cut out small hole if a hole punch is not available.
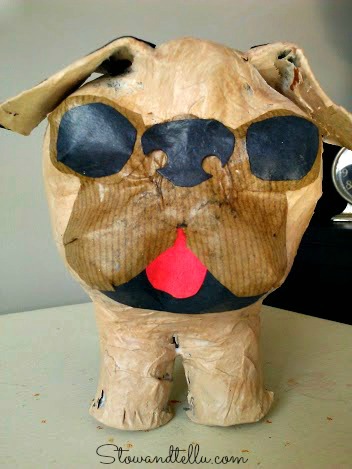
19-Using decoupage, apply pieces #1 and 2 to face, and then and then #3 and 4, and then #5 and 6. Finally attach pieces #7 to ears. Smooth all pieces down with damp fingers to get good adhesion on the bumpy surface. Let Dry. Apply second coat decoupage, smooth down some more, if needed and let dry.
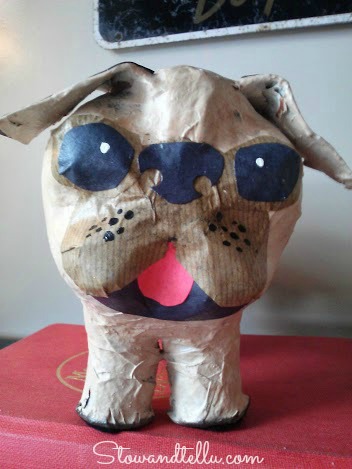
20-Add two white dots for the eyes and black dots as whiskers, let dry. re-coat with decoupage if desired.
21-Dab black craft paint on the bottoms of the paws and around the edges of the paws.
22-Cut out black felt pieces for the bottom of the paws, attach with decoupage – TIP: Trim off a small inside section of felt on inner part of the paws to make the puggy bank more sturdy.
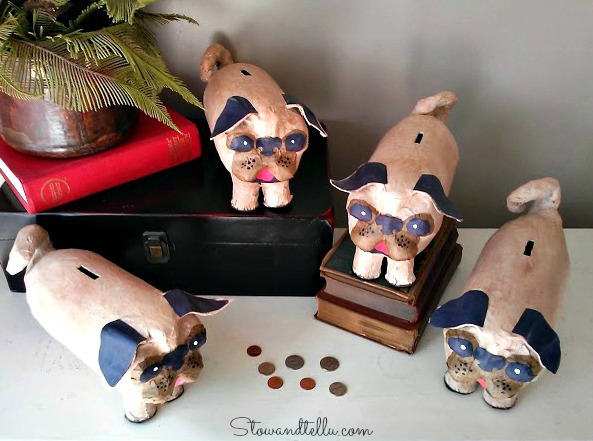


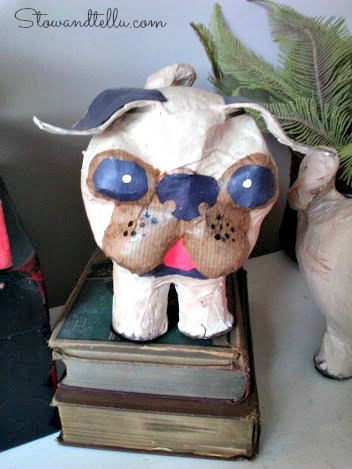
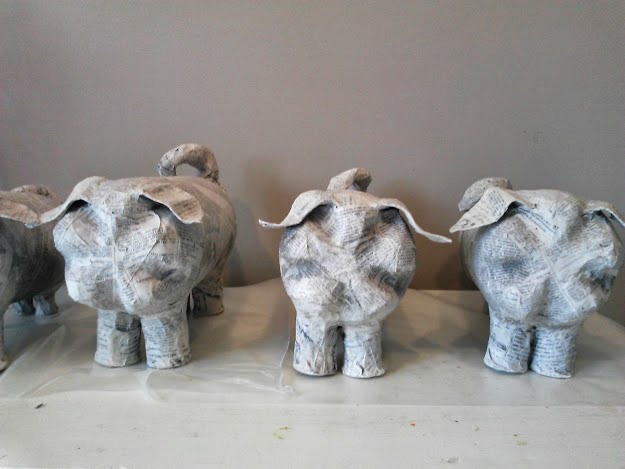
These guys turned out cuter than I had expected. With a little help from some decoupage, paint and construction paper, the bottom part of a soda bottle ends up looking quite like a pug’s face. Aren’t they cute??
This pack of puggies will be donated to the West Suburban Humane Society for re-sale, which will inevitably help to buy supplies for the care of the animals in the shelter. It feels like a great way to give back to the shelter where I was able to find my much-loved pet Kitty!
Thank you so much for stopping by and please come follow along on the Hometalk Thrift Benefit for Sheltered Animals Blog Tour.
Find FREE printable template and directions right below:
Click to download: Puggy Bank Face Template PDF
Click to download: Re-Purposed Soda Bottle Puggy Bank Directions PDF
Linking up to:
Mel says
Amy they are so cute! I remember when Martha made hers and its been on my o do list for ages but your pugs are even cuter, what a beautiful way to support the animal shelter.
Vicky says
Wow – these are amazing! I can’t believe you started with just a soda bottle and some thread spools!
Amy says
Thank you, Vicky. I was a little scared at how it would turn out. You know it’s a 50/50 chance when you mess with the original recipe:)
Shanna Gilbert says
OMG these are the cutest things ever! There isn’t a kiddo alive that wouldn’t want one of these! Great job Amy! Pinning!
Amy says
Thank you Miss Shanna! I better get them over to the shelter right quick, before I start thinking they are my pets 😛
Danni@SiloHillFarm says
Oh Amy, those are so cute! I bet the humane society is so pleased! What a great cause and a great project! You know how much I love a good upcycle!
heather f says
Oh my goodness!!!! I might have to think about making these when it’s my turn to teach at girl scouts…how long did it take over all? so fun!
Amy says
Thank you, Heather!! Warning: it does take a few days because you have to let the paper mache dry between coats (like 8 hours). The decoupage part will dry much faster 😛
JoAnn @ SweetPepperRose says
This just makes me smile – too adorable for words!
Feral Turtle says
OMG These are amazing!!!!! Pinning
Robin @ Redo It Yourself Inspirations says
Oh my goodness, they are soooo cute!
You’ve got to share them with us at our Creative Craft Challenge this month! Everyone will love them!
Robin
http://redoityourselfinspirations.blogspot.com/2015/01/craft-challenge-creative-link-party.html
Kristina and Millie says
In love 🙂 these are so adorably cute and I have a little chug so one of the puggy banks could be a new friend for her lol! thanks for sharing at the new Creative Challenge link party!
Lisa says
These are so adorable. My daughter loves pugs so Im going to share this idea with her. Thanks.
Lisa
Andrea Fogleman says
OMG how cute and creative. They’re amazing and I can’t believe you used a bottle to create them. Thanks for joining us for January’s Craft Challenge.
Darlene says
I never would have thought the bottom of the bottle could be shaped into a puppy’s face. Fantastic job on the puggy banks.
Robin @ Redo It Yourself Inspirations says
Thank you so much for sharing with us at the Creative Craft Challenge, Amy! I chose to feature your amazing creations during our February challenge! Hope you stop by and share with us again!
~ Robin
http://redoityourselfinspirations.blogspot.com/2015/02/february-creative-craft-challenge.html
Tina says
Cute project, how to take out the coins and notes? Is there a provision
Amy says
Hi Tina,
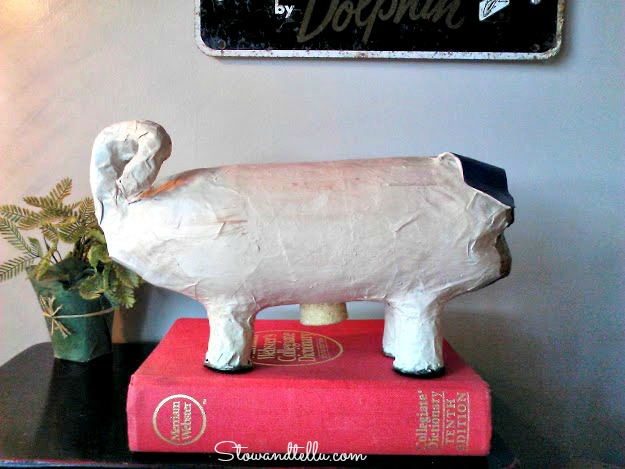
Yes, you should cut an opening underneath (on the pug’s belly) and use a large round cork (found at most crafts stores, and online) to plug the opening. I think a few of the photos in this post show the cork. I hope that helps.
Thanks,
Amy