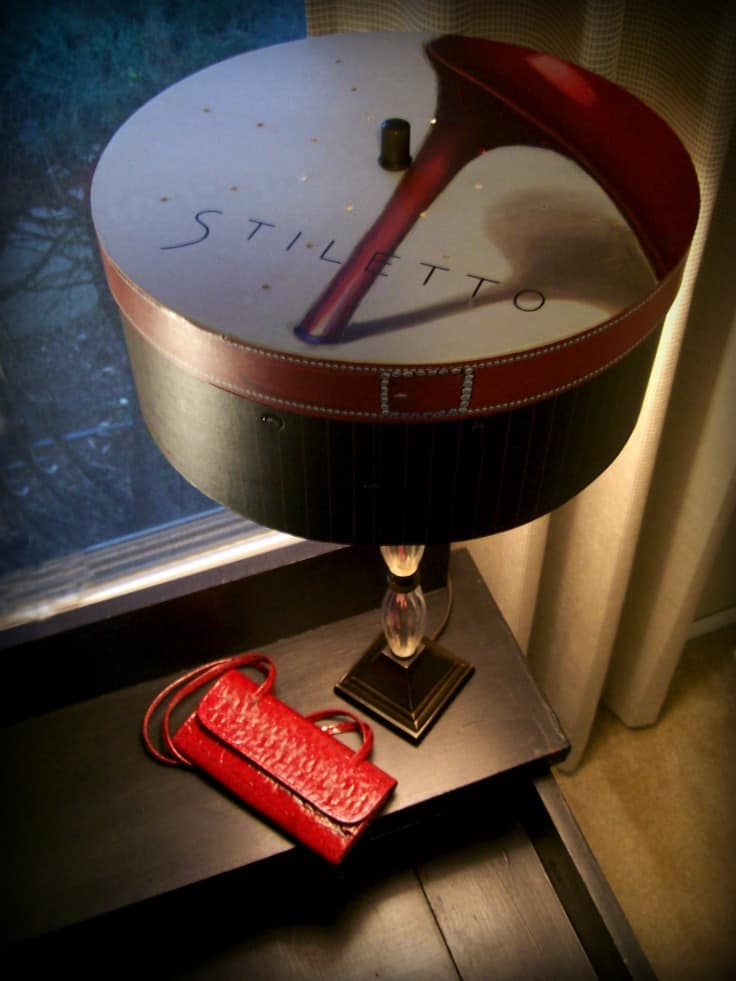
Hey fashionistas! Don’t keep all your pretty hat boxes hidden on a shelf. Turn your favorite one into a lamp shade. The top of a hat box is often the interesting part. Why not give it more exposure by displaying it on a lamp? This is a DIY project that can be done in as little as an afternoon. Find a lamp shade base to match in proportion and style, and you are almost there.
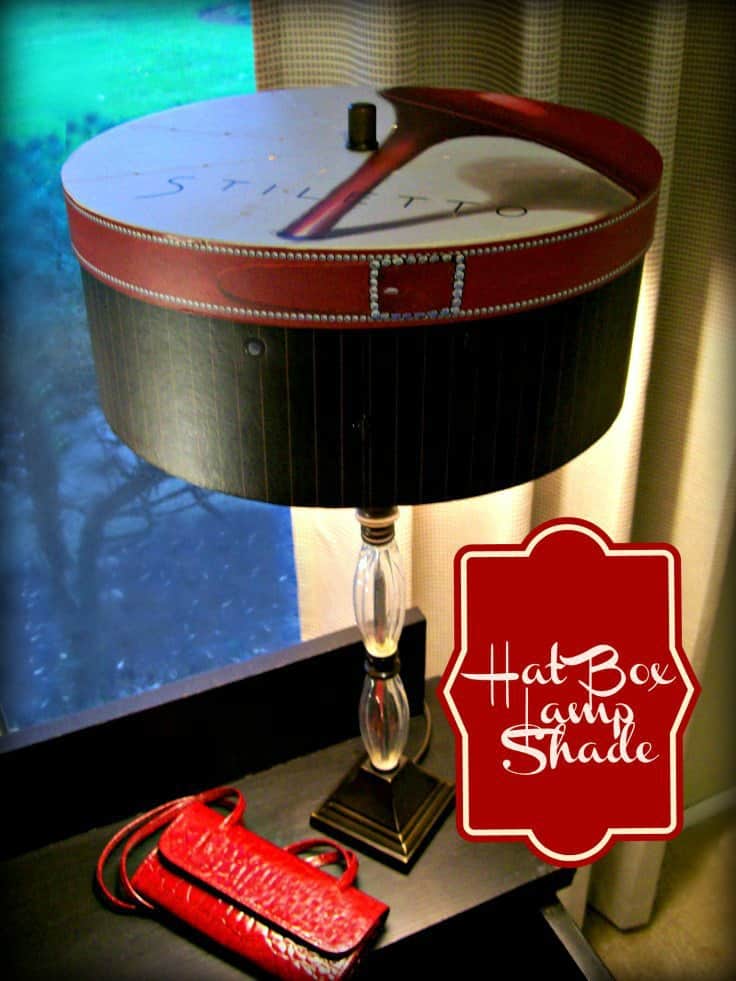
Add a little luxury to any room and who knows maybe you’ll feel like you’re shopping on one of those fancy streets. I would name few, but you would never believe how long the list is!! Click here:Wikipedia, and have a look for yourself at the top list of shopping streets around the world!! Did you find one close by? While you plan your shopping trip, here is a short tutorial on how to DIY a hat box lamp shade.
Supplies:
Hat box
Lamp shade base that matches in proportion and style
Small lamp shade mounting hardware
1 Sheet of either: craft paper, news paper, or wrapping paper
Ruler or straight edge
Power drill
1 large drill bit
1 smaller drill bit
White glue
Pencil
Sizing up the Shades
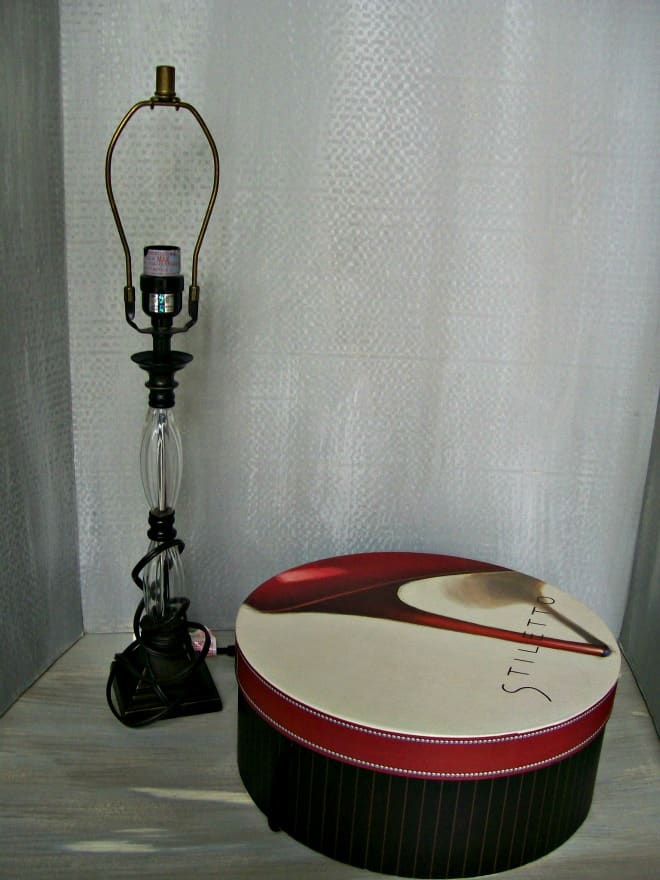
With your favorite hat box in mind, find a lamp base that fits in size and style. You will also need a smaller size of lamp shade mounting hardware, preferably one with a screw at the top for mounting a shade.
I salvaged both the hat box and lamp shade from my local thrift store.
Remove the hat box top and place the bottom of box over lamp shade mounting hardware to make sure you have a good fit.
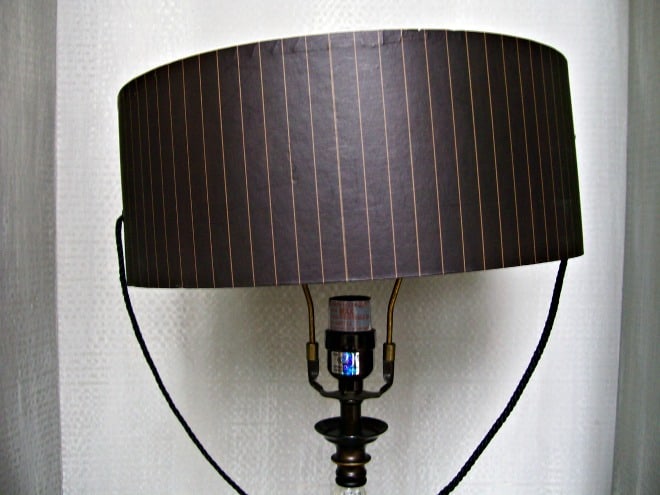
Tip: Use a little craft paint to cover the lamp shade hardware and any unsightly labels, for a unified look.
Flip the Lid
Remove box cord handle. You can either re-tie the handle to one side only, or discard.
Lightly glue the hat box lid to the bottom of the hat box bottom. In other words, the hat box lid should now be on the bottom of the hat box.
Note: Alternatively, if you do not want the hat box design to be upside-down, then cut the bottom portion of your hat box off using a straight edge or razor blade. To hide the cut edges of the box bottom, consider applying a strip of washi tape around the rim. Then attach the box top to the top of your hat box.
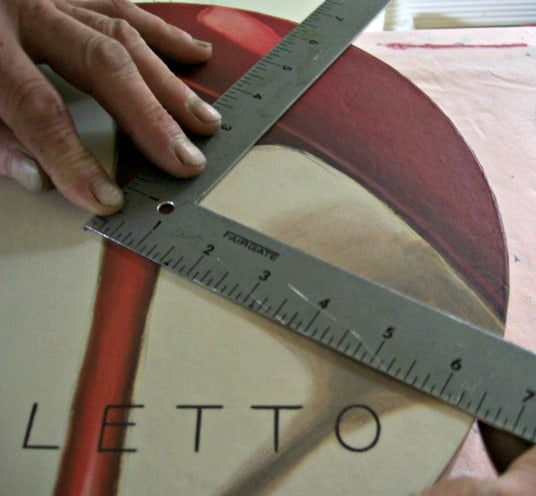
Find the Center
Place the hat box, lid side down, on a piece of craft paper and draw a line around the circumference with pencil.
Cut out paper circle. Fold paper circle in half, then into a quarter circle.
Lay the quarter circle on the hat box lid and find your center. Place the quarter piece several times around the box lid to make sure you have dead center.
In this picture, I used an angled ruler as my quarter circle, but the paper circle method is much easier.
By the way, those grimy man hands aren’t mind, I swear!!!
 Just Like Pie
Using your quarter circle, draw lines with a pencil lightly onto the box lid, like a pie with 4 quarter pieces; and then with a ruler draw additional lines to make 8 pie pieces.
With the ruler make 2 or 3 marks along the lines for air vent holes. Erase the pencil marks once you are done drilling.

Drill don’t Slice
Size the drill bit to match the screw on the top of the lamp shade base, and then, using the larger drill bit, drill a hole for the center.
Using the smaller drill bit, drill holes for the air vents.
With your finger push the paper edges back into the holes and then push a pencil tip into the holes to countersink, hiding the rough edges of the card board.
Place the hat box center hole through the screw on the lamp shade hardware. Done.
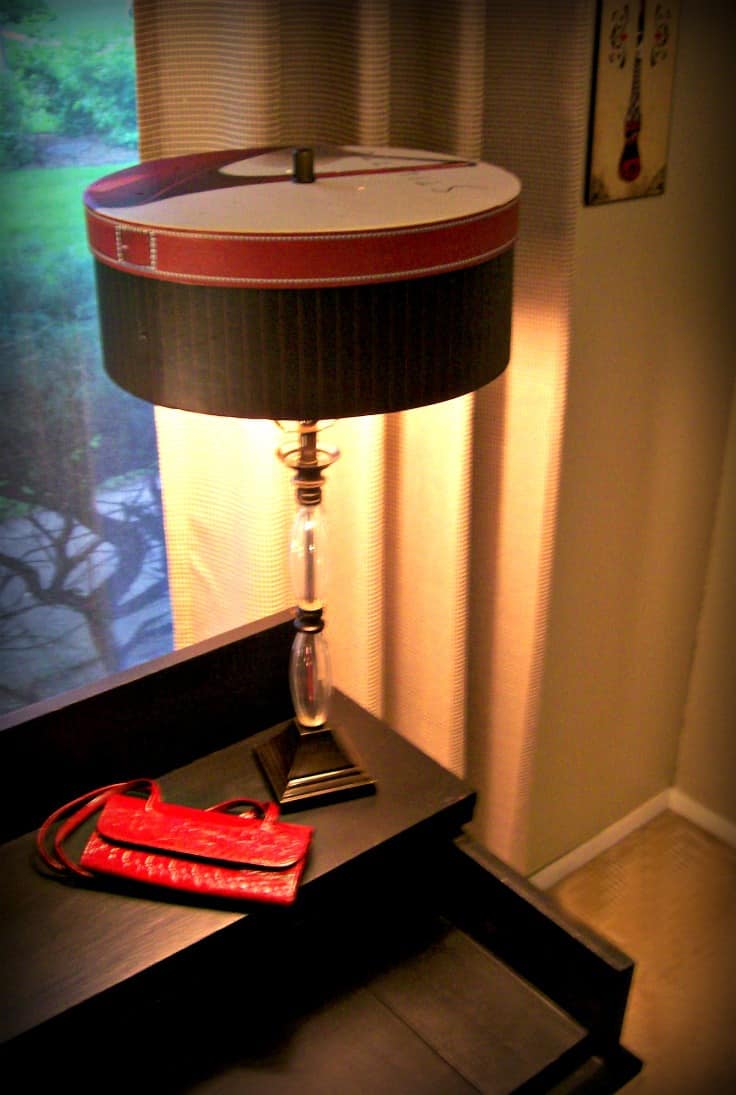

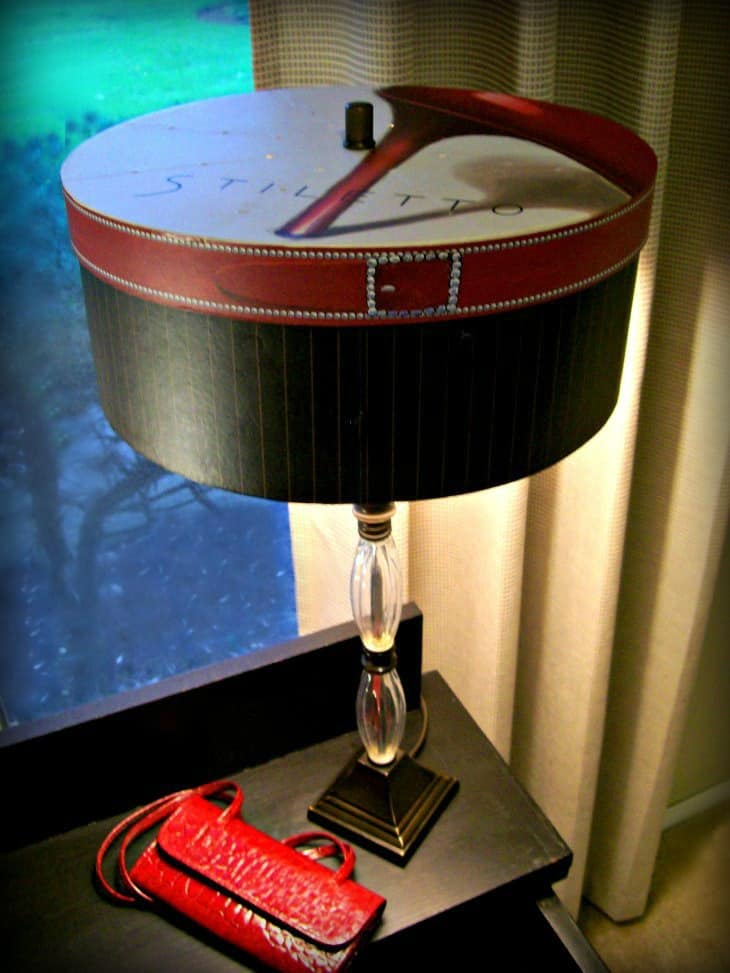
A hat box from an expensive boutique or a vintage haberdashery can add charm and elegance to a room. Displaying that fancy hat box as a lamp shade is just a interesting way to show if off!
Linking up to:
Throwback Thursday
Mel says
Amy that is awesome! So so clever!
Bliss says
How cute is that!!! Pinned it to my lighting board.
Bliss
Shanna Gilbert says
Your best project yet! Love it!
heather f says
this is so fun. Do you know, I think Americans need to do as the British do. I want to see more fascinators!!!!
SheilaG @ Plum Doodles says
Love it! I don’t see many hatboxes around, but when I do, I’ll be grabbing them now. 🙂
samantha @ how to find a man says
That’s a really nice hat box you started with. I would be so scared if I broke it.
It must of took guts to operate on it, because I would be so afraid of messing up…
But the pictures are the proof, I really love the pinstripes, and the stiletto on the top.
Very sexy!
Danni@SiloHillFarm says
Coolest lamp evah!! I’m still catching up…but slowly! I love this Amy! It’s so original and amazing. The stiletto heel makes it even more awesome! Great project!
Jennifer @ PinkWhen says
OH MY GOSH!! That is so super cute! I would have never thought of that, and I love the stiletto up top and the writing underneath. Very cool! Thanks for linking this up at the DIY Sunday Showcase, PINNED!!
Pat @ Life At Lydias House says
What a cute idea! Found you from Throwback Thursday!
Amy says
Thank you, Pat 🙂
Toodie says
This is a really fun idea and I love how it looks!
Amy says
Thank you for stopping by, Toodie 🙂
Paula@SweetPea says
I never would have thought to use a hat box as a lamp shade. What a clever idea!
Thanks for sharing at Throwback Thursday!
Amy says
Thank you for stopping by -and- throwing the party!! ~ Amy