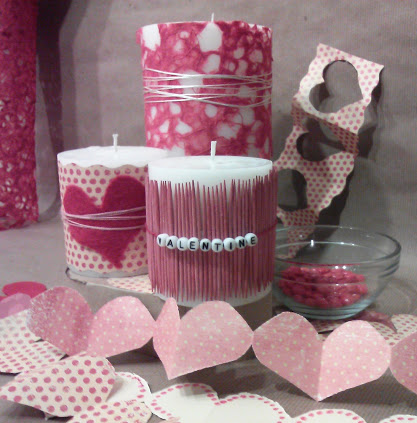
Each holiday seems to come and go so fast, it’s hard to keep up with corresponding decorations. Here is a Valentine’s Day decorating idea for pillar candles that is cheap and changeable, meaning, you can remove these decorations from your candles on February 15th, and still have usable candles. If you like to display pillar candles, without lighting them, then you might like this project. Before I go on; however, I want to say that this idea was inspired by the post, 5 Ways to Decorate a Pumpkin from Infarrantly Creative. Why I’m talking about pumpkins around Valentine’s day must seem crazy, but it’s the idea of decorating ideas that can transform or last through a few holidays per season, is pretty clever if you ask me.
Changeable pillar candle decorating
This Valentine’s craft project is easy enough for kids.
You can make decorations for several holidays at a time, so that all you have to do is change them up.
Warning: This project is meant only for unlit candles.
Do not light these candles if you have applied any decorations to them.

Supplies ideas:
Pillar candles
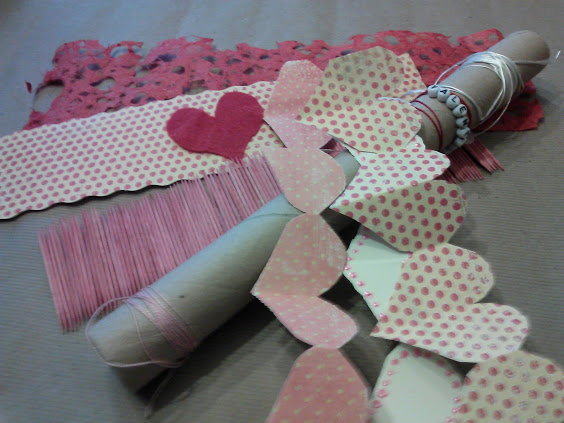
Scrapbook or decorative paper, felt, fabric
Twine, cord, wire, yarn, ribbon
Beads, toothpicks, embellishments
Rotary cutter with decorative edge blade
Scissors
Glue gun
Scotch tape
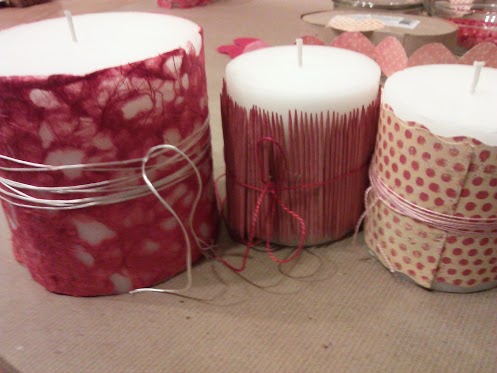
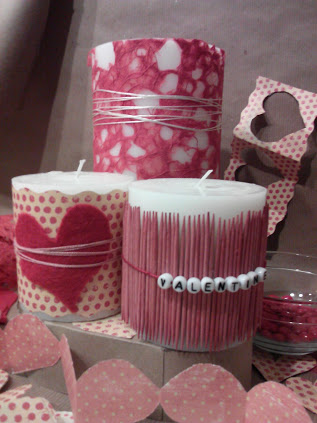
Wrap with paper, felt, or fabric:
- Measure and cut paper, felt or fabric to wrap around a pillar candle.
- Trim down to size, if needed.
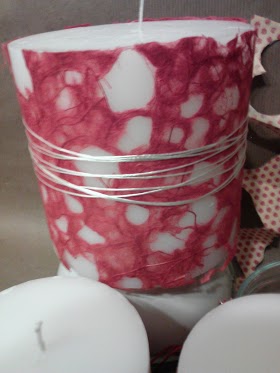
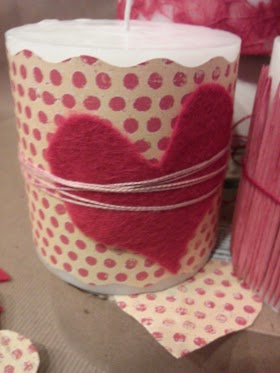
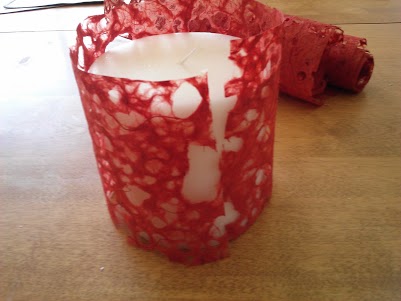
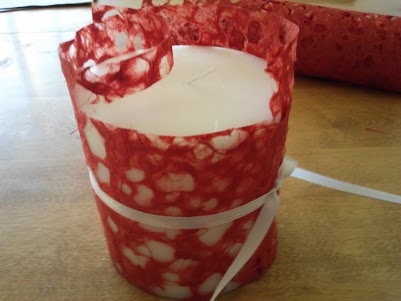
- I wrapped one candle with Jolee’s Boutique Red Fiber Lace Paper. I wrapped the other candle with some scrapbook paper.
- Attach paper around candle with a small piece of scotch tape.
- Attach any type of embellishments with glue.
- Wrap with the candle with twine, cord, wire, yarn or ribbon and tie on the back side.

Wrap with a strand of toothpicks:
I found this pretty toothpick craft idea from Sarah Obradovic’s post, Gimme 5 #004: The Crafty Toothpick. You can click on this link to get her directions.
I made two small adjustments to Sarah’s directions:
- I colored my toothpicks by soaking them in a red food coloring for a few days.
- I did not attach the ends of the strand of toothpicks with hot glue. Instead I made the toothpick strand a little longer than the width of the candle, and then I overlapped and attached the ends with a small piece of scotch tape, and finally I wrapped and tied with beaded twine to secure.
- Once your celebration is over, remove your decorations and store them until next year.
- Now, your candles are ready for the next holiday.
 I am not sure if this concept is old or new, but I know that I’ll give a thumb’s up to decorating ideas that are easily changeable, transitional or “multi holiday functional” if that’s even a term….
See more Valentine ideas here
Thank you for stopping by ~ Amy
{ sarah } says
Howdy, and thanks for linking up to my toothpick post. I love how your projects turned out!
Amycha says
Your welcome, and thank you for the great idea. I really dig your all of your Toothpick projects.