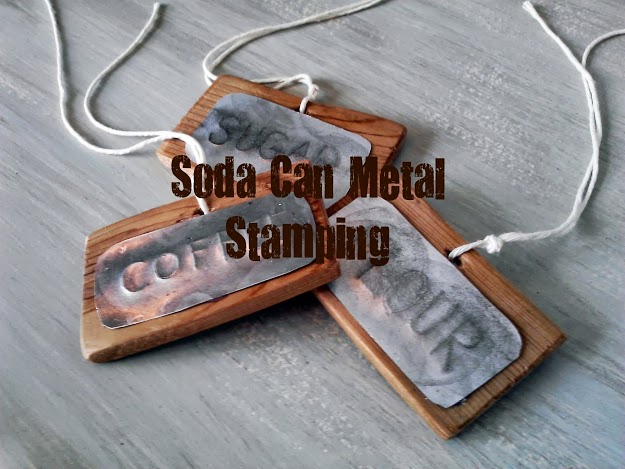
Soda can metal stamping is what I like to call the “dime store” method for creating metal stamping for crafts and jewelry. I just adored the 4 Stamped Silver Projects from Karianne at Thistlewood Farms. She captures a vintage look and elegance in her silver spoon stamping projects that you just have to see for yourself. They are gorgeous!!! I had no idea that I liked metal stamping. Now I know I’m hooked!
Elegant is not a word I would use to describe this DIY project, but vintage looking, perhaps. If you are trying to add a bit of rustic charm to a project, then this might be just the one for you.
If you have a soda can or two and a few other household items, then you can make some of these pretty quickly. It took me about 1 hour.
Get creative and improvise if you need to…the following supplies are pretty basic.
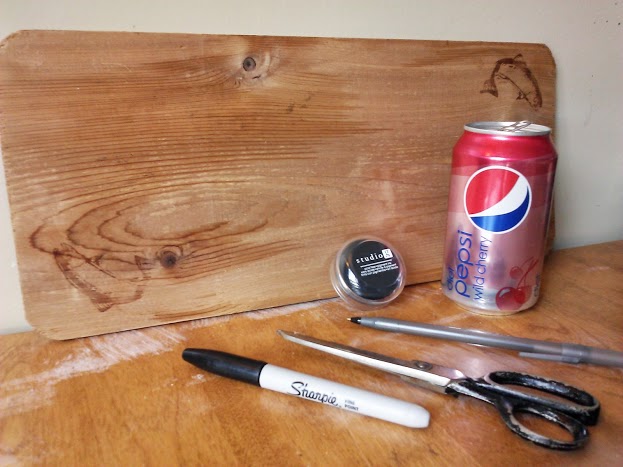
Here are the supplies I used:
Aluminum soda can
Scissors
Ball point pen or an awl if you have one (Make sure the pen is the non-click kind)
Black ink pad
Black marker
Pieces of wood (I used a cedar cooking plank)
Hand saw
Glue gun
Soda Can Metal Stamping
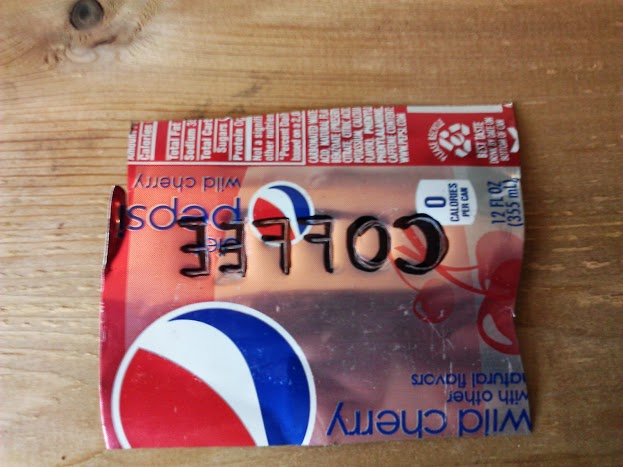
Cut the top and bottom off the aluminum can. Be careful, wear gloves if you need to, but a standard pair of scissors should do the job. It helps if you poke a hole in the can with the sharp point of your scissors to get the cutting started.
Flatten the aluminum strip out a bit and determine how many pieces you want, and then cut them out.
Lay the aluminum strip down printed side up and write your word back words with a black marker, or draw your design. It helps to write your word on paper first for practice, it is not as hard as it looks. Try to write in block letter style, kind of like kindergarten!
Once you are happy with your letters or image, trace over the letters or design with either an awl or a the tip of a ball point pen. You will have better results with a ball point pen that does not click open and closed. Make sure to press fairly hard to make your stamp impression. The idea is to have a face stamp that will be prominent enough to be darkened with ink.

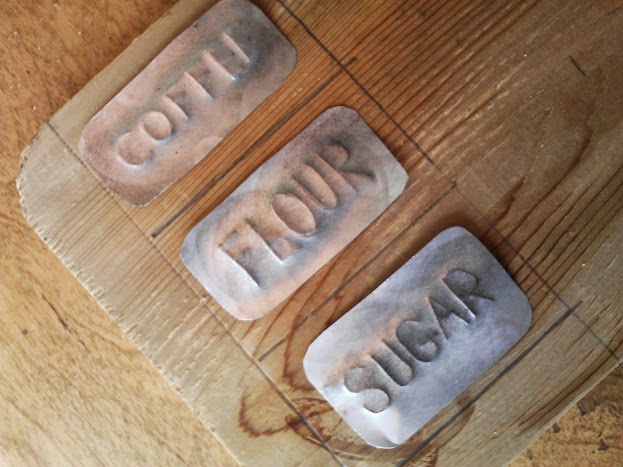
Turn the aluminum strip around and darken the face with an ink pad, trying to catch the ink on the embossed letters or design. You may have to rub some off and apply more until you get the look you like.
Round off the sharp edges.
Mount Metal Labels on Wood
If you would like to mount the metal labels on wood, start by lying your metal labels down on a piece of thin wood and draw lines with a pencil around the labels.
Cut the wood pieces out with a hand saw.
Sand the wood pieces down, drill a small hole, and apply a bit of stain or paint, if you wish.
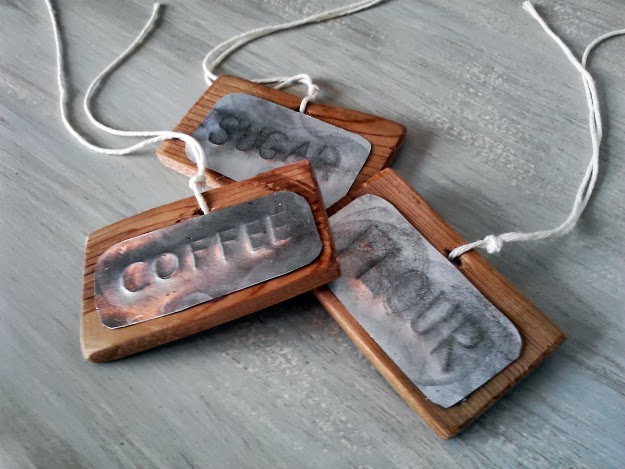
Apply the metal labels to the wood pieces with hot glue.
Run string through the holes and tie off.
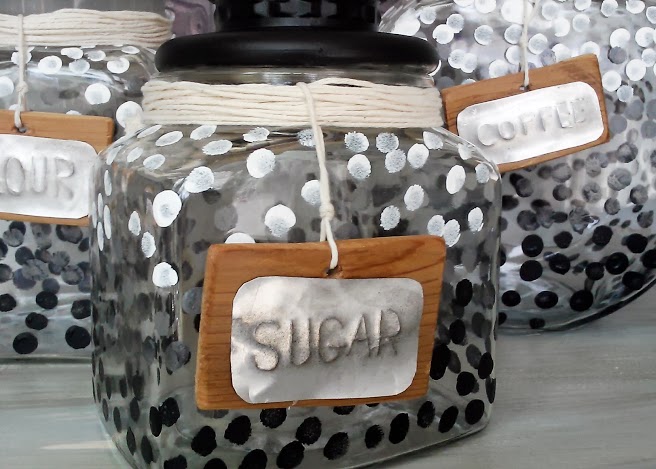
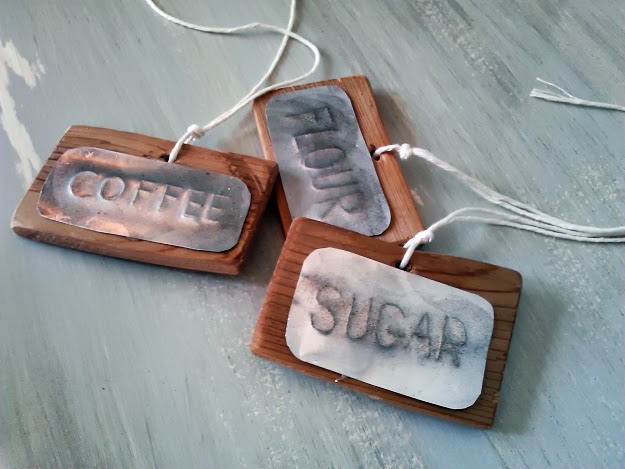
I used soda can metal stamped labels on wood for this Ombre Dot Canister Set, but you could use soda can metal stamping for any project. It is a quick, easy way to get that rustic embossed look for labels and designs on metal, when in a pinch!
Meanwhile, I’ve got my sights on a the real deal: a metal stamping set… thanks, Karianne!!
Sharing at:
Inspiration Cafe “It’s a Steal -Knock Off Link Party
Vicky says
I would totally cut myself sometime during the process of making these. They look really cool though. This is something I would have never thought of doing!
Thistle says
LOVE this!!!!! Seriously! It turned out so cute! Already pinned and scheduling it tomorrow for Facebook!
You are such a rock star!
karianne
Shanna Gilbert says
Such a cute idea Amy! Love it!
Natalie@NorthShore Days says
Amy what a fantastic project!!!! Love love love!!!!! Pinning and featuring you on FB. Hope you’re having a great weekend xx Nat
Danni@SiloHillFarm says
I love this idea! I have some metal stamps and truthfully, working with them is much harder than I thought it would be! This is so much simpler. You are a genius! Pinning this!
Anne@DesignDreams says
AMY!!!!!!!!!!!!!!!!!!!! How freaking adorable!!! Totally pinning & plussing.
Best idea ever!!!
ImJacobsMom says
What a cool idea, I can so see these used as plant markers as well!!! 😀
Susan says
I too was thinking of plant markers. Just need to come up with a stake/support idea.
Amy says
Hi Susan,
I have thought about this off an on for years, myself. What could work for garden markers? It can’t be wood because that breaks down too easily. This idea just came to mind: What about thrift store dinner knives? Those would take years to breakdown. You would want to use a glue that works for exteriors. Gorilla glue or E6000 may be good ones. I hope that helps. If I think of any others, I’ll let you know.
Have a great night,
Amy
Bliss says
You know, these are awesome…. so I had to pin ’em.
Bliss
Mel says
I love this Amy, what a fab post and an awesome project pinning this xo
Marilyn says
These labels are amazing! You did a great job with these! Thanks for sharing your amazing tutorial.
Angela says
This is so neat! Great job. Newest follower from HickoryTrail
Feral Turtle says
What an awesome project. I might have to steal this idea too! Cheers.
Natalie@NorthShore Days says
Yay I’m so glad you linked up to the Party Amy – I still LOVE this project xx Nat
Megin says
How fun! What a unique craft and I love the look of the tags on your jars.
I’m visiting today from DIY Showoff. I hope you get a chance to visit my blog, too. I’m co-hosting the DIY Sunday Showcase and would love for you to come by and link up!
~ Megin of VMG206
Open Now! DIY Showcase ~ Come Link Up!
Susan says
Very cool, I’m going to try this!
heather f says
I try to comment on all the people who post on our link parties, because we’re so thrilled to have people participate, I didn’t get to very many of them this last time because of…life… but I really love this!
Jen says
Thanks so much for linking this up to the DIY Sunday Showcase last week! You are featured!! Jen @ Pinkwhen
chris aka monkey says
i love it when hometalk runs old posts…. this is awesome amy and so something i can do even in my crippled up state lol xx
Andrea Eakin says
I’ve been looking for some type of metal to use for projects that’s cheap & easier than what I’ve been using. I’ve used metal roof flashing cut & filed the edges down to make things. Metal leaves that I’ve painted, a double sided bird that I painted a rusty look, then glued to a cork. Aluminum cans great idea….wonder where else I could get thin tin or aluminum in bigger size than cans? In PA, Lowes & craft stores only have small expensive pieces. Maybe a metal working plant? Any ideas anyone?
Amy says
Hi Andrea,
Great question. It wouldn’t have dawned on me to think of places to get cheap metal. But now that you mention it, a few ideas came to mind. One if those foil catering trays from restaurant supply store (maybe even party stores) You can also get them online, here is an Amazon affiliate link: Foil catering trays (affiliate link) https://amzn.to/2D40H4U
There are also these metal foil rolls that are called craft foil. You might be able to find these at a craft store, but it is available on line, here: Affiliate link: https://amzn.to/2D6ZbPt
I hope that helps, or is in your price range. If I think of any other resources, I’ll send you another email.
Thanks so much for asking. Let me know if you have any other questions.
Amy
Lindsay Phillips says
I’ve tried to make mine look distressed like yours do, with the dark ink around the lettering, but it doesn’t stay in the metal. It just wipes right off and the letters are hard to see. What’s the trick? Is it the ink pad I used? Please help! . I’m doing this for a Boy Scout craft on Saturday and I’m stumped.
Amy says
Hi Lindsay,
I truly apologize for the delayed response. I realize your boyscout project has come and gone, but I did want to follow up with you to let you know that one way you can get the ink to stay is by slightly sanding down the raised area with some sand paper.
Once again, I apologize for the delay.
Thank you,
Amy