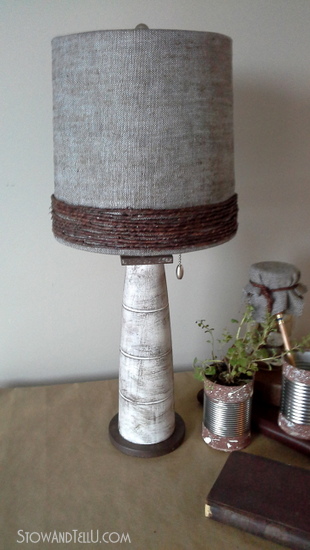
I came upon some grapevine wire in the store a short while back and knew right off that I was going to have to wrap it around a lampshade to see what kind of texture possibilities I could come up with. The grapevine wire reminded me of the twigs from my twig trivet, but with a twist, literally because you can twist grapevine wire!! But as I digress, lamp shades come in so many shapes, I seem to lean toward the drum shape style myself. I just so happened to have a lamp with a drum shade that I picked up from a yard sale for a dollar last summer.
 I was thinking, this lamp would work perfectly for the grapevine wrapping session.
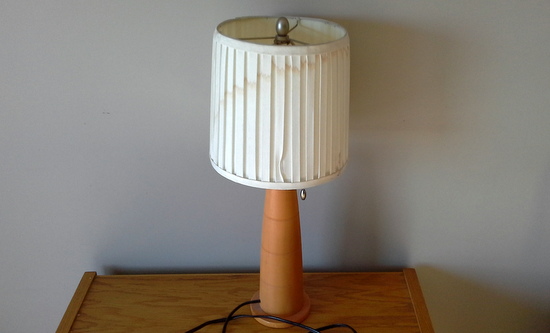 The fabric on the shade was stained and the lamp base was just not doing it for me. It’s a designer brand, and the base in it’s original form has a faux wood look that would probably work well in a modern setting or perhaps a boys room, but I really needed it to work for me, here and now, thus the lamp re-vamp.
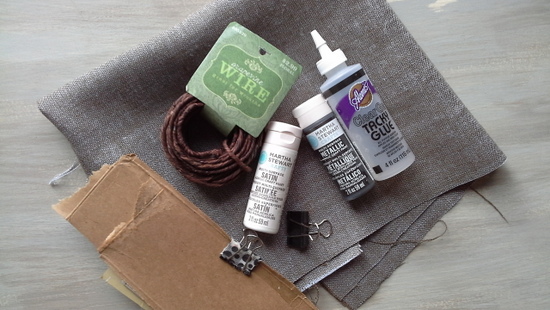 Using some scrap tweed fabric that I salvaged from my days of working at a drapery house, craft paint, grapevine wire and glue, I got to work.
Supplies:
Grapevine wire from Hobby Lobby
Scrap fabric
Craft paint:
(I used Martha Stewart Multi Surface craft paint in Wedding Cake and Metallic Gunmetal, and burnt umber)
Glue (I used Aleene’s Clear Tacky Glue)
Decoupage (I used Mod Podge matte)
Office type clips
Cardboard strips and 1 larger piece of cardboard
Craft sponge paint brush and several chip brushes
 First I stripped the fabric off the lamp shade and gave the shade a few light coats of the Wedding Cake craft paint mixed with Mod Podge at a 50:50 ratio.
 I laid my lampshade out on the fabric and cut the fabric piece 4 inches larger on both the top and bottom of the shade with enough length to wrap around the shade and then some.
Using the sponge brush, I applied Mod Podge to the lamp shade and starting at the lamp shade seam, I wrapped the fabric around the shade a section at a time. I trimmed off the excess leaving 1/4 ” or so on top and bottom and then wrapped the ends down inside the shade adhering with the Mod Podge. I also trimmed off the excess, width-wise, to create a seam. I gave the fabric a coat of Mod Podge and let that dry.
Next I gave the lamp base a coat of Wedding Cake, let that dry, and then a dry brush of the metallic Gunmetal and the burnt umber mixed at half and half. This process game the lamp base a sort-of birch-y wood look.
I ended up painting the bottom and top section with a solid coat of the metallic/ burnt umber mixture.
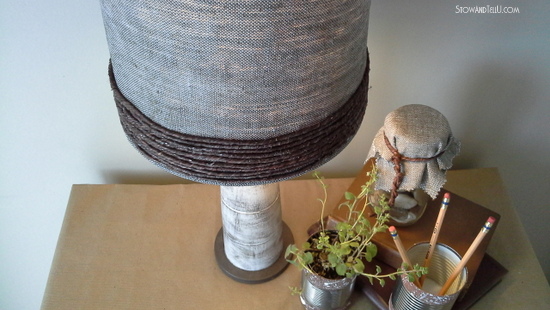
 For the grapevine trim, I unravelled the grapevine wire and started a glue line at the very bottom, right a the seam. I glued half way around the shade, laid down the wire, pressed it in, and put one of the clips just over the end to hold it in place and the other clips just half way around. I applied another glue line half way around (going back toward the seam) and repeated the pressing and then clipping process.
(Note: I should have made a small bend, just at the end of the wire, folding upwards, so that as I wrapped the wire over the bent piece, it would hold down the end, but I didn’t).
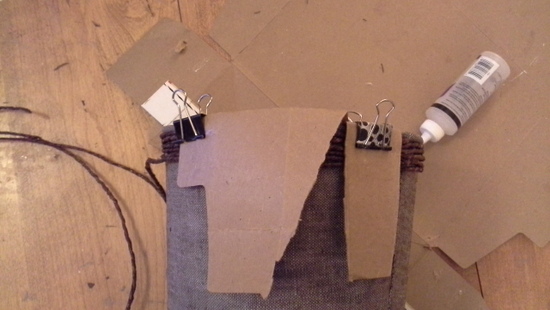 I continued these same steps. The only added step was that I applied a folded piece of card board over the wire and then added the clip for better holding power. I let the cardboard sit over the wire for just a few minutes. The glue dried fairly quickly, enough so that the wire stayed in place, and then I removed the cardboard piece.
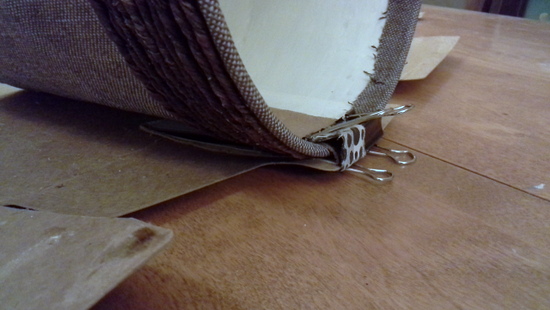 When I reached the end of the wire, it was just enough to give it a trimmed out look, so I stopped there and used the card board / clip method, this time. I also clipped it down onto a larger piece of card board to hold it in place and let it dry a little.
 I let this dry for about 5-10 minutes, and then bent about a 3/8″ piece of the end and tucked it into the body of the wire, right at the seam.

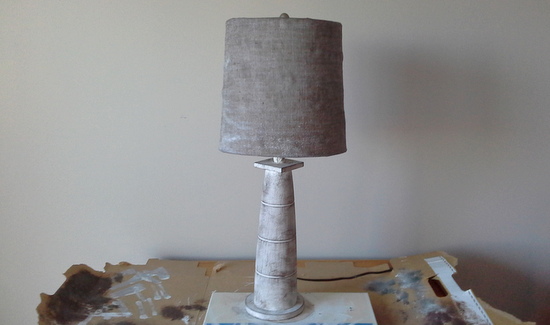
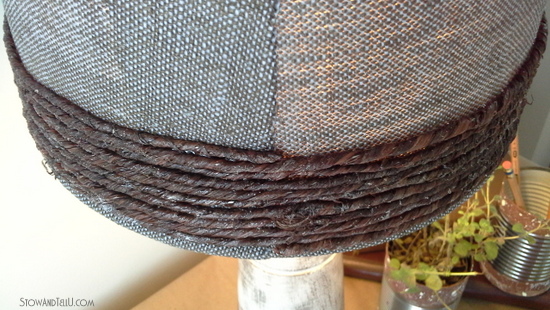
 The texture of the tweed fabric shows through differently at various time of the day.

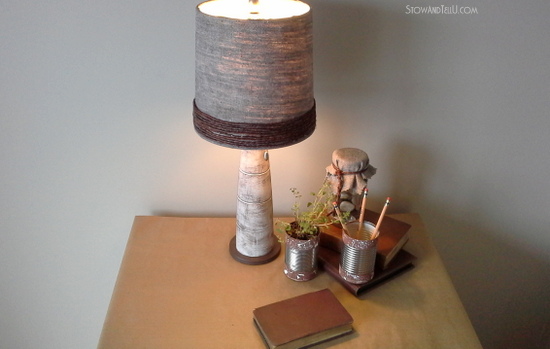
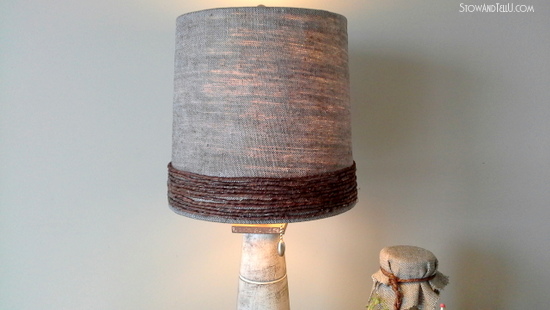 I’ve since decided that I like grapevine-wire-wrapped texture! (try and say that say that 10 times fast)
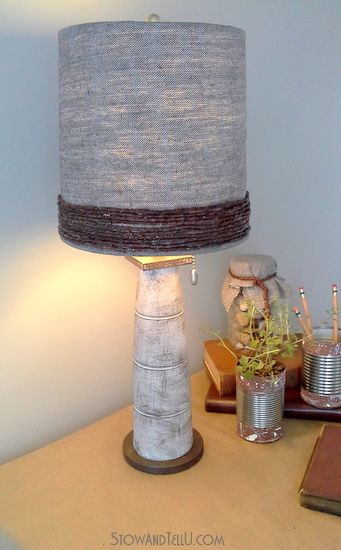
But seriously, I do like how it turned out. It is a vast improvement from it’s original state as purchased at that yard sale, and it’s going to be a keeper around here, at least for now… perhaps in my kitchen.. we’ll see.
See more lighting ideas.
Thank you for stopping by ~ Amy
Linking up to:
Deanne Scimeca says
Love EVERYTHING you come up with…your so amazingly TALENTED…
Mel says
Amy I didn’t even know you could get that! It’s exactly what I need for a light shade I need to find a local supplier. I love the lamp.
Bliss says
What a transformation! Excellent, so I’m pinning it to my lighting board for inspiration.
Sharleen says
Amazing transformation, love the colours, and the use of the grape vine wire. That’s some thing I haven’t seen before Amy. Love it.
Joy@aVintageGreen says
Now you have me thinking about lamp shades and bases and how they can be changed. Love that grape vine wire.
Joy
Danni@SiloHillFarm says
that is one beautiful lamp makeover! I have to laugh because I have a lamp makeover fail that I am on my third round of and just walked away for now! I’ll get back to it…you’ve inspired me! I did not know that stuff was called grapevine wire…but I have it and I love it! I love your pictures too by the way!
Feral Turtle says
Wow. Every lampshade I have ever tried to re-do turns out to be a big failure. What a beautiful transformation. I love all the natural textures and I have to say it looks like it came from a designers store!
heather f says
Look at you Miss Clever! I love this. I am stunned and amazed. Great job.
TucsonPatty says
I love this! I also am pinning this to my lamp board! You have a knack for seeing things that others don’t and can put it all to work. Amazing lamp.