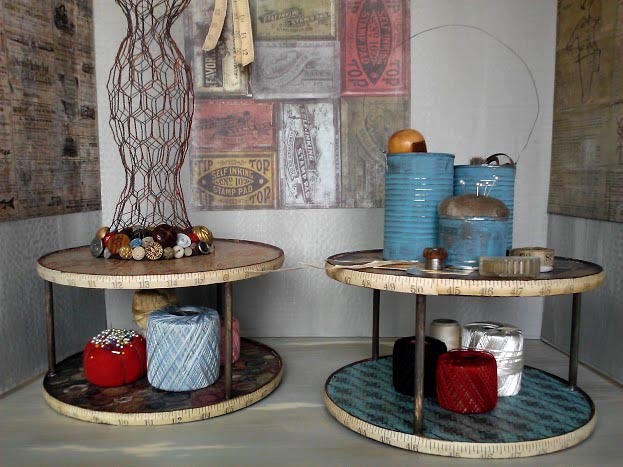
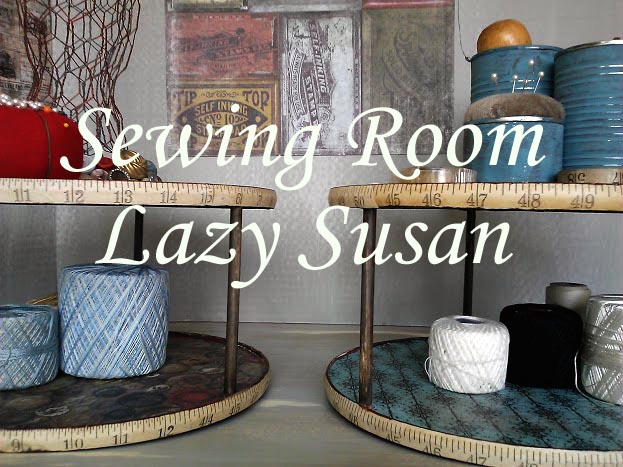
Lazy susans can be quite handy in the kitchen, but how about in your sewing or craft room? I have been piecing together items for a sewing/craft room that I don’t even have, yet, but who could pass up a pair of lazy susans that would otherwise end up in the trash? Not me, that’s for sure! So with a little paint, scrapbook paper and Mod Podge, I scrambled together a pair of old plastic lazy susans, handed down from my mother. I think these lazy susans will fit in quite well with my seamstress mini dress form and tin can pin cushion caddy. In for a penny, in for a pound, if I keep making items for my craft room, I’ll have it just yet!
If you would like to make one or several, lazy susans like these, here is what you will need:
– plastic lazy susans
– primer and or paint (brown and off white)
– scrapbook paper large enough to cover the top of the lazy susans
– A seamstress measuring tape
– Computer printer/copier and plain white paper
– A few tea bags
– A plastic container or two
– Ruler
– Small sponge paint brush
– Inkpad in brown and a few Q-tips
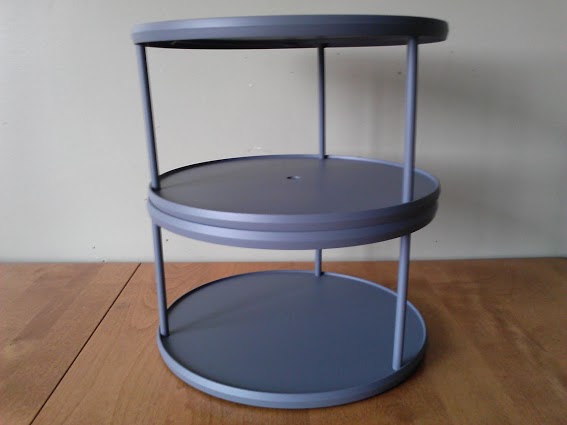
Prime and or Paint the Lazy Susan
I added a coat of primer, then a coat of off white paint and then a coat of brown paint over that, letting each coat dry.
I sanded the brown down just a bit to give it an aged look.
Cut and Apply Scrapbook Paper to Lazy Susan
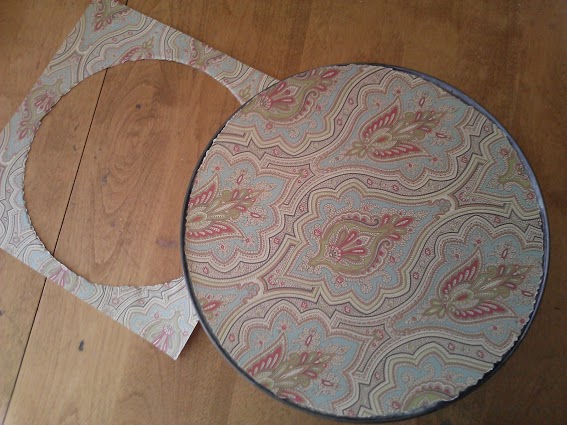
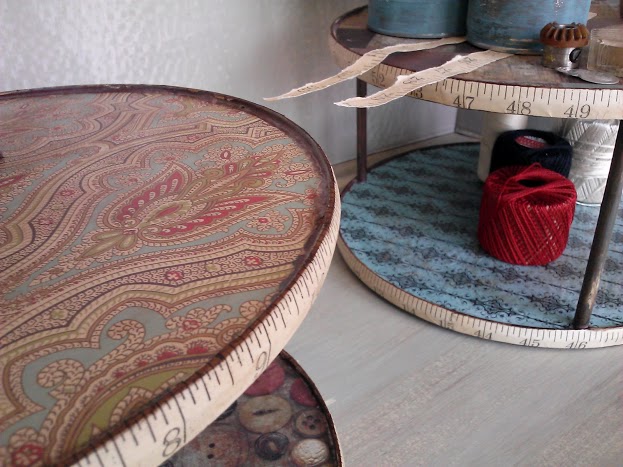
To get the round shape, I laid the scrapbook paper on the top side of the lazy susan and pressed down to crease the paper along the round edge and then I cut the paper out along the round edge.
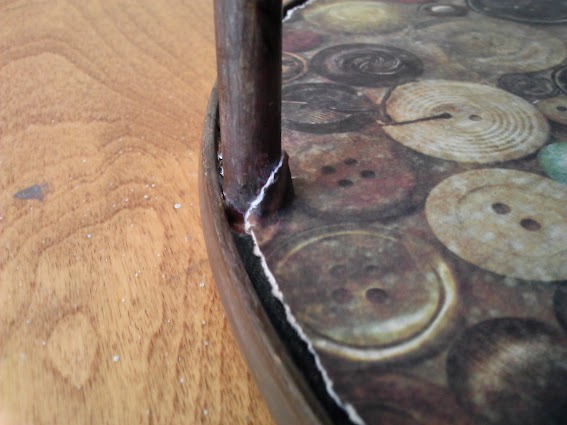
I applied each piece of the paper to the top and bottom section of the lazy susan with Mod Podge making sure to push the paper around the posts on the bottom section, to give it a good fit before adhering it with Mod Podge. I let that dry overnight.
How to Make Measuring Tape Paper Trim
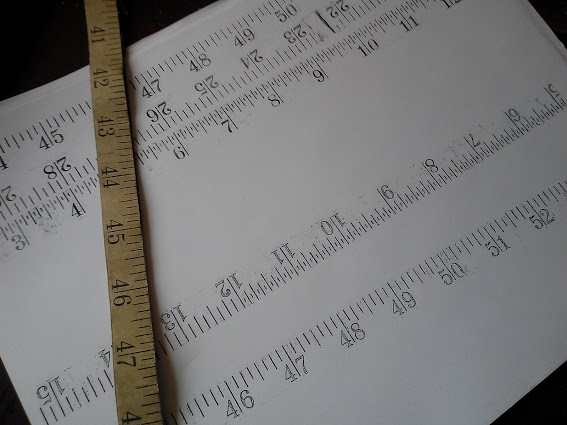
To make the measuring tape paper trim, I laid an old seamstress measuring tape on my computer scanner and made black and white photo copies.
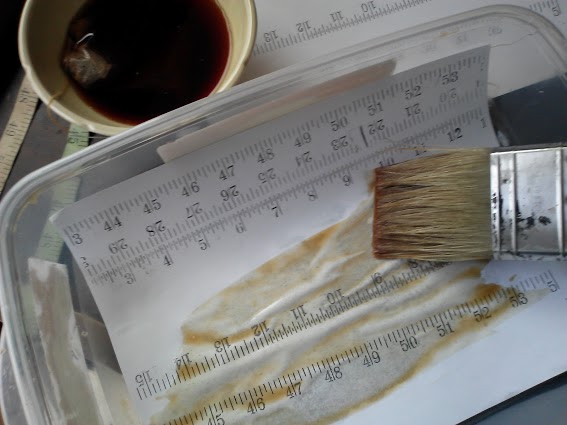
Next I tea stained the photo copies and let them dry.
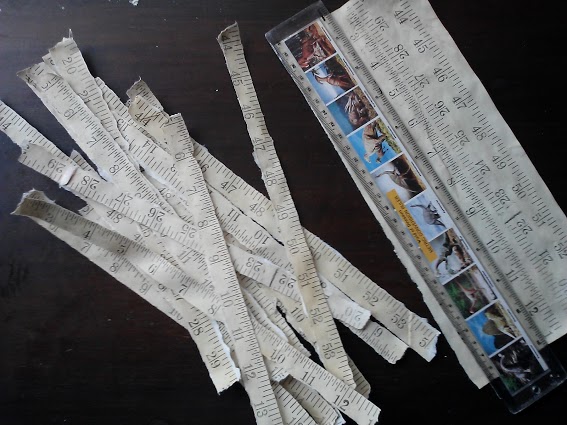
Then I laid a ruler along the edges of the measuring tape image on the paper and ripped them into measuring tape strips.
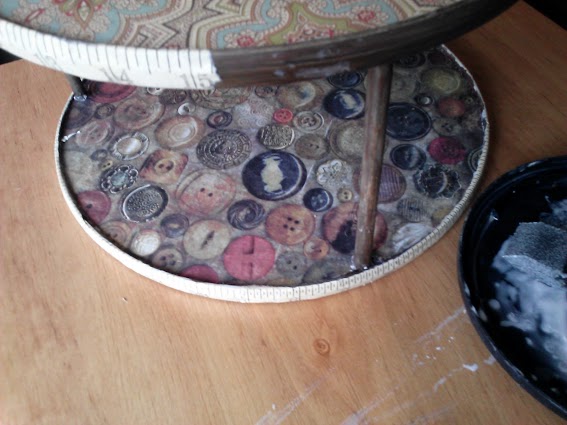
Finally I applied them to the lip of the lazy susans with Mod Podge and let dry.
Create Detail with a Brown Ink Stamp Pad
To create a little more detail on the edges, I ran a brown ink stamp pad along the rim of the edges. I loaded a Q-tip with the ink and touched it to areas around the posts that I could not reach with the ink pad.
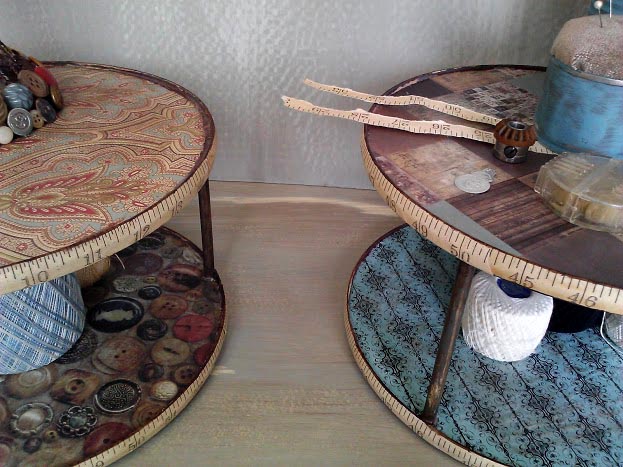

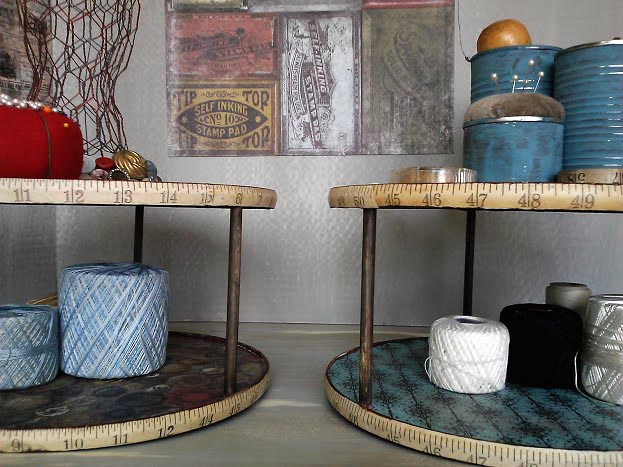
I really love to sew, though I just don’t do it enough, but the seamstress measuring tape trim on these lazy susans will certainly inspire me to try to sew more often. Lazy susans are handy little storage trays that can be used in just about any room, to hold items for easy access, sewing rooms included… of course it helps to have a room like that!
Linking up at:
Mel says
Amy these are gorgeous! I’m so jealous I’ve been looking for some for my craft room!
Shanna Gilbert says
I think this is my favorite project of yours! So darling!
Danni@SiloHillFarm says
Love these Amy and they certainly could be useful in my craft room! I am crowning you the queen of mod podge and the queen of clever ideas, because that sewing tape around them is the cutest/cleverest for a sewing room. I’m with you…I think you keep at it and you’ll have a sewing room soon!
Elena @ `a casarella says
Love these! I may or may not be slightly obsessed with Lazy Susans and you have found a way to make them a little more attractive!
Vicky says
I love the ideas of tea staining and detailing with the ink pad. You’ve opened up new possibilities for me!
SheilaG @ Plum Doodles says
Ooh, I like these! I don’t think I’ve ever seen the double-decker ones. Love the tape measure idea, very clever. Now I want some!
Anne@DesignDreams says
That is adorable!!! What a cute way to transform those useful but really kinda ugly lazy susans.
Great idea!!
Nancy @ Artsy Chicks Rule says
What a great idea! So cute!
Nancy
Bliss says
Amy these are excellent! I have an old plastic lazy susan in this shape that holds vitamines in the cabinet. How cute I could make it huh, following your directions!
Bliss
Amy of while wearing heels says
WOW. That is one beautiful transformation. Thank you so much for the detailed how to you put together. I especially love the measuring tape paper you made and added to the edges…that and your dinosaur ruler 🙂
Dee says
This is so cool, and truly unique! Thanks for sharing at Snickerdoodle. 🙂