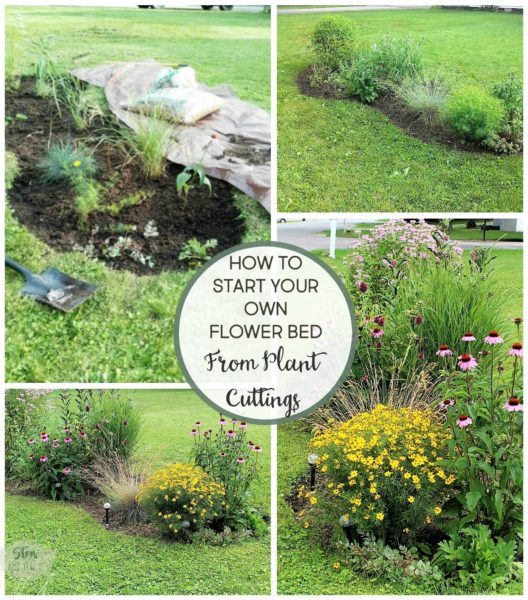
Last summer, I started a native perennial flower bed from the ground up – and on a budget. We started by digging up an area of grass, and let me tell you, this was a huge task. Fortunately, that was the hardest part of the project but the end results have made it well worth the work.
As for the butterflies and the bees, they have found a sweet little stop-off on their daily rounds.
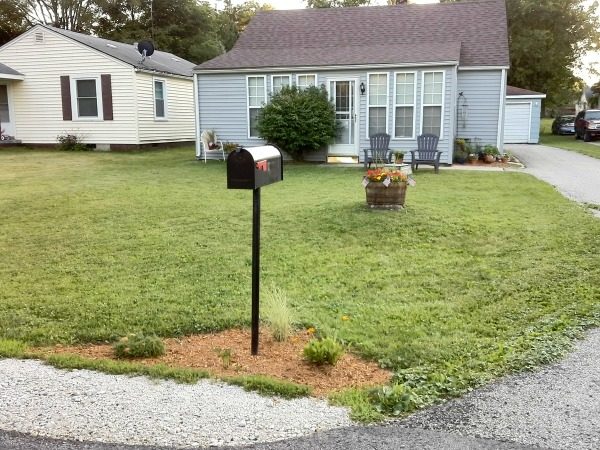
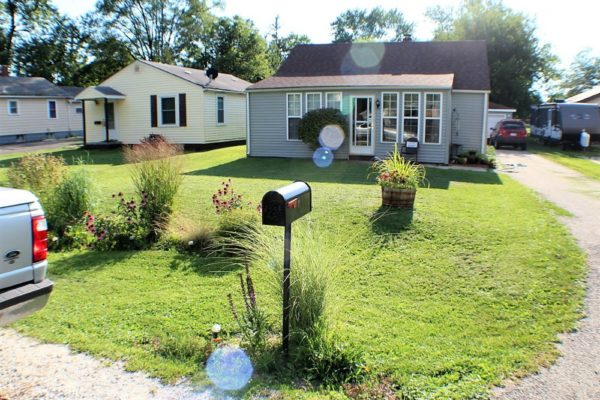
Here is where we started last year. Pretty much, just grass and the start of a mail box garden.
6 Tips for starting a perennial DIY flower bed
This post contains affiliate links for your convenience. Read full disclosure, here.
Digging up the sod
Outline the shape with a hose:
I used the hose to create an outline of the shape I wanted, then traced a line with a large piece of sidewalk chalk.
Cut-in a grid pattern:
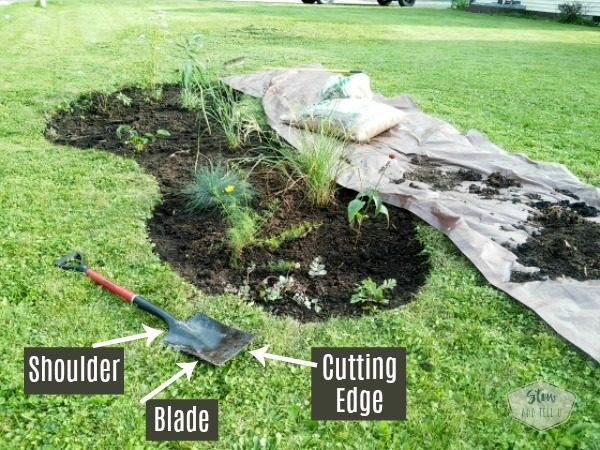
Next I used a garden spade , which has a straight cutting edge tip, to cut down into the sod along the edge of the shape the shape. Then I cut a grid pattern into the sod, within of the marked off area.
Lining up the cutting edge of the shovel to the sod and standing on the shoulder of the shovel so it sinks down into the sod makes for easy cut-in work.
Dig out and remove the sod:
The next step and the absolute hardest part, was to remove the top layer of sod by cutting under it with the garden spade.
Fortunately, all the grid pattern cuts to the sod help shrink the sod down to manageable pieces. My son did most of the sod removal part, and he probably removed a bit more than a layer. But it was free help, so who was I to complain.
Handy tools for removing grass or sod
The most important tool to have for this job is a garden spade shovel . One for each person digging is best.
Other handy tools include a plastic tarp to lay the sod sections on and a wheel barrel
 to haul away the grass to either another part of your yard or the back of a truck for off site disposal.
Disposing of yard waste
There was a LOT of grass!! Two truck loads full…
I found the best way to find a place that would accept our yard waste (for free) was checking with our local county department. Fortunately, they referenced a nearby farm that would accept would yard waste disposal for free.
Planting the flower bed and documenting the layout
The next step was adding plants to the flower bed. This is where the fun part begins.
DIG:
Once again, using my handy garden spade, I dug small holes, added the cuttings and push some of the soil back in. This part could also be done with a small standard garden shovel .
.
DOCUMENT:
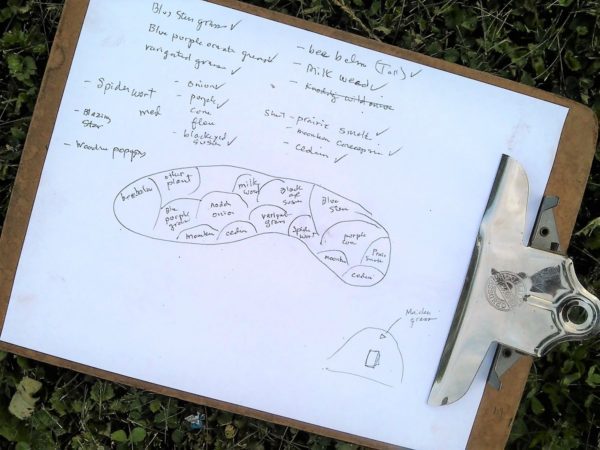
I made sure to document what I planted, and where with this less than formal drawing. I took a picture of the drawing with my phone, so I’d be able to reference the chart this spring. And good thing I did because, honestly, I did not remember where everything was planted.
GETTING HOLD OF INEXPENSIVE PLANTS:
I was able to save BIG on the cost by getting plant cuttings from my niece, who is an amazing gardener. They were the littlest of cuttings (not that she was being stingy, but she was sharing her plants with several others, and she said I wouldn’t need huge cuttings to get it started anyway.
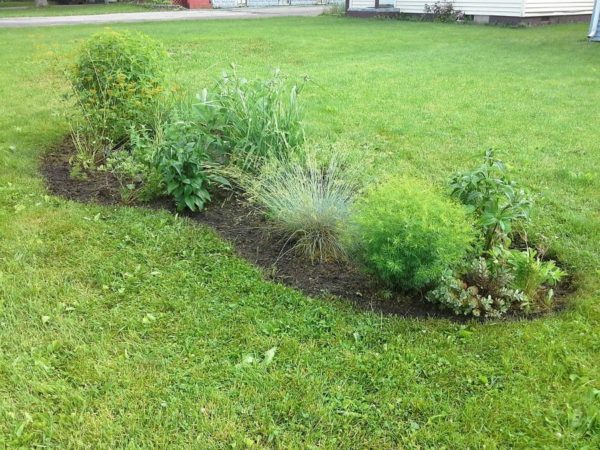
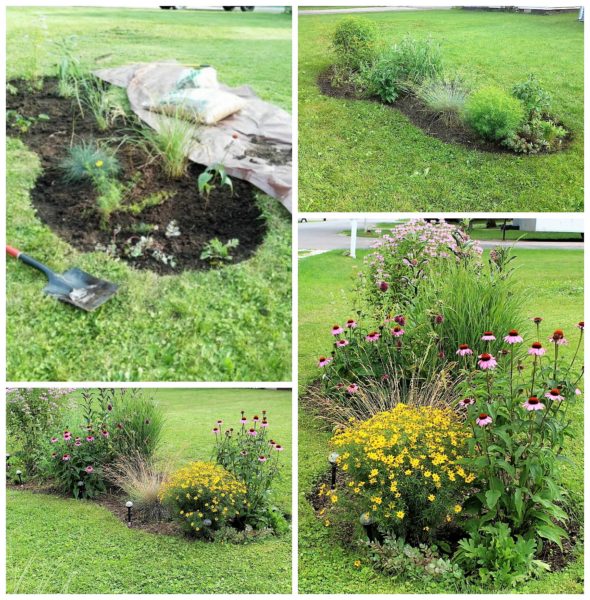
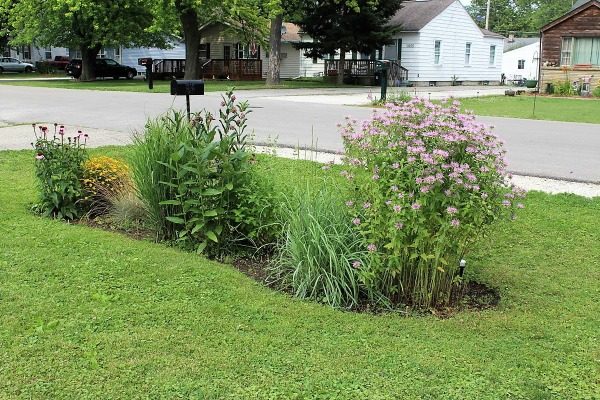
Top picture is how the flower bed looking in the spring.
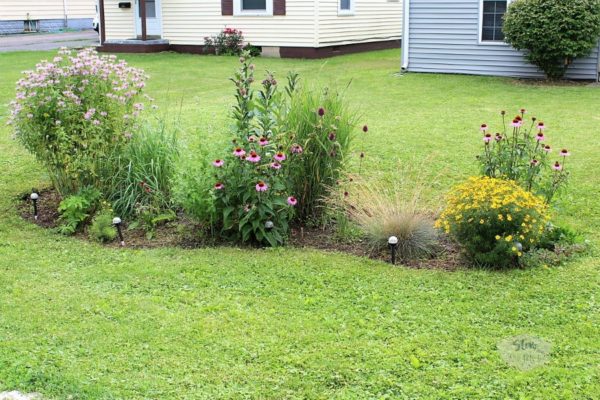
Bottom photo is a flash forward 365 days from the initial planting. Isn’t it an amazing, albeit modest transformation?
Ways to save money on perennial plants:
Plant cuttings:
Seek out someone who is giving away or selling plant cuttings. Try: friends, family, neighbors, local garden groups, local online garden groups and even Facebook Marketplace.
Buy the smallest container:
Buying the smallest plant sized offered at the store. Perennials usually take about a year or more to mature, so whether it’s the larger or smaller container, both will look about the same after about a year.
Plant your own seeds:
Follow along with my Start with a Seed Series for tips and motivation on starting your own plants from seed. I’m still in the throws of learning and sharing posts, but I can tell you, planting from seed is a very inexpensive way to a achieve a well rounded and bountiful flower garden.
Although patience is key because you won’t obtain and instant garden with this method…;)
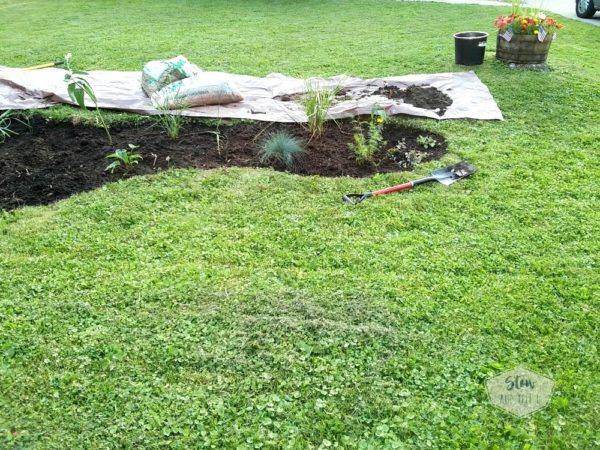
Add rich soil, mulch and water, water, water
Before adding the cuttings, we added back in about 10 bags of nutrient rich soil.
We also added a good layer of mulch, although since our flower bed is located in our water run off area, the mulch floated away after a few rain storms. Once everything matures in this garden, we won’t miss the mulch.
Several weeks of watering after initial planting will help the new plants roots take a foot hold into the soil. After that, watering can be done less frequently. Of course, the type of plants and their requirements should also be considered.
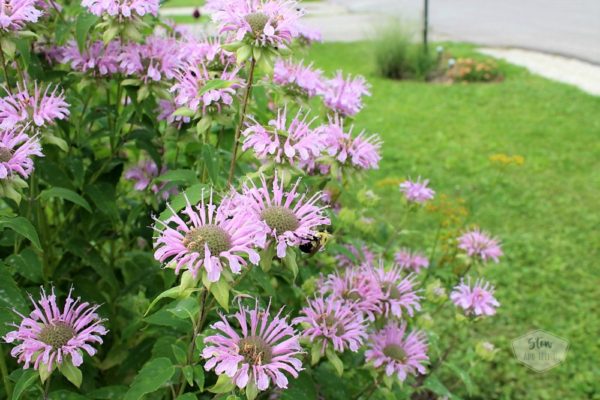
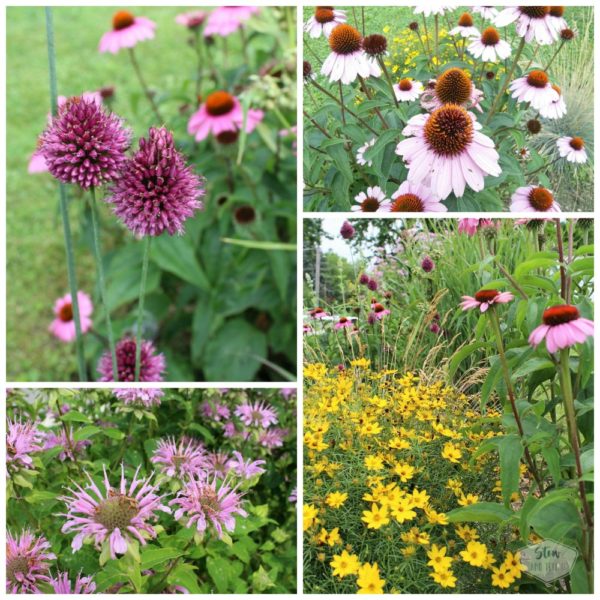
Can you find the bee? Every time I looked, at least 10 fuzzy bees were hovering around this plant.
The plants my niece gave me are mostly native Illinois flowers and grasses. Most of these plants attract bees and butterflies, so it’s been really fun to see soooo much activity in the garden this summer. It was like a living, moving, breathing garden every time I went out to water.
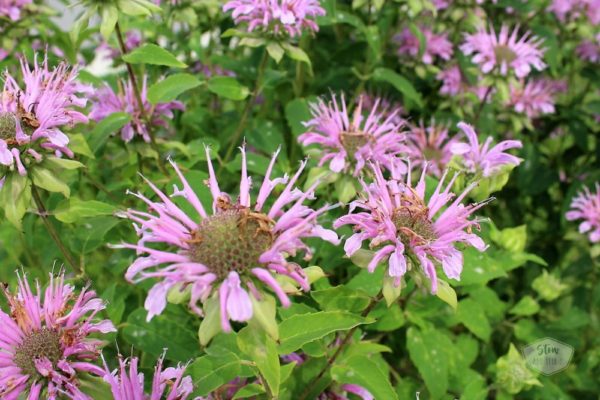
Bee Balm (Bergamot)
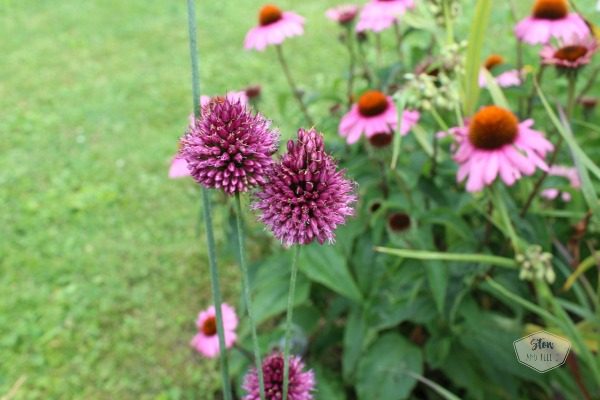
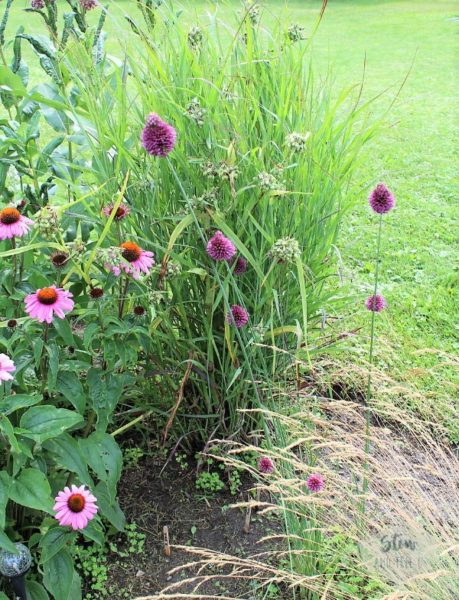
Nodding Wild Onion

Echinacea (Purple Coneflower)
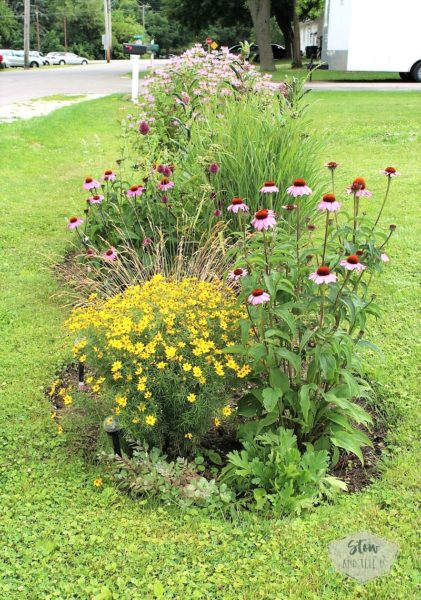
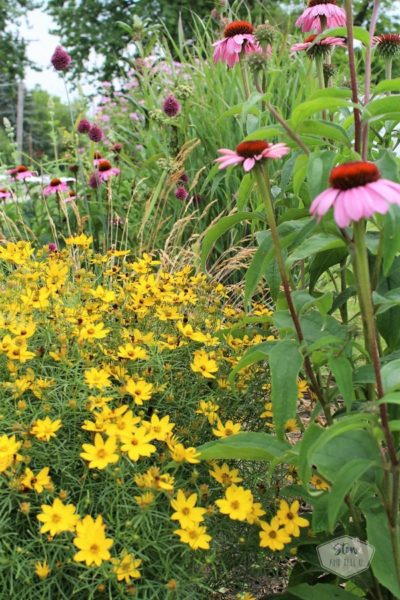 Moonbeam Coreopsis (the yellow flowers)
A few weeks ago I was able to bring my niece a tray of seedlings and some leftover seeds from my Start with a Seed project. She was excited to be introducing several new plants species to her yard, and it was also nice to do a giving-back to her paying-it-forward.

This butterfly and bee friendly flower bed includes the following plants, all grown from plant cuttings:
- Bee Balm
- Coreopsis
- Echinacea
- Prairie Smoke
- Milk Weed
- Nodding Wild Onion
- Big Blue Stem

I have greater plans for our front yard curb appeal. For one, I plan to extend the size of the flower bed, make it meet up with the mail box garden and eventually add a border. But for something to start with from a blank slate, it inspires one believe in the possibilities.
 Starting a perennial flower bed, transplanting and seeding can usually be done in spring, summer and fall, although keep in mind, full plant growth and blooming can take up to a year, or several years.
As I said, the hardest part to creating a flower bed was digging up the sod. But if you can do it yourself, or even better find someone to help, it’s the start to an inexpensive way to add curb appeal to you yard.
Doreen@foxdenrd says
I certainly did see the bees! We have tons of them too. They love that flower.
You have done so much Amy. I know how much work goes into digging up grass. Such a pain! But worth it 🙂
zxz
RoJean in Wisconsin says
Your yard and home are beautiful! I am doing the same thing here in southern Wisconsin Trying my best to plant native and bring in the bees butterflies birds and anything else that wants to stop by! You and your family have put in a lot of hard work and it shows! Wonderful job! I can’t wait to see more updates! Enjoy the summer! Thanks for the inspiration!
Amy says
Hi RoJean,
Thank you so much for the compliment. I’m excited to hear that you are adding native plants to your yard as well. The state of Wisconsin has been a leader in incorporating native flowers and fauna back into the landscape environment for years now. Illinois followed your lead. Adding natives to our yard certainly helps. I hope you enjoy your newest garden additions. Feel free to send me pics. I’d love to see them!!