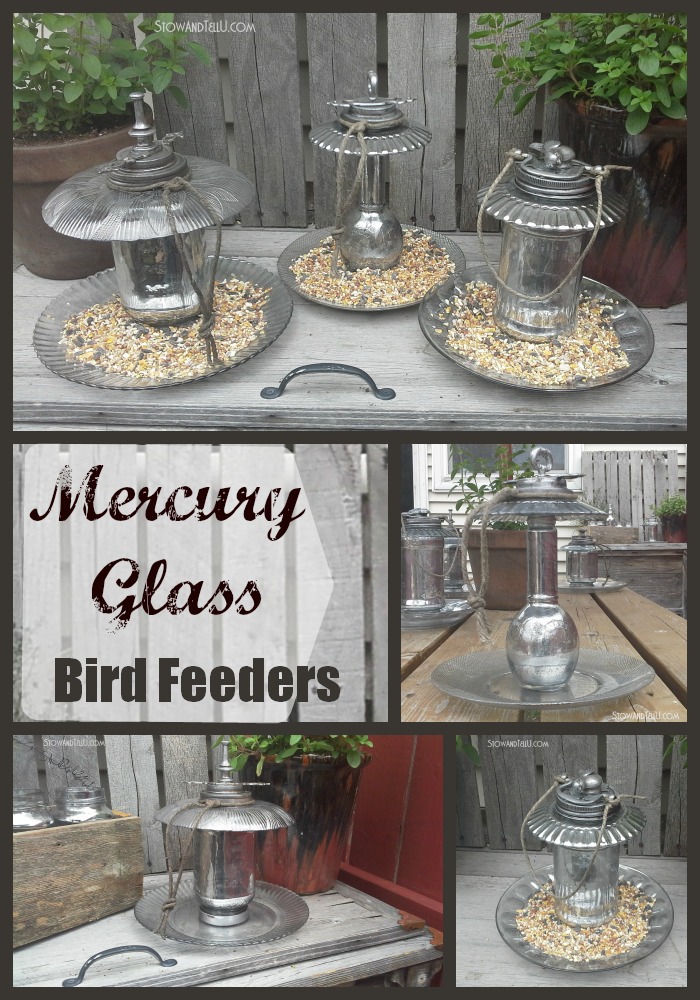
My intention was to make jar type bird feeders and create bird feeder roof tops as Karen, from The Feral Turtle, had suggested using the faux hammered copper soda can technique. It is now several weeks later and I have some bird feeders, alright, but there is no hammered metal insight. There is a lot of faux mercury glass however; because somewhere along the way through this project, it all seemed to go together so nicely that hammered metal just wasn’t going to fit the bill.
I’ve labeled these bird feeders as “ornamental” for the reason that the jars are sealed off and cannot be filled with bird seed and may not pass a rigorous bird feeder enthusiast’s examination (if there is such a thing, but fyi, just in case).
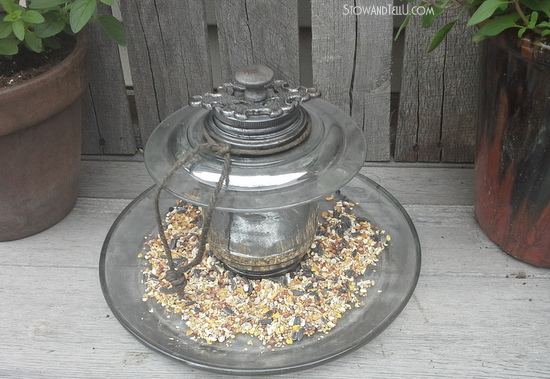
Having said that, the dish or plate section of each bird feeder can be filled with bird seed if someone would feel inclined to feed the birds, rather than just let one sit pretty on a table or shelf in a patio or porch.
To play it safe, the jars are only painted on the inside and the dish/ plate sections are only painted on the underside, so the bird food does not come in contact with the faux mercury glass paint…. and that part was my intention, as a safe bird= a happy bird= a happy bird reflection (just in case)!
How to make faux mercury glass bird feeders
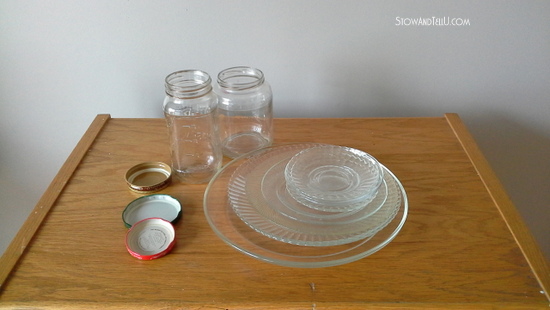
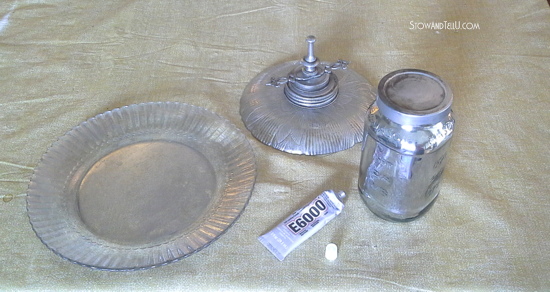
Supplies
Glass jars
Jar lids that fit each glass jar
Extra jars lids of various sizes (I used lids from baby food jars, pickle jars, and spaghetti sauce jars)
Dinner sized clear glass plates
Salad or saucer sized clear glass plates
Furniture hardware odds and ends ( I used handles, knobs, back plates and finials)
Krylon Looking Glass Mirror Like Paint
Champion Sterling Silver Spray paint
Jute twine in tan cut into 24 to 36 inches (60 to 90 centimeters )
Dark brown and black craft paint
Craft paint brush
Spray bottle mixed vinegar and water at 50/50
Paper towels
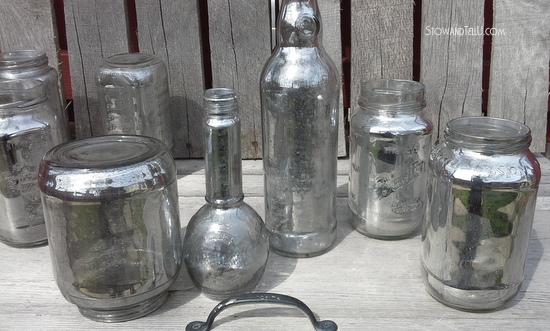
Spray the inside only of each jar with the vinegar/ water mixture.
Apply a few light coats of the Looking Glass paint into the jar allowing 20 seconds in between each coat.Spritz more of the vinegar water mixture over the paint.
Lightly dab with paper towel to create an aged lookApply one or two more light coats of the glass paint.
Repeat the above process if desired until your jar looks the way you like.
Let dry completely.
Here is a helpful tutorial on DIY mercury glass application from 17Apart.
I just did the inside of the glass piece rather than the outside.

Using the same vinegar/ water and paper towel technique, apply the glass paint to the under side or bottom of the dinner sized glass plates.
Apply the glass paint to the top side of the smaller glass plates.
Let dry completely.
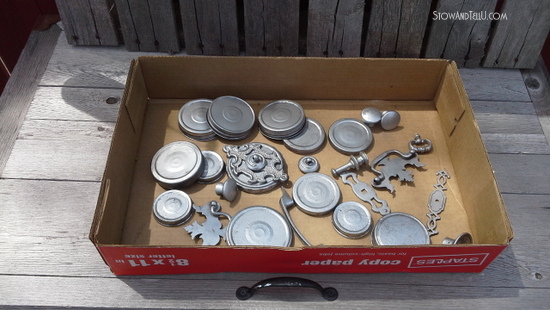
Using the Sterling Silver spray paint, spray several coats on the jar lids and furniture hardware.
Once dry, dab a small paint brush into a mix of brown and black slightly-watered-down craft paint and dab it all over each hardware piece and jar lid.
Wait a moment, and then buff it off with a dampened piece of paper towel until it has an aged look.
While the craft paint is handy, run the paint brush over the pieces of twine to darken them up a bit.
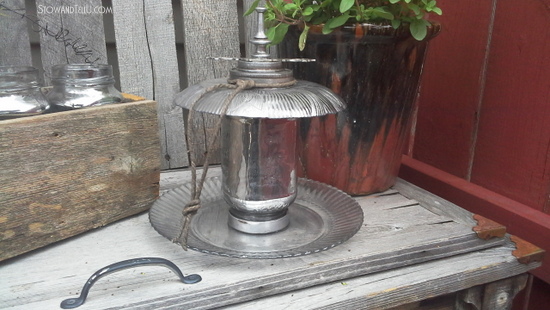
Mercury Glass bird feeder assembly
Screw on and secure the jar lid to the jar.
Apply the E6000 glue to the top and rim of the jar lid and wait 2 minutes.
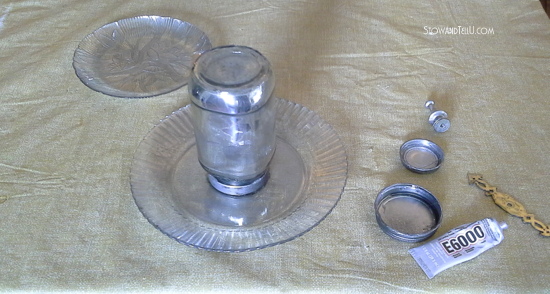
Attach the jar with the lid on to the center of the dinner plate and let dry until set.
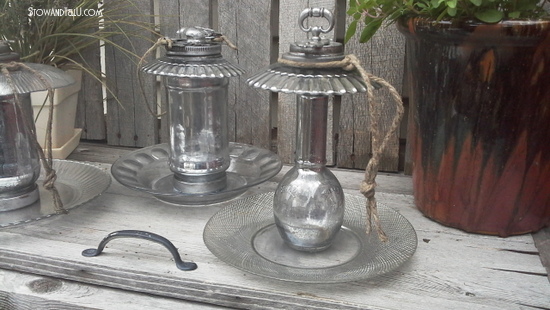
Next, apply the glue to the bottom and rim of the upturned jar, as well as to the areas of the other jar lids and hardware pieces and wait 2 minutes.
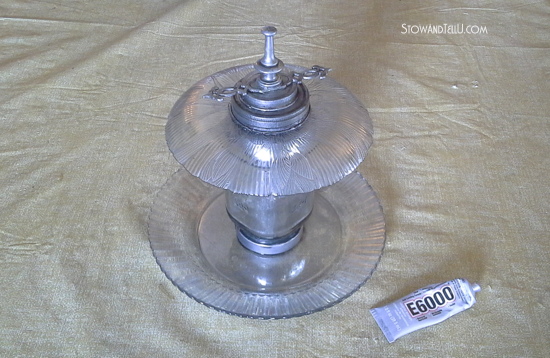
Assemble the smaller plate on top of the jar first, followed by the jar lids an then the hardware and let dry until set.
Attach the twine to finish it off.
If you attach with the E6000 glue, make sure to use the same 2 minute rule.
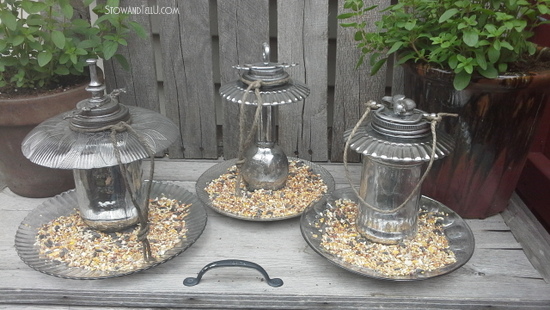

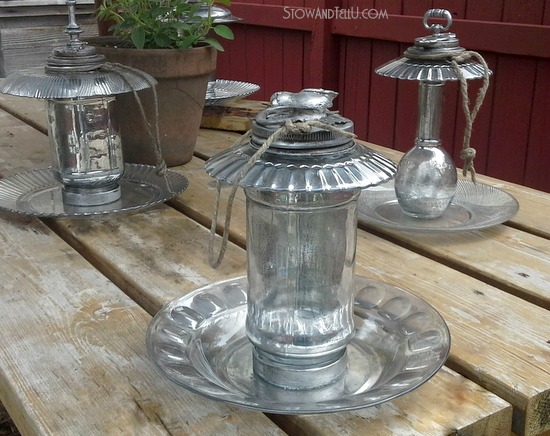
I already have a few of these bird feeders lined up as gifts, although I really like the impact the mercury glass gives off when they are all grouped together, don’t you?
My hesitance using the E6000 glue and my trials and errors with the mercury glass made this project take longer than I had planned, but if I were to do it again, I’m pretty sure I could pull this project off in one afternoon.
Thank you so much for stopping by. Hope your day is FLY ~ Amy
Linking up with:
Mel says
They look fantastic they look like really awesome lanterns do you think they ould be used as a lantern?
Shanna Gilbert says
Amy these are too cute!! I love these! I may have to make one for my mother-in-law who is a huge bird lover. Great job!
Feral Turtle says
OMG these are amazing!!! I am pinning these! What an excellent recycled project Amy! Just brilliant!!
Danni@SiloHillFarm says
Amy those are strikingly gorgeous!! Good for you for looking out for birds safety!
Thistle says
LOVE these! They do look like old lanterns. too! What a fun project and thanks for inspiring me today!
Happy day to you rock star!
karianne
heather f says
I think these are so pretty! you’ve done such a great job and I know your birds are going to love you for it.
doreen says
Your bird feeders are delightful! Pinned, and I’m inspired to create one!
Amy says
Thank you, Doreen. They were pretty easy to make, once I figured out what I was doing. Have a wonderful weekend!
Christine says
Super cute bird feeders….love them, they look great!
Carolyn says
I think these are beautiful. I was just wondering … after you fill the jar with grain, how does it get out onto the plate ? or do you not fill the jar, and just put it on the plate by hand ?
Amy says
Hi Carolyn, thank you for your compliment and great question. I did not fill the jars with seed at all because I didn’t want the seed to directly touch the paint. I just went with the option of putting the seed on the plate by hand.