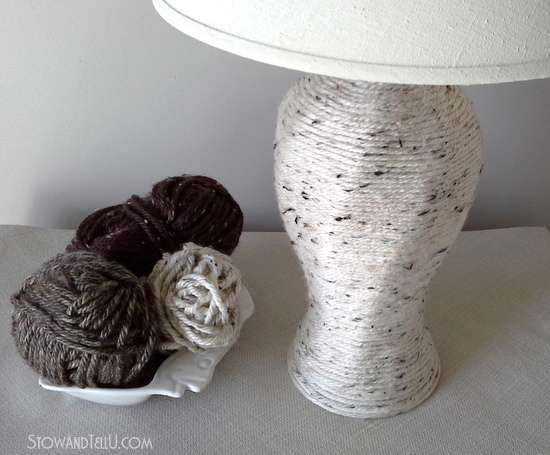
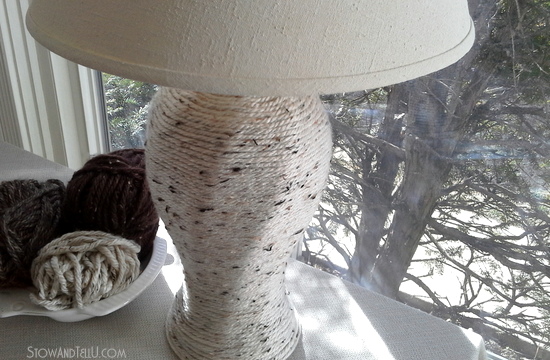
I like to call springtime fuzzy sweater weather. It’s finally warm enough in Chicago to loose the parka, but it’s not quite warm enough to go without some kind of cover. I found this collection of yarn called Hometown USA from Lion Brand. It has bits and strands of color variation (called roving) running through the yarn. The look is to mimic raw fibers, such as cotton seeds, that would get caught in the yarn while spinning it the old fashioned way. This yarn is on the thicker side in terms of yarn gauge, and it has a rich, organic texture that really caught my eye. I would LOVE to knit myself a few button-up type sweaters with this yarn…but I fear I cannot knit!
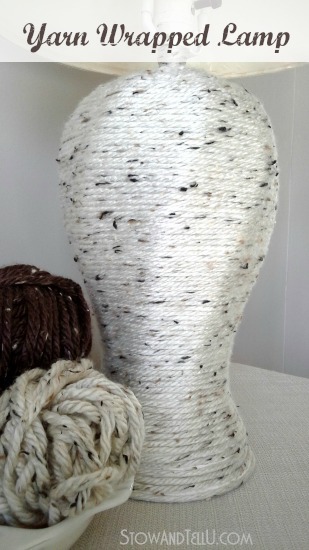 Ah, well, I was determined to put at least some of it to good use, and it’s just about time for another lamp project. Since I was so pleased with how the grapevine wire wrapped lampshade turned out, I decided to keep with the “wrapped” theme and wrapped a lamp with this chunky, textured yarn.
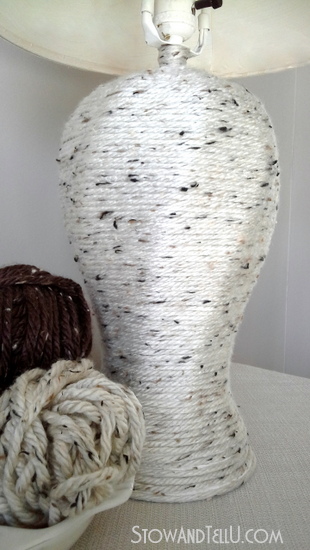
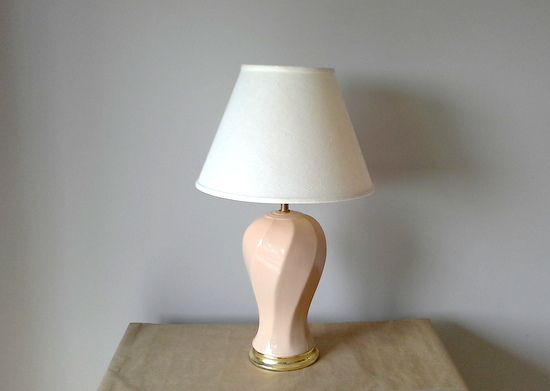 I picked up this woefully flesh-toned, vase style lamp at the Goodwill. It was actually screaming from the shelf, “Someone give me a new look, pleeeaaassssse!!!” How could I turn my back on such a petition? After all, I’d seen this lamp sitting on that same shelf the last three times I’d been in that store.
 How to wrap a lamp with yarn:
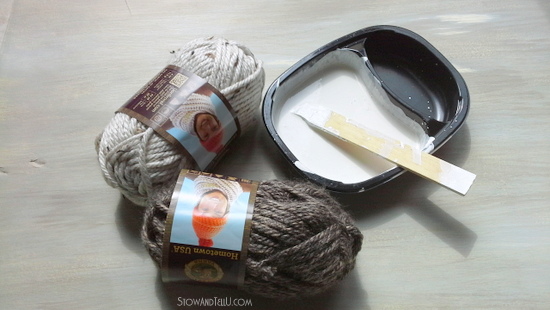
Supplies
Lion Brand Hometown USA color: Aspen Tweed
Aleene’s clear tacky glue or something similar
Lamp base
chalk based or a multi-surface type craft paint / colors: white, raw umber and off-white
Sponge paint brush
Small topped table (as the work space for the yarn-wrapping part of the project)
 Paint the lamp
I mixed up the craft paint using mostly white, with a dab of raw umber and off-white until the color was somewhat close to the color of the yarn (no exact match, just close).
I gave the lamp, the lamp shade, and the lamp shade frame a few coats of the paint, allowing dry time in between.
Painting the lamp shade and lamp shade from is optional, mine were just worse for the wear, so it made an improvement.
Note: many lamps are made of what I call “hard to paint” materials, that is why I suggest a chalk based or multi surface paint because the results are usually better. My lamp base was part ceramic or glass of some kind = hard to cover with standard acrylic craft paint.
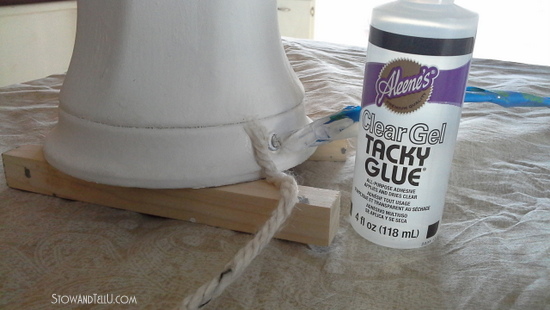
Test the drying time of the glue
Test the open time of the glue. The open time of the Aleene’s glue I used was about 5 minutes, meaning that with in five minutes, it was dry enough to hold the yarn in place. I tested this with a strand of yarn and a piece of card board to know what kind of time I had to work with.
Tip: try to use a fast drying craft glue with about 5-10 minutes open time at the most. I don’t recommend hot glue for this project. Yarn and hot glue could be very messy (in my personal opinion).
 Wrap the lamp with yarn:

I used a small topped table to do the yarn wrapping part. This allowed me to walk around the lamp while I was adhering the yarn. Notice that black ball of fur in the back ground? That’s our elusive kitty.
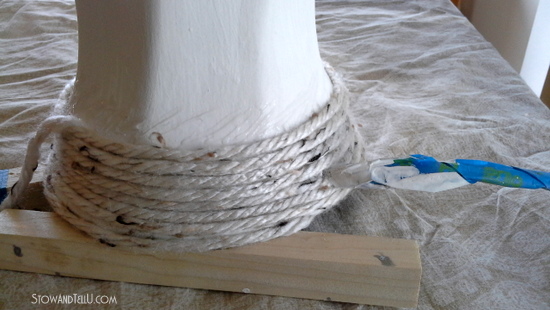
 I glued about an inch section of yarn vertically to the back bottom of the lamp base, and let it dry for about 5 minutes.
From this point on, I began applying glue and wrapping in a horizontal manner, but to start by laying the end down vertically keeps the starting point neat so that you do not see the end piece because as you wrap the yarn over it, the end will become hidden.
 (Notice how the end piece is no longer showing?)
I applied glue in a zig-zag pattern upwards about an inch a time to the lamp base, and gently began to lead the yarn with one hand, and secure it into place with my thumb on the other hand. Once I wrapped the yarn over the glued area, I applied another inch or so of glue and repeated the same process.
As I mentioned since the glue was rather fast drying, the yarn was staying in place with no problem.
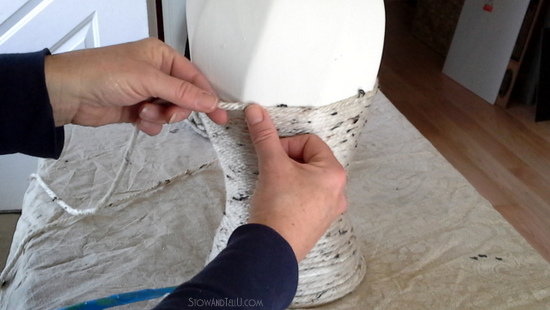 I continued to lead with one hand and gently secure into place with the thumb on my other hand.
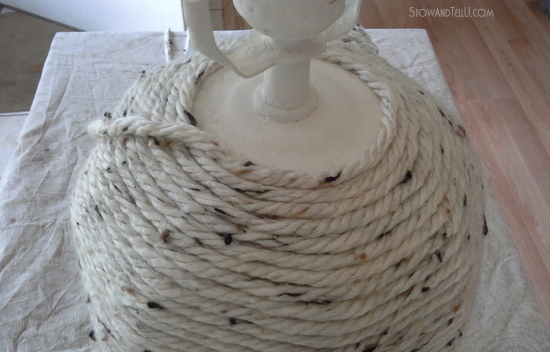 I didn’t stretch or pull the yarn, especially not in the curved areas. But I did let it lay itself down naturally, lining one strand right up against the next strand; checking and double checking to make sure the yarn wasn’t riding up anywhere from being too tight.
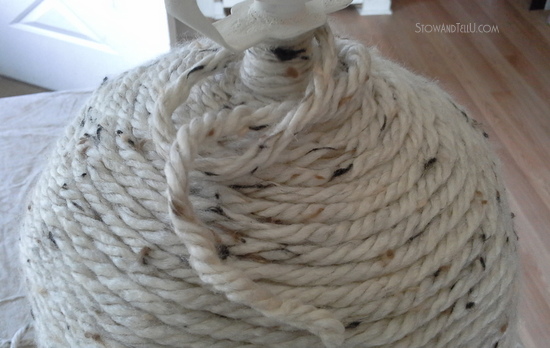 When I reached the end, near the top, I DID PULL AND WRAP TIGHTLY around this section ONLY. I gave the yarn some length and cut the strand. I started a knot and pulled to tighten. I then applied some glue all the way around that section. I repeated this step 2 more times. I snipped off the end with a quarter inch to spare, applied some glue on the end and smoothed it into place along the same area.
 Out with the dated flesh-toned and brass look.
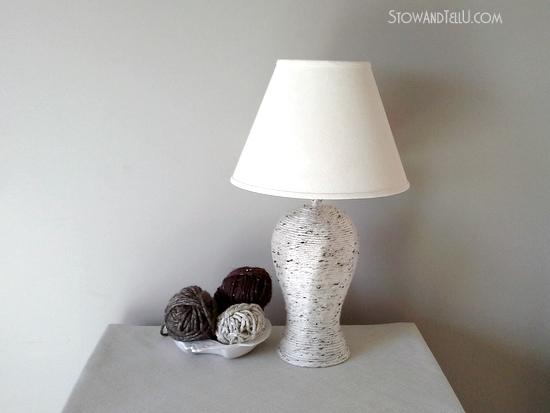
In with a neutral colored, cozy looking yarn wrapped lamp.
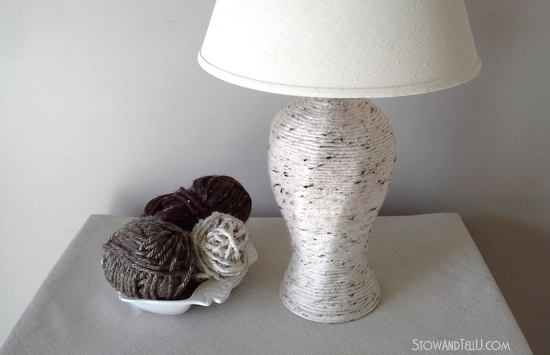


 The yarn wrapping part of this lamp project took me about 2-1/2 hours to complete, and I ended up using about 3/4 of a 64 yard skein of yarn. The most challenging part making sure not to pull the yard too tightly so that it would stay in place and not ride up around the curvy areas. I have more of this yarn in a few other colors. Maybe someone who actually knows how to knit will knit me one of those sweaters after all… any takers?
You can see more lamp projects here.
Thank you so much for stopping by ~ Amy
Linking up to:
Thrifty Decor Chick Before and After Party
Mel says
That looks so much better, I really love the yarn, you should try learning to knit it would make a great scarf and they’re eay for a beginner.
Danni@SiloHillFarm says
Oh I want to try this! I have a green lamp that will not go in my new house and this would be perfect for it! Thanks for the inspiration!
Amy says
Go for it Danni, if you don’t mind giving the lamp a coat or two of paint, the yarn wrapping was really quite easy to do!
Feral Turtle says
Genius. I would have never thought of a yarn wrapped lamp!
Amy says
Thank you Karen! Have a great weekend.
heather f says
I agree about spring being cozy sweater weather. And I alas, cannot knit either, so this is a perfect substitution. I think this is so clever! I am trying to figure out why you did the bit vertically in the back? Was it to keep it away from the cord? See, this is why i am so glad to know you and see what you do that I wouldn’t ever think of.
Amy says
Good question, Heather! I started wrapping with the small vertical section to keep the end tucked under, you know, so it won’t try to unravel. I should have shown a better picture of that step, but once the vertical part was dry, I started wrapping the yarn horizontally around the lamp which ends up covering that small vertical section. I hope that makes sense. Here’s to spring and fuzzy sweaters!! ~ Amy
Shanna Gilbert says
This turned out so pretty Amy! I love the color of the yarn, it would be perfect in any room!