I am taking on my linen closet. It’s in pretty bad shape! Before I pull it apart, I want to make sure I have adequate storage to put it back together with some sense of ORGANIZATON! I could buy a bunch of storage boxes, but I’m going to DIY it instead.
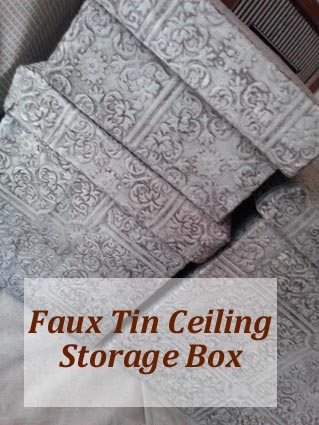
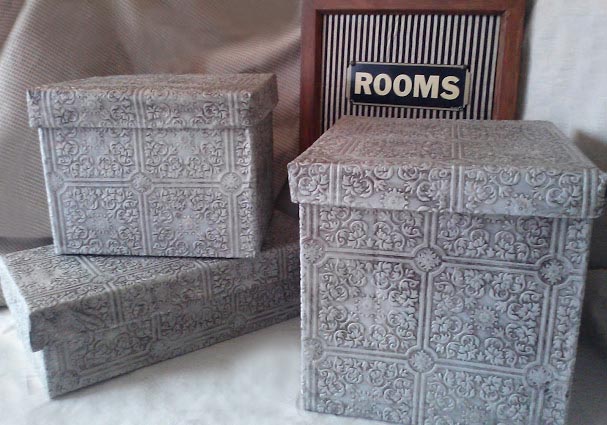
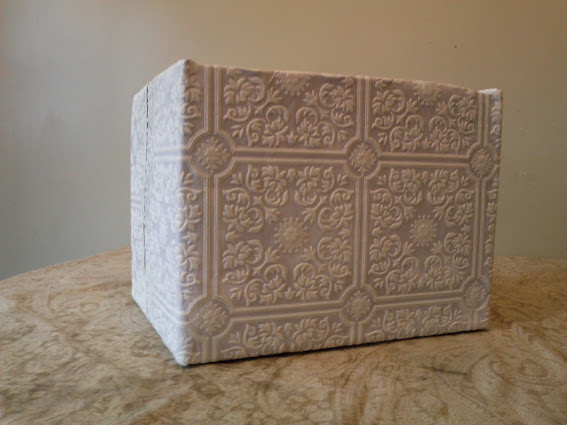
I have made a bunch of storage boxes with lids from cardboard. Now I have to decorate them and make ‘em fancy. Here are a few, that I have made so far, in the faux tin ceiling style, and here is how I made them.
Supplies
Several cardboard boxes with lids, click here to learn how to make your own
Paintable tin ceiling look wallpaper
Primer
Paint – Martha Stuart Living / color: Winter’s Day
Decoupage ( I used Mod Podge Matte)
Sponge paint roller
Small sponge paint brush
Paint glaze – Martha Stuart Living/ Metallic Glaze/ color: Black Coffee
3 small trays, 1 for paint, 1 for Mod Podge, 1 for glaze
Sealer (I used Mod Podge Acrylic Sealer)

Apply a coat or two of Mod Podge to the inside of the boxes
Apply primer (you can also use flat paint in a pinch) to the outside of the boxes, let dry
Fit and Cut Wallpaper
Dry fit and cut wallpaper to fit over boxes and lids, making sure to add several inches of overlap for the inside of the box.

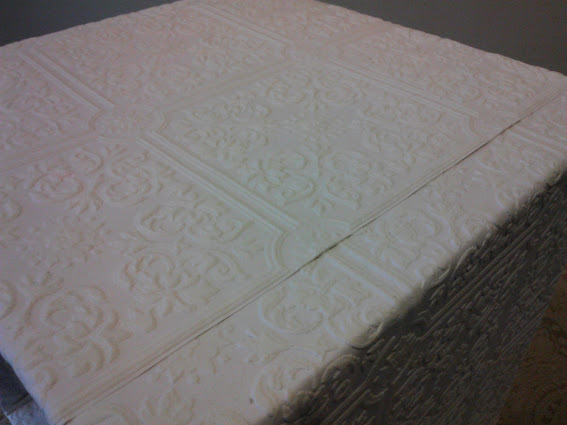
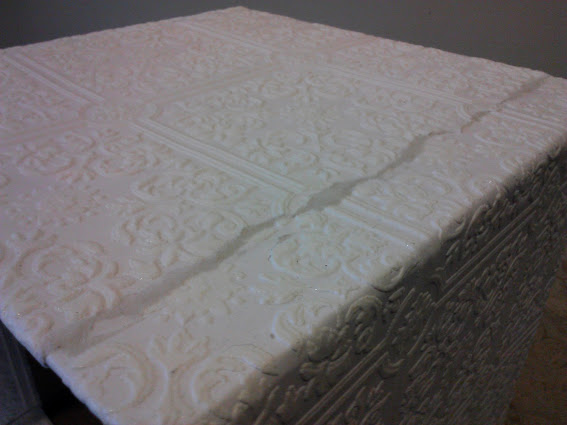
For the Lids
Lay your lid, bottom side down in the center of the wallpaper and draw a line around the box with a pencil. Bring the lines to the edges and then cut out, or rip out the corner pieces.
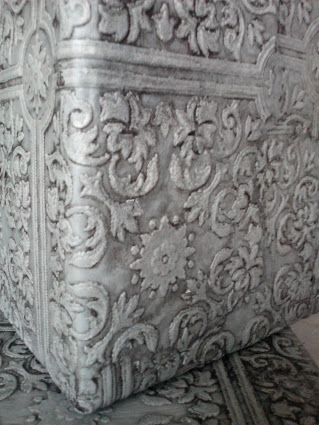
Note: Ripped edges always seem to adhere better than cut edges. It is not always easy to rip every edge before you apply the paper to the box, but if you can, use a ruler and rip any edges against the ruler where ever possible. You can always rip the edges after you have applied all of the paper, and I show you examples of that further down.

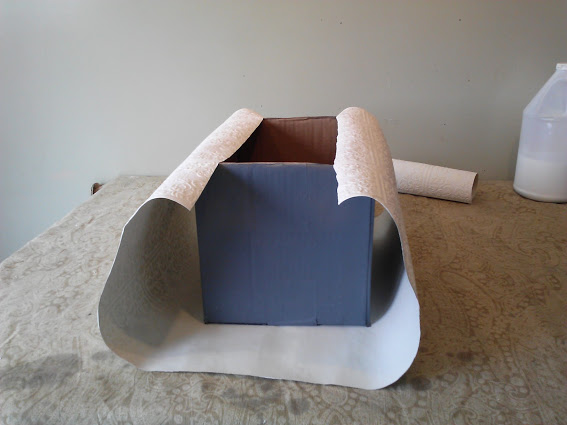
For the Bottom Box Part
Depending upon your box size, you can try to use one cut piece to cover the whole box – kind of like wrapping a gift – but you made need to cut several extra pieces. Once you have your cut pieces, lay the box bottom side down on the larges piece and draw a pencil line around the box. Finally cut or rip slits at all the corners.
Note: If you are doing several boxes, do this step for all of the boxes at one time and put each one aside until you are ready to apply the wallpaper with Mod Podge.
Note: Some paintable wallpapers have a pre-glued back side and that is okay, too.

Apply Wallpaper with Mod Podge
If you have cut pieces, rather than just one wallpaper piece, then apply the smallest cut pieces first (using the directions below,) and then apply the larger piece creating an overlap onto the smaller pieces.
Lay your wallpaper face side down. If your paper is the pre-glued type, then dampen the wallpaper backing with warm water using a foam brush and then apply the Mod Podge to the center pencil markings and place the bottom of your box on the pencil markings.
Turn box over and smooth paper on the bottom of the box. Dampen your fingers with water to smooth if needed. I did not apply Mod Podge over the outside. I only do this step after the paint and glaze final steps.
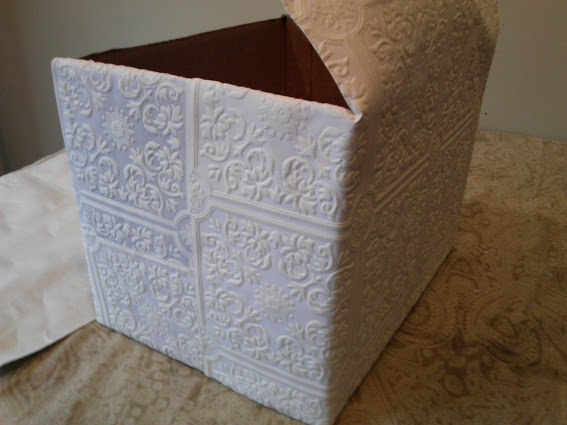
Turn box back down and start to adhere the sides, one at a time in the same fashion. When you get to a piece that you are wrapping around a corner, cut a slit in the paper down to the edge of the box. Wrap and smooth one side of the box, and then wrap and smooth the other side of the box, making sure to wrap the paper over the edge and to the inside of the box.
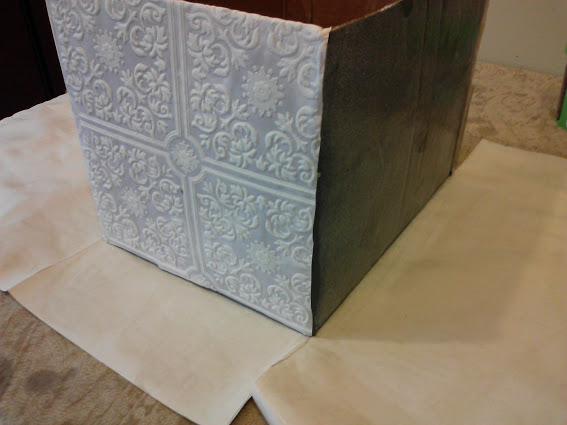
If you haven’t ripped any edges, let the Mod Podge dry and then gently tear any edges that are showing. See these examples. Don’t worry, once you paint the wallpaper, the ripped edges blend very nicely.
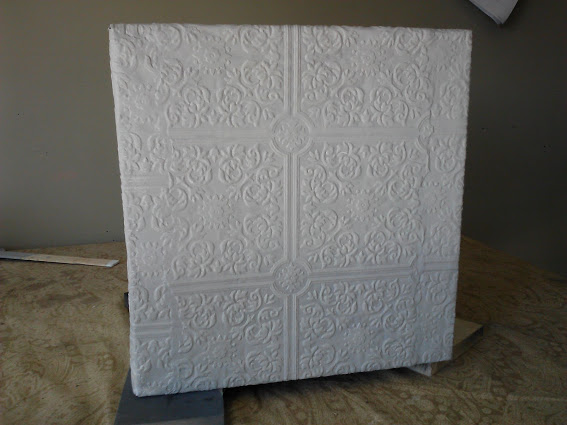
Paint Boxes and Lid
Apply two coats of paint to the boxes and lids, and let each coat dry.

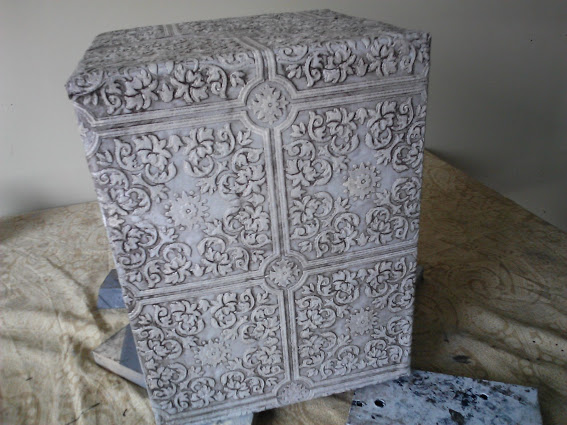
Apply Glaze
Take a sponge brush and dampen a side with warm water. Apply a thick coat of paint glaze. Rub off glaze with a dry cloth, and then rub off more of the glaze with a damp cloth. Repeat these steps until you have the look you like. Let dry.
Apply 2 more coats of Mod Podge, let each coat dry
Apply 2 coats of sealer to prevent tackiness, let each coat dry
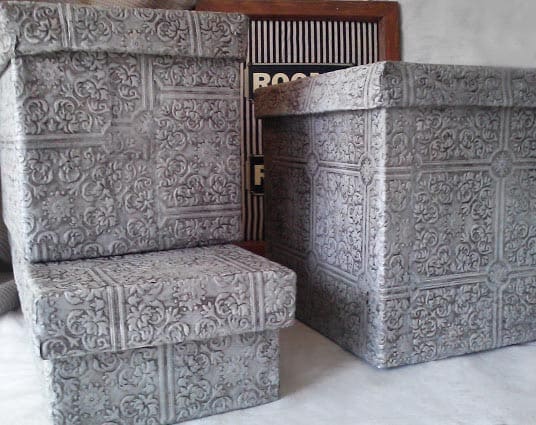
Now that these are done, I am certainly getting more motivated to tackle my linen closet; however, I still have a few more boxes to decorate. Stay tuned – or – See more storage box ideas here…
Linking up to:
Mel says
They’re fantastic! What a great idea thanks for sharing Amy xo
Anne@DesignDreams says
So beautiful! I love the paint treatment too. You made them look ancient and wonderful!!
Danni@SiloHillFarm says
Amy, these are so very cool! I love that you made your own boxes. I could make these to perfectly fit my craft shelves! They really do look like that pressed tin! Nice job and I’ve pinned it to a couple of boards. Going to share it on my facebook page when i get over there!
Nancy @ Artsy Chicks Rule says
Oh, pretty boxes!! What a great idea! I can think of so many things you could use those for. Thanks so much for sharing 🙂
Nancy
AnnMarie says
That is quite the ambitious project and beautiful! Thanks for visiting my blog through Bloglovin’!
Rhonda @ The Messy Roost says
Oh my, I totally love these. I will be making some soon. I have a little $$ on a Home Depot card and now I know what I will be getting. Thanks for stopping and following me on Bloglovin’. I am following you on Google+ and Bloglovin. I look forward to seeing you around. Rhonda
Angela says
These are super cool! I’m always looking for new storage ideas!! ~~Angela
Tracy @ Warratahstree says
These are beautiful! What a great idea and the look of pressed tin! Returning the follow and having a look at your site. I love it!
Tina says
I love it! Very impressive.
I feel like I’d end up with a huge mess. I was once told in design school to “work on your craftsmanship”- I like to think that 12 years later I have..there is always a fear of disaster!
Well done!
Allison says
These are simply gorgeous!
Amy says
Thank you, Allison!!
Ann says
Amy, I just wandered over here from your faux leather box post and I see more of your creativity. Lordy. I realized while reading your post that I have this same wallpaper in my stash. I must have been saving it just for this project! Thumbs up!
Teri says
what kind and color paint did you use?