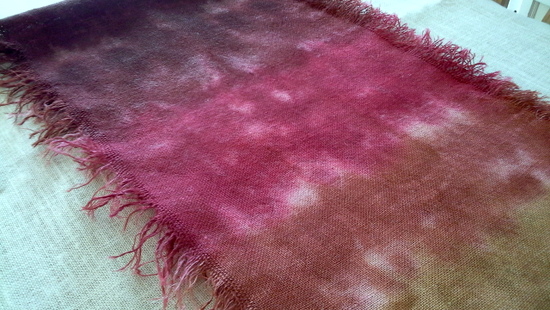
I love a good experiment and that is exactly where I was headed when trying to mix Rit Dye colors while making a burlap table runner. I had most recently tried washing burlap and had pre-cut a few of the pieces as table runners. Using a mix of Cocoa, Scarlet and Tan dye colors with the same tie dye and pour method used on the stars and stripes table cloth, I concocted a tie-dyed table runner any hippie would be proud to drape themselves in… or shake their dreadlocks at, take your pick.
 As Valentine’s Day approaches I choose complimentary red and brown tones. When tie-dying anything, there’s a preconceived notion that there must be incense burning nearby and lava lamps alight, but in truth, there is no such around here. I just really wanted to try out mixing dye colors, kind of like when you mix paint colors. Since I had done some tie dying before, I was familiar, so my learning curve was low on this one.
I know the Rit website has a Color Formula Guide, but I decided to wing it on the color mixing this first time around, making my own formula.
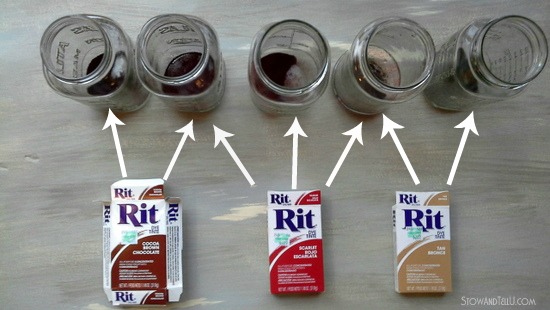 I mixed up 5 jars of dye and hot tape water from the 3 packets of dye in the following proportions:
Jar 1 – 1/2 pack Cocoa Brown
Jar 2 – 1/2 pack of Cocoa Brown and 1/3rd pack of Scarlet
Jar 3 – 1/3 pack of Scarlet
Jar 4 – 1/3 pack of Scarlet and 1/3 pack of Tan
Jar 5 – 2/3 pack of Tan
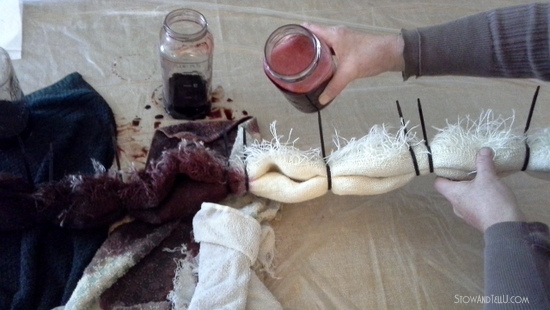
I folded and zip tied the burlap (rubber bands work better) and started pouring the dye one color at a time, starting with the Cocoa. I messed up the first pour, but corrected myself by the second, making sure to hold the bunch of burlap up, so that the spill-off doesn’t get all over the whole piece.
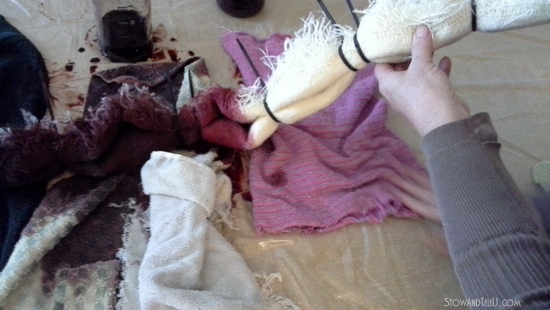 Then I used a rag to wipe up the excess.
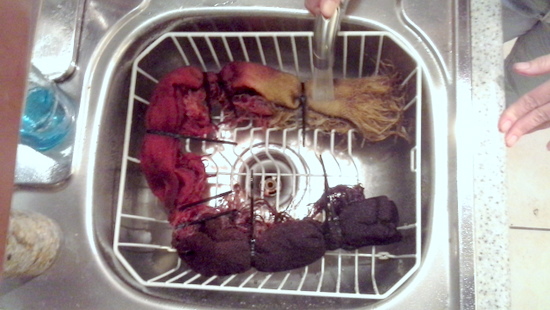 After I poured all the colors, I let the piece dry for several hours and then laid it in my drying rack to rinse all the dye out with color water.
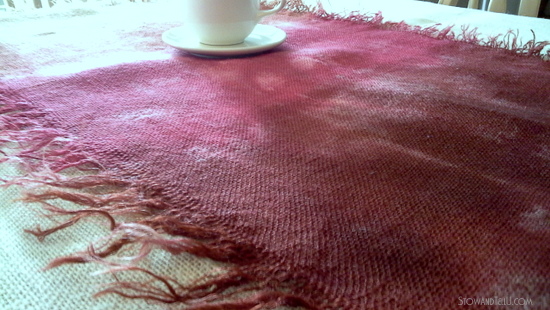
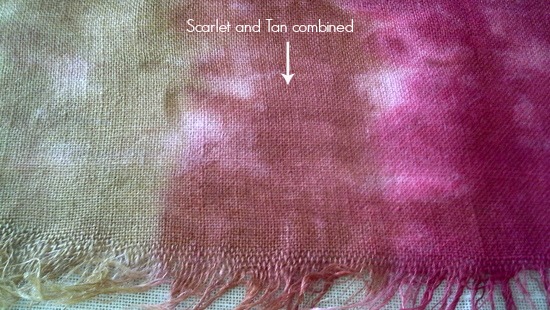 The Scarlet/ Tan mixture ended up looking rather mauve-y.
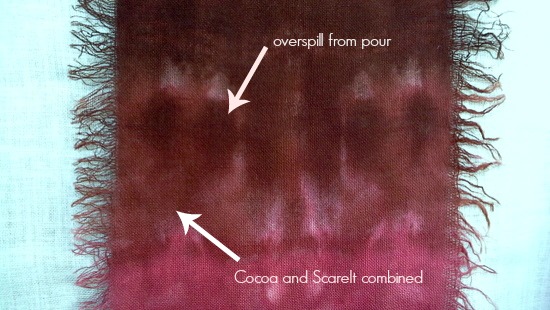 The Cocoa/Scarlet ended up looking rather maroon-ish. You can also see the excess Cocoa color from the over pour areas.
Results
The trial and error method is helping me get the knack for finding what dye method might work best and if it’s even at all worth it to mix dye colors. Burlap is only one medium for using dye, it seems like the ideas and possibilities are endless. I have more packets of dye in waiting and plans to try out more dye color mixing. What I’m trying to say is that I’m just getting started!
More on dying burlap
In the meantime, have a Hippie Valentine’s Day.
Thank you for stopping by ~ Amy
Sharleen says
I love that Amy. The colours are beautiful and I love the little dangly bits hanging off the burlap. Sharleen
Mel says
The COlours look quite pretty. Ve never died anything before so I’m interested in your experiments. But I have to ask are you sure there was no incense burning 😉
Danni@SiloHillFarm says
I have never tie dyed anything, but it looks like an interesting process! I think the mixed colors are quite nice and I love that you are experimenting with this and saving us all the trouble of figuring it all out! That stars and stripes table cloth is still one of my all time favorite projects of yours!
Feral Turtle says
Wow That is so pretty!! I would wear that as a scarf if the burlap wasn’t so darned scratchy. Good job Amy and Hippie Valentines Day to you too!!
Shanna Gilbert says
I’ve never heard of anyone ever doing this before! Turned out so pretty!
Bliss says
An experiment gone right.
heather f says
I super love this! And I really enjoy that you kept track of all the colors you mixed and how they turned out in the end. Very pretty!