I confess…I am quite new to the online world of crafting, blogging while crafting, pinteresting while crafting, and so on. I have to admit, I feel like of newbie a LOT these days. I’ve been crafting in my own little world for a quite a while, but one medium I’ve never really gotten into is burlap, although I’m pretty sure it’s been around in the crafting world for like, EVER!! Obviously, I didn’t get that memo. Oh well, nevertheless, I’ve recently been exposed to some fabulous burlap projects on the web, and now I want to join in. That said, I’ve rustled up a few of my own projects and found that I had to dye some burlap in the process. I was able to find several tips online, but couldn’t find any instructions on how to dye burlap specifically with Rit liquid dye. So I took my chances and gave it a try. Here is a quick tutorial on how to dye burlap with Rit liquid dye.
 It was easier than I thought it would be.
This method is good for medium sized burlap projects, such as 3-5 yards of fabric. If you have much smaller pieces of burlap to dye, try this microwave method.
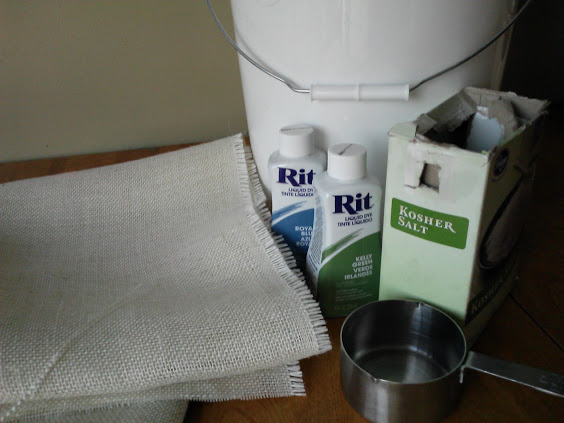
Supplies
Burlap (I used the lighter color)
Rit liquid dye
Large bucket (5 gallon) – or a large metal pot – or a stainless steal sink
1 cup salt
Stirring device, preferable metal
Rubber or plastic gloves
Hot water (but not too hot; from your sink will do)
Washer/ Dryer Method or Bucket Method?
Some tips have suggested washing or dying burlap in the washing machine; however, the ladies at the fabric store strongly discouraged this notion. By the time I left the store I could see why. I had heaps of light colored burlap fibers all over my black fleece jacket. I started getting itchy and decided then that I would steer clear of my washer and dryer for this project but use big plastic buckets instead. It’s all a matter of preference.
Update: I have since tried the machine washer/dryer method and it was successful.
Burlap Dying Process (In the Bucket)
- Wash fabric with a little bit of laundry detergent (make sure it doesn’t have fabric softener in it,) Rinse well, and try to wring water out as best you can.
- Fill bucket about 2/3rd’s of the way full with hot water from sink
- Add 1 cup salt
- Add Rit liquid dye
- Stir well.
- Add damp fabric that has been run under hot water briefly.
- Let fabric soak 30 minutes. Agitate or stir fabric well and often while fabric is soaking.
- Once you are done soaking fabric in dye, drain water/ dye solution out of your bucket, begin to rinse fabric in hot water, continue until water starts to run clean.
- Add a bit more detergent, stir that around, and then rinse again.
- Line dry if possible or lay on a drying rack
Burlap Dying Process (In the Washer/Dryer)
Follow the instructions above but let the machines do the “heavy lifting” part.
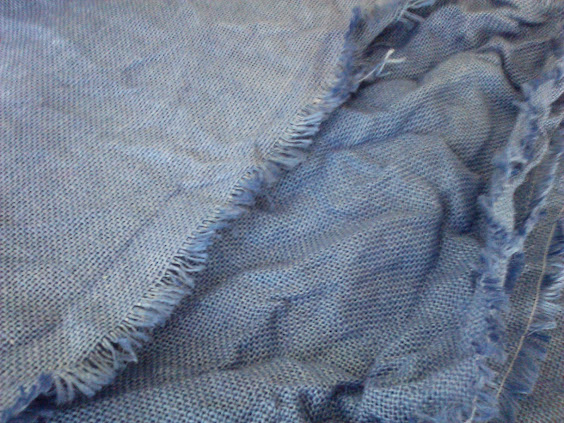
How to get the wrinkles out of burlap
(Ironed shown in left side of pic/ un-ironed on right side of pic.)
Once my burlap was dry, I noticed how many wrinkles it suddenly had??? Okay, I wasn’t planning for that, but after some trial and error, I found that spritzing plain water on the burlap and then, running an iron over the damp fabric worked pretty well. As far as the iron setting goes, every iron is different, but I first set mine to the “silk” setting, which wasn’t hot enough to do the job. I then set it higher bit by bit, until I reached a spot between wool and cotton and was able to get most of the wrinkles out. Still needs a little work, though. Update: see more on how to wash/dry burlap for better, less wrinkly results.
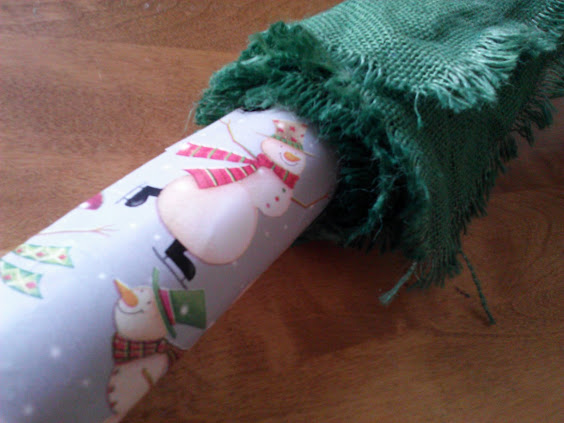
How to store burlap to prevent more wrinkles and creases
Since I had just ironed the burlap, I didn’t want to fold it back up and have more creases, so I wrapped it around a roll of wrapping paper.
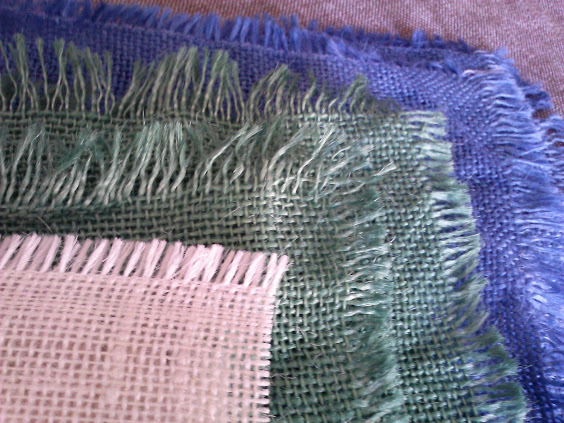
Click here if you want to see how I gave the green burlap an aged look on my Nail Head Stool project.
Inspire Me Heather says
I haven’t tried dyeing burlap yet – thanks for posting your tutorial. I’ll have to remember the wrapping around a tube trick, that’s clever!
Amycha says
Thank you, Heather! Let me know how it turns out if you try it
Mel says
thats a great idea, we dont have all the fancy colours just the plain stuff pinning this 🙂
Amycha says
Thank you, Mel. I’d like to try it with some plainer colors myself. Have a nice weekend.. and thanks for pinning!!
Vida says
Thanks for the tutorial! Do you know if this dye is permanent? So if I spill water on it, will it wash out? Thanks!
Amy says
Hi Vida,
The dye is permanent; and it should not wash out if some water is spilled on it; however, if the dyed fabric is put in the wash, it will fade just a bit, each time. I hope that makes sense, let me know if still unclear. Thank you so much. ~ Amy
Ashley says
I have the tan colored burlap and I need to dye it grey. Do you think the normal measurments and time recommended on the RIT package will work?
Michelle says
How much Rit do you put in it?
Amy says
Hi Michelle,
I put one whole bottle of dye in the water when I did this project. Follow this guideline from Rit’s FAQs:https://www.ritstudio.com/faq/ and hopefully that should help you determine how much you want to go with. I hope this helps – Amy