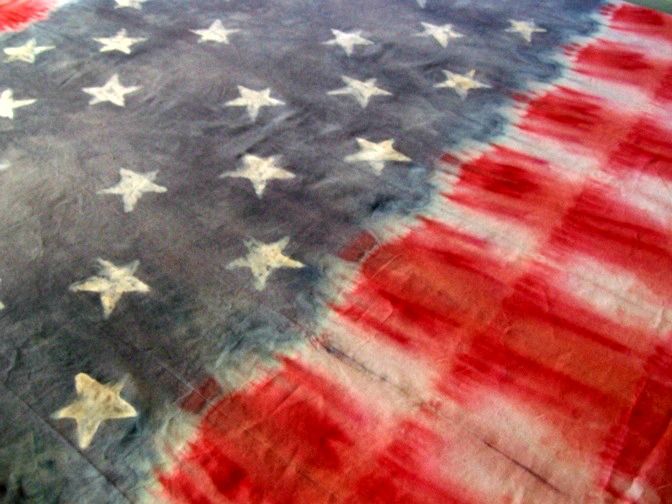
Red, white and blue tie dye for the Fourth of July!! I made this stars and stripes patriotic table cloth using Elmer’s Washable Glue as a faux batik and Rit Liquid Dye. One of my favorite Fourth of July memories from childhood is the stars and stripes cake that my mom always used to make. While surfing the web for a stars and stripes project, I came across the Patriotic Batik Tie Dye T-Shirt project from Deb @ Just a Mom’s Take on Things. Her and her gang made up a bunch of adorable patriotic t-shirts. If you are looking for tie dye ideas, click on over and check out her awesome t-shirt projects. The stars and stripes one in particular struck my eye, so I decided to try her method on a table cloth. I’ve tried dying burlap in the past, and that worked out quite well. By the time I was done with this project I found is was fairly easy to get a star spangled tie dye look on a table cloth!
Patriotic Stars and Stripes DIY Dyed Table Cloth
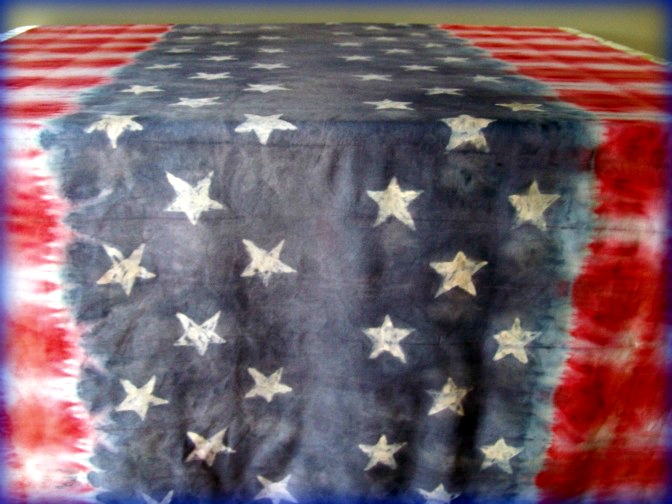
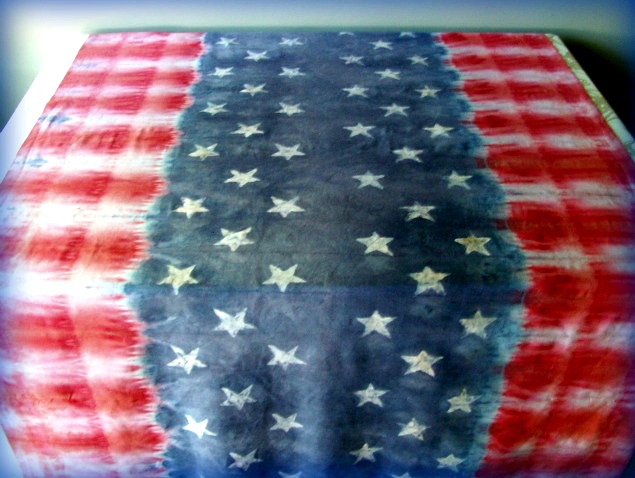
Here it is, stars, stripes and all! Deb’s method worked out splendidly. I don’t get to keep this one, though because it’s actually a gift for my brother-in-law. Why am I giving my brother-in-law a patriotic table cloth?? I promise I’ll explain that at a later date. In the meantime, here is how I made a patriotic stars and stripes batik and tie dye table cloth… that I’m giving away as a gift…sorry, just reminding myself!

Stars and Stripes table cloth supplies
1 Bottle of Rit Liquid Dye in Scarlet Red
1 Bottle of Rit Liquid Dye in Denim Blue
Elmer’s Washable Glue
Dye-able fabric, size approximately 72” x 44” (click here to see what kind is dye-able)
Several thick rubber bands
½ cup salt
2 mason sized jars
1 shallow glass or plastic bowl
Plastic drop cloth
Clean rags or towels
Shallow 9” x 12” pan (plastic or glass is best)
1 plastic bucket (for rinsing)
Plastic gloves
To make star template, you will need:
Manila file folder or piece of cardboard
Ruler and pencil
Straight edge or razor
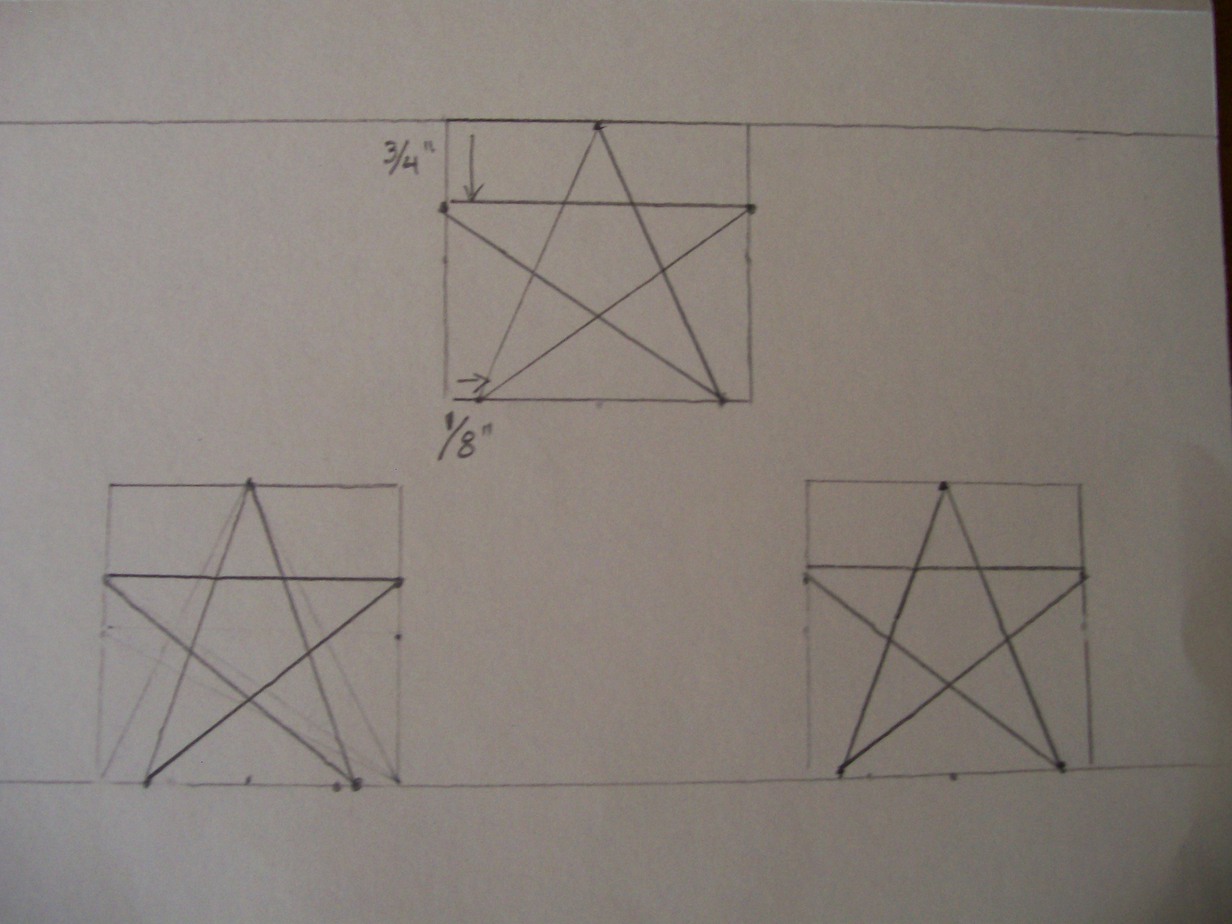
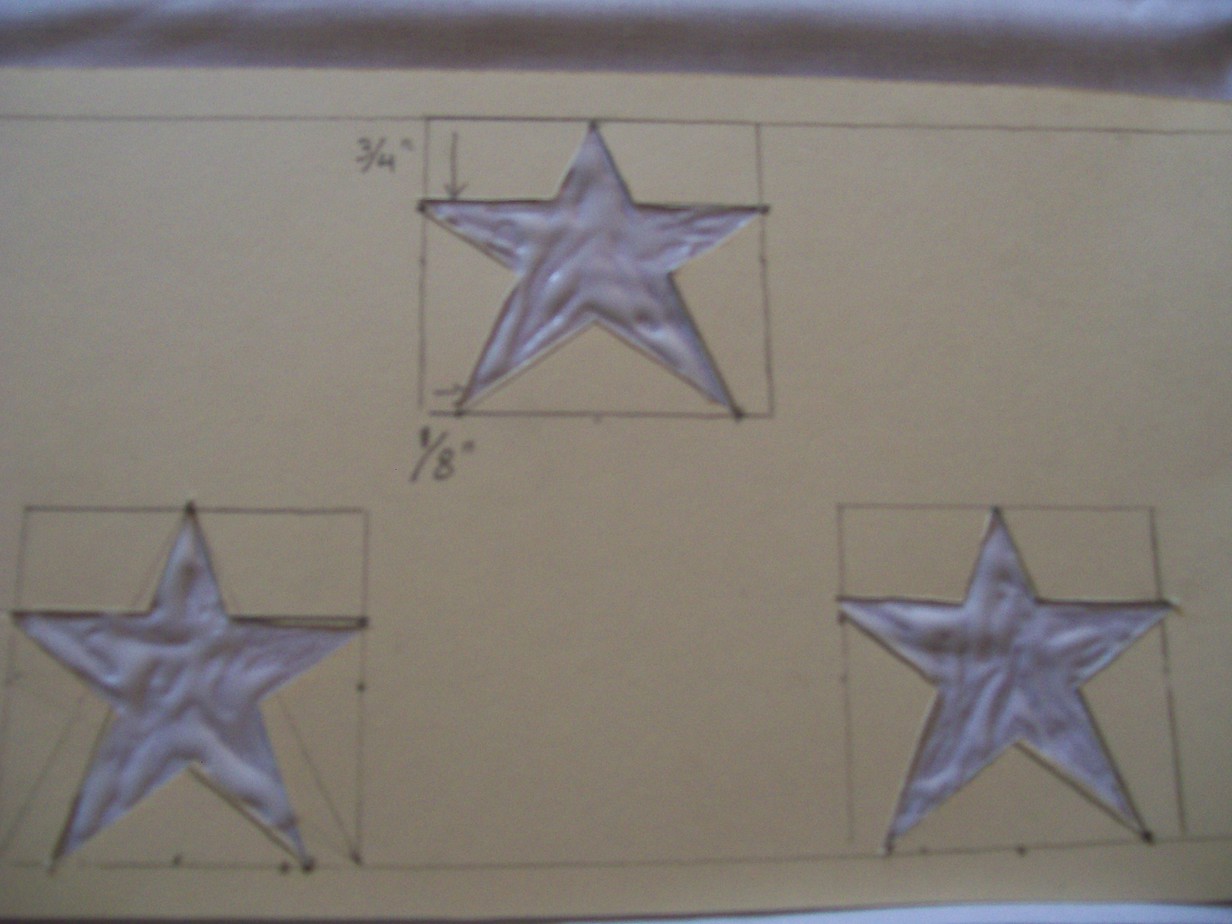
How to make a star template:
Cut one side off the manila folder and cut to the size of about 11” x 7”. Using a ruler and pencil make 3 squares at 2-1/2” x 2-1/2”. Make a center point on the top of each square. Make one point on each side of the square at about ¾” down. Make two points on the bottom line each 1/8” or so in. Use the ruler and points to draw a star with your pencil. Cut out stars with a razor or straight edge.

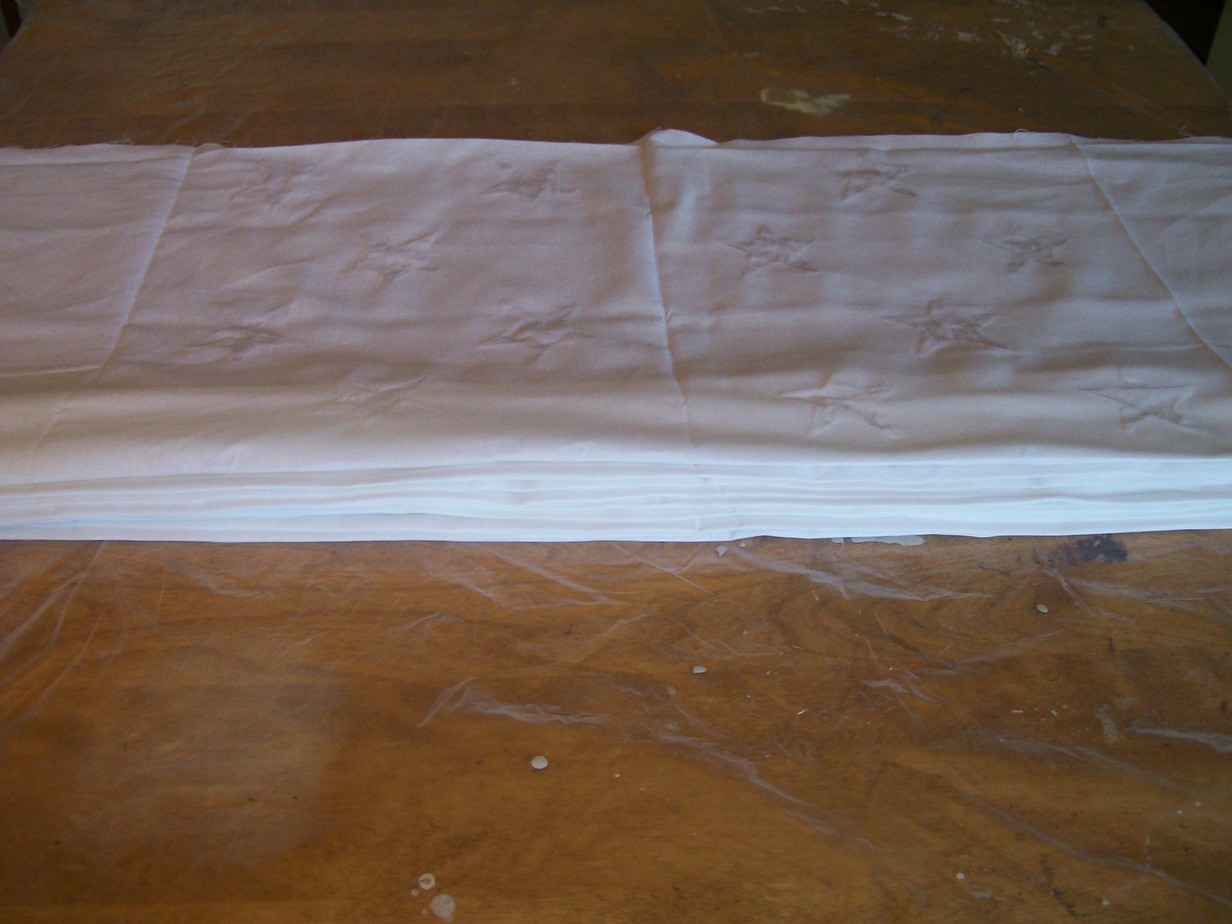
Lay a plastic drop cloth on a table and lay the fabric over the plastic. I used the Creative Cuts fabric that I picked up from Wal-Mart, but you could also use fabric salvage, sheets or linens. The purchased fabric had fold marks in it, so I was able to use those as a guide, but otherwise fold the fabric in half lengthwise, and then fold again and run an iron over the folds to create guide lines.
How to make the faux batik stars:
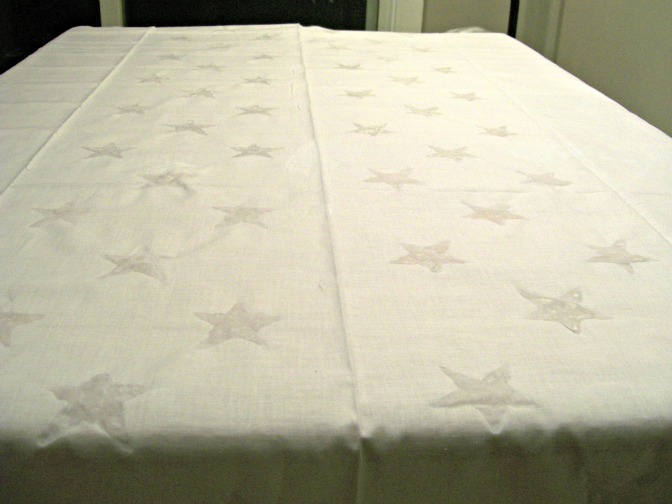
Lay template at the end of the fabric on one side of the center fold and fill stars in with the washable glue. Pick the template up and move it up one and repeat until you have run the template the full length of the fabric. Reverse the direction of the template and do the other side of the center fold the same way. Let all the glue dry. Drying time is long, several hours to overnight.
Accordion fold the fabric:
Starting at one end begin to accordion fold the fabric lengthwise. Once you have several folds, flip the fabric and accordion fold the rest of the way by folding over and onto the accordion.
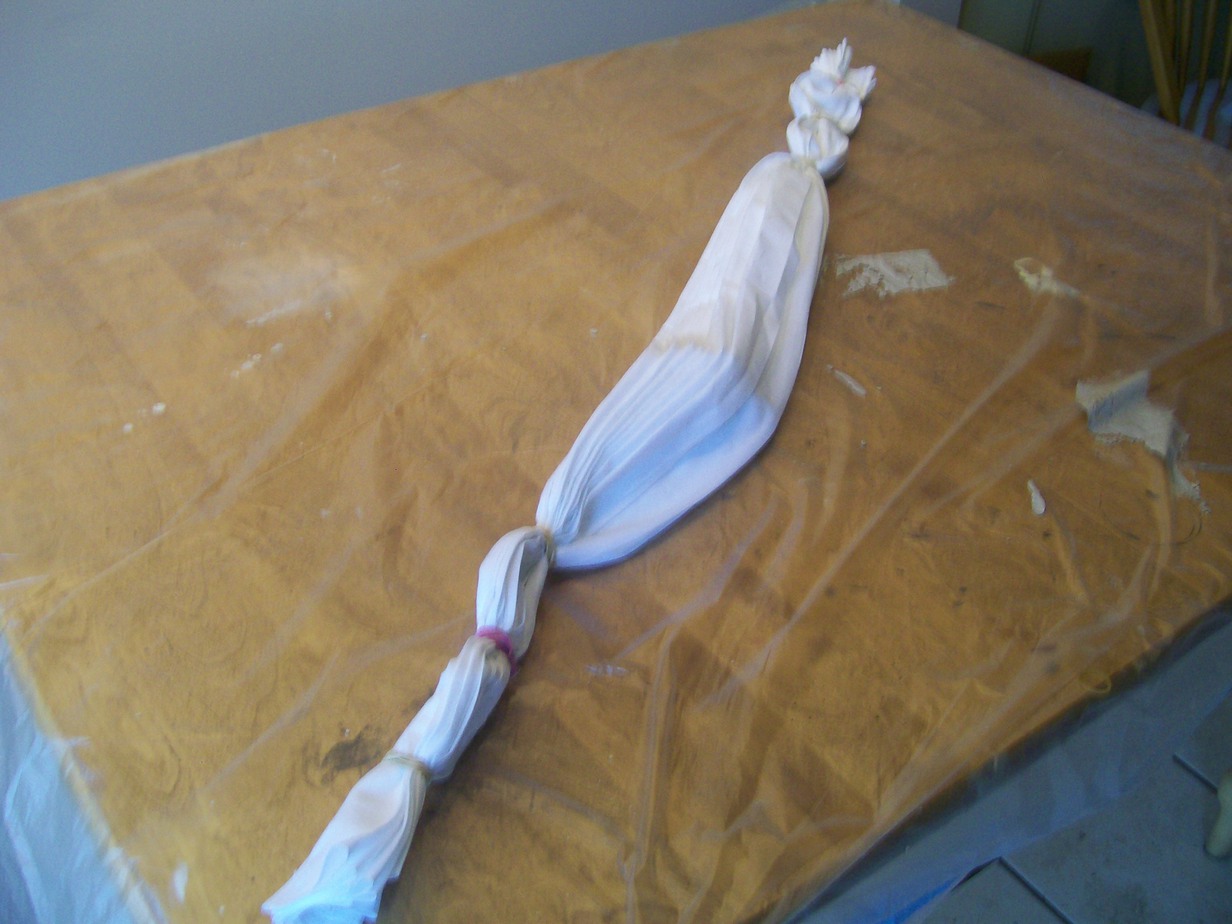
Add three rubber bands on each end of the fabric up to where the plain fabric meets the fabric with stars on it. Unfold the center part.
Pour the red and blue dye into each of the two mason jars. Add hot tap water and stir well with a metal spoon. Add ¼ cup salt to each and stir again then let liquid cool down to a luke warm temperature, at least.
How to make the stars and stripes stencil:
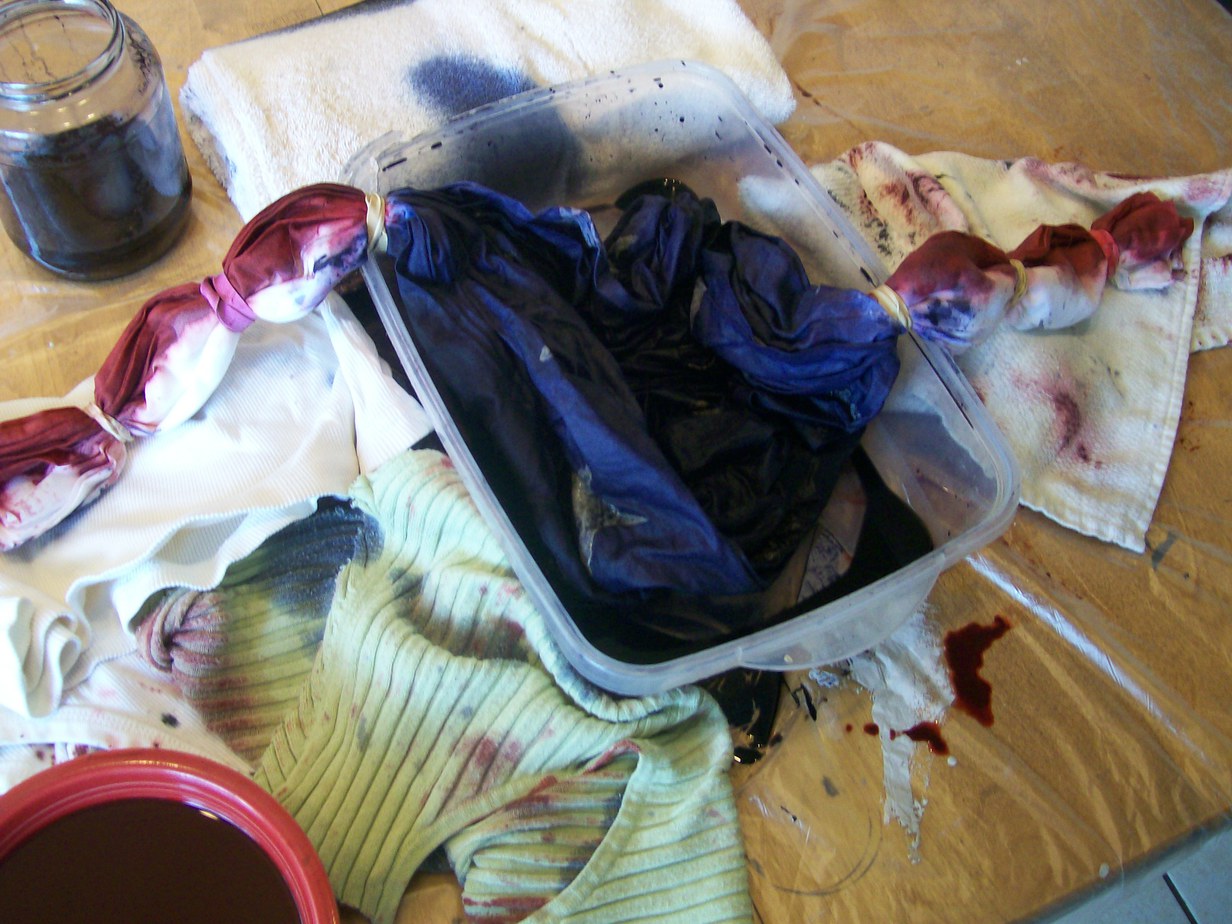
Pour the red dye into a shallow bowl. Dip one side of the folds from the accordion folded end into the red dye. Let liquid drip off and then lay it down on a clean towel. Repeat with the other end.
Place the shallow 9” x 12” bowl underneath the stars section of fabric and pour the blue dye onto the fabric. Swish fabric around as little or as much as you would like. Let dye sit on fabric 10 minutes or so. **Update, you can let dye sit on fabric anywhere from 10 minutes to overnight to obtain more saturation.
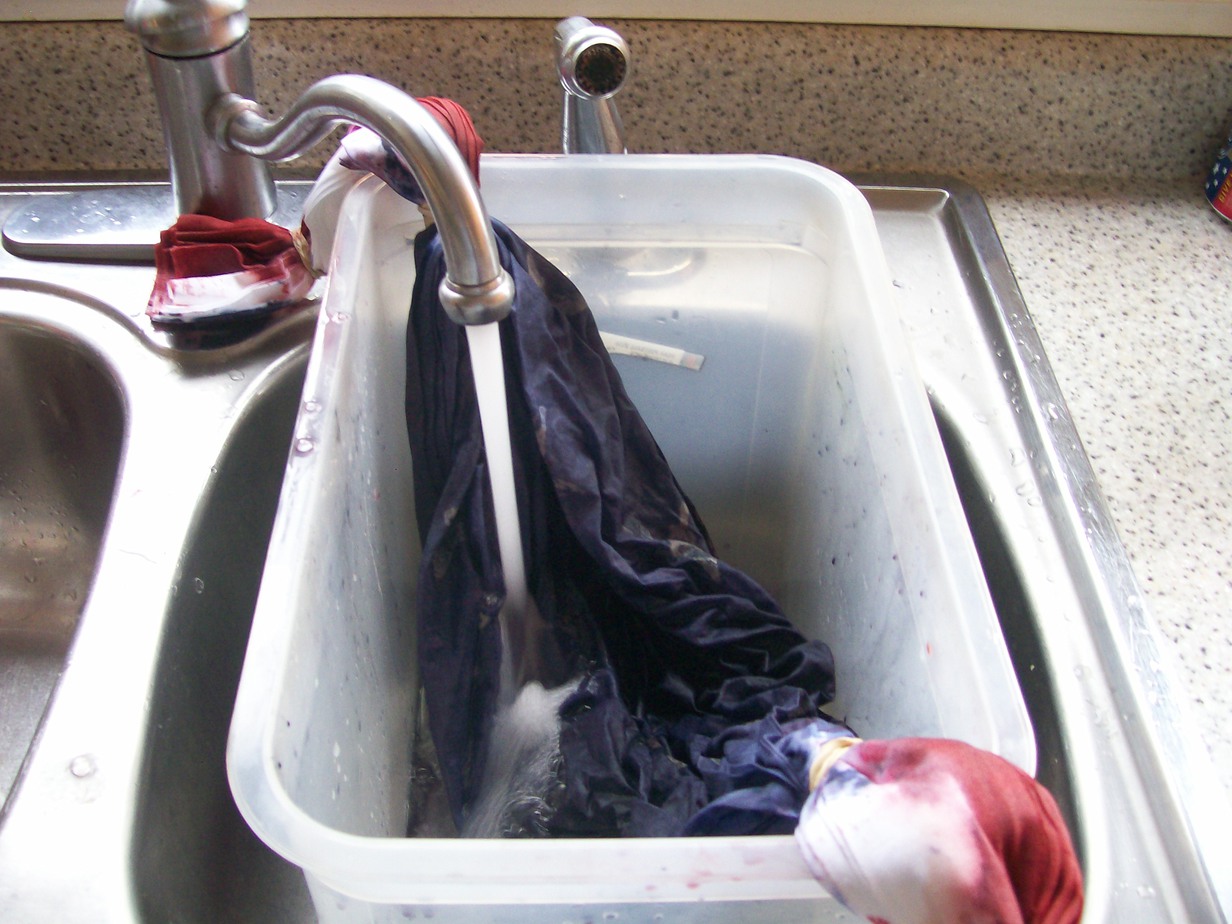
How to rinse dye out of fabric:
Pull the fabric out of the blue dye and place the blue section into the larger bucket, keeping the red part on the outer edges of bucket. Run cold water onto blue fabric and continue to dump excess water until most of the blue dye is out. Squeeze blue section out a bit, and then place the red, end sections under cold water, MAKING SURE TO KEEP WHITE SIDE UP while rinsing. I didn’t do this and the red part bled onto the white, more than I would have liked. Once most of red and blue have been rinsed out, add a few drops of laundry detergent into bucket and swish the whole table cloth in the soapy water. The glue will start to dissolve as you scrub. Rinse again and line dry, if possible, or dry on low heat in the dryer.
Hem up the seams or add a bit of trim!

As I head over to my sister’s house this Fourth of July with the stars and stripes table cloth in tow for my brother-in-law, I’ll be thinking about my mother’s famous stars and stripes cake… and hoping my sister makes it this year!! Happy Fourth of July!!
Read on: Patriotic Ideas for Decorating your Outdoor Space
For more stars and stripes craft and decor ideas,
Or, check out our Patriotic Blog Tour by clicking here.
Linking up to:
Danni@SiloHillFarm says
Amy, this is the coolest! I love it! I think you should make another one for me…or…smarter yet…for a giveaway on your blog next year on the 4th.
Shanna Gilbert says
Oh, I love this Amy! I so want one!
Mel says
Oh Amy that’s fantastic….hmmm might steal this idea next Australia day xoxo
Bliss says
Pinning this too!
Bliss
MonaLisa65 says
This is gorgeous! I’m going to use this technique to make my brother a tee-shirt for now, and the tablecloth for my sister (she has us over for a Memorial Day bbq every year). Thanks for sharing!
Marci @ Stone Cottage Adventures says
‘Seriously cool! This post will be one of my features for Celebrate the USA! -Marci @ Stone Cottage Adventures
Amy says
Thank you so much for the feature and for hosting the party, Marci!