Would you like to get the look of chicken wire without all the chicken wire commitment? Okay, well there’s a small commitment. You will need a piece of chicken wire. But you won’t have to bend, flex, and tie it off like I so rigorously did with the chicken wire lamp shade, pumpkins, Christmas trees or mini seamstress form.
Laying a piece of craft paper over a piece of chicken wire and rubbing with an ink dye pad is for the most part, all you have to do to create a rustic chicken wire texture on paper. In fact, I didn’t even have to cut any wire. All I had to do was unravel enough of the roll of chicken wire to tack down a piece large enough to work for this project.

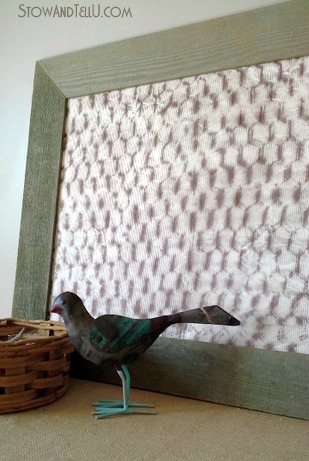
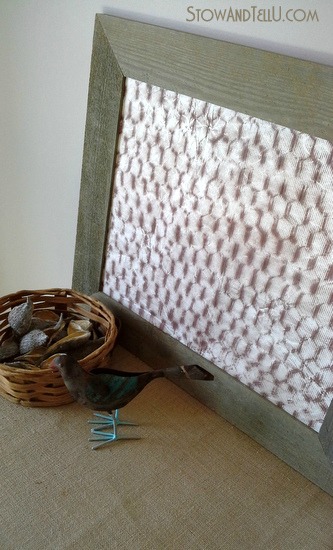
I’m calling it chicken wire texture, and when placed in a frame, I’m thinking that I have a farmhouse style piece of textured “art” that says chicken wire, without all the wire.
Here is what you will need if you, too would like to make rubbed chicken wire texture on paper:
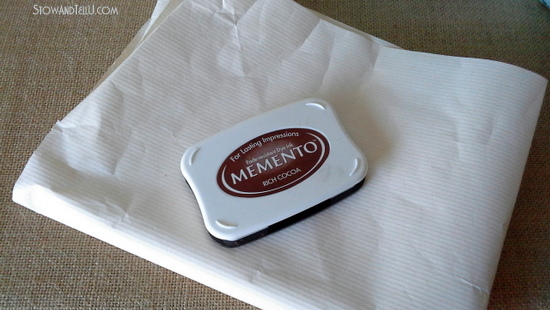
- Craft paper (I upcycled a piece that I used to wrap my husband’s birthday present in)*
- A roll of chicken wire, or a piece of chicken wire a little larger than the size you want overall
- Flat piece of board or a piece of drywall, larger than your overall desired size
- Staple gun with staples
- Ink dye pad in color of choice, darker and fade-resistant is better (must be dye, not pigment)
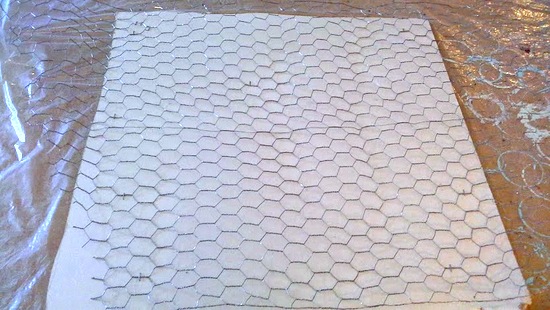
Lay out the piece of board or drywall and staple a piece of chicken wire onto the board. This is the small commitment part, as you will need to work with it a little to get it somewhat flat. The flatter the better, but expect some non-flat areas (unless you have all day).
As I mentioned, I actually unrolled a length of chicken wire right off the roll and stapled it down and then rolled it right back up when I was done.
Make sure your piece of craft paper is ever so slightly crumpled. Mine was a used piece, so it had some small crinkles. You can achieve this by gently folding here and there, random pattern style.
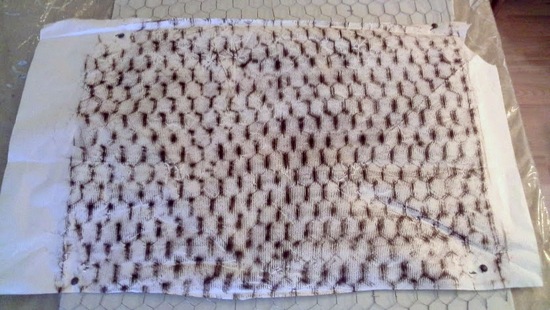
Lay your piece of paper on top of the chicken wire and staple down in the corners. Make it as taught as possible without ripping. (I used tacks for this part, and that worked fine, too).
Rub the ink pad over the chicken wire until you start to see the chicken wire pattern appear. Rub a lot, don’t be scared. Rub at different angles to reach the various nooks and crannies. Keep going until it has the appearance of chicken wire texture. There will be some variations unless you have made your chicken wire piece completely flat.
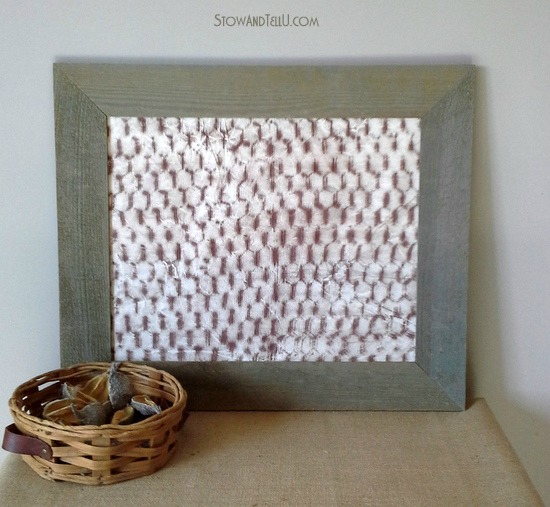
Put it in a frame when your done.

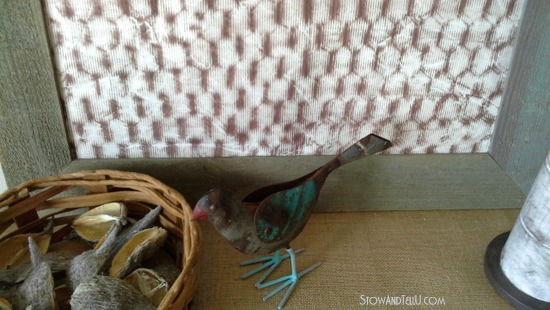
*Please note: the craft paper I used is off-white in color and has a lined texture running through it which adds more dimension to the texture. I was able to find this type of craft paper at Michaels. You can also consider using butcher paper or thick, light colored gift wrapping paper.
On the StowandTellU difficulty scale, this one ways in as one of the easier projects.
Using different types of paper, ink colors and /or picture frames will change up the look.
Hey, who says it has to be framed, at all?
Thank you for stopping by. ~ Amy
You can see more chicken wire projects here.
Sharing at:
Feral Turtle says
This is fantastic. I remember drawing out wire years ago and what a tedious task it was. Maybe I will have to give this a try!! Thanks for sharing.
Amy says
Somehow, I missed out on the drawing chicken wire fad, if I had known about it, I’m sure I would have partaken. That’s just the kind of difficulty level I like to join in on, regretfully 😛
heather f says
I have chicken wire!! Why have I not made something with it yet? I am going to get it out, stair at it until something awesome comes to mind.
Amy says
With all those chickens you have clucking around, you had better get to work on a chicken wire project! Thanks, Heather
Mel says
Oh how pretty! do you think that would work with fabric too?
Amy says
Mel, I think that this would work as well with certain fabrics, probably something like a canvas. If I happen to try it, I will give an update and let you know – Amy
Danni@SiloHillFarm says
Amy this is a great idea! I’m thinking it would make a great background for some blog pictures for projects! Leave it to you to hand me a simple project in the midst of my crazy painting!
Teddee Grace says
When you say craft paper do you mean brown Kraft paper? It appears white in your photos so I’m uncertain. Really like the idea. Thanks.
Amy says
Teddee, the craft paper I used was an off white color. I was able to find it at Michaels craft store. You can also use the brownish craft paper, but I would go darker on the ink color. Finally, if you want to go with the whiter/ lighter craft paper, I suggest using butcher paper, or plain off white wrapping paper. I really hopes this helps. Let me know if you have any other questions. Thank you so much for stopping by ~ Amy
Doreen@househoneys says
How cool is this??! Seriously Amy, where do you come up with these things?