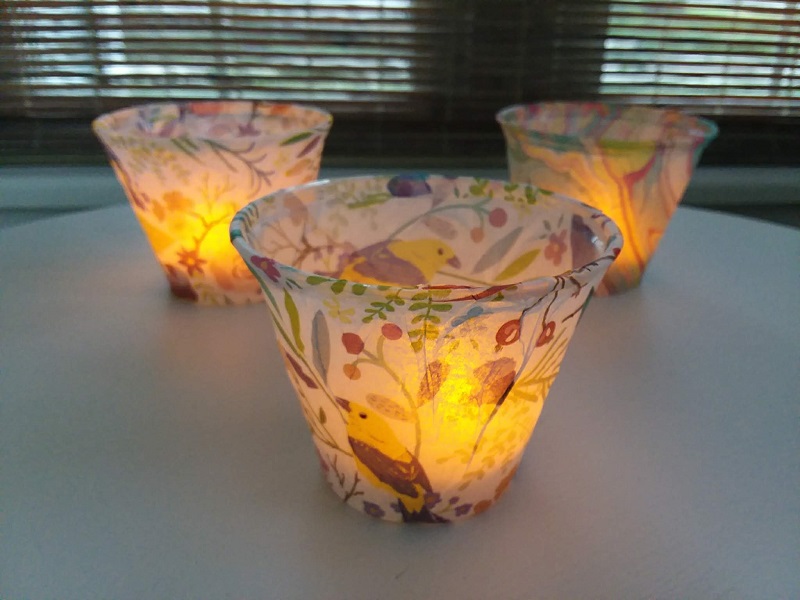
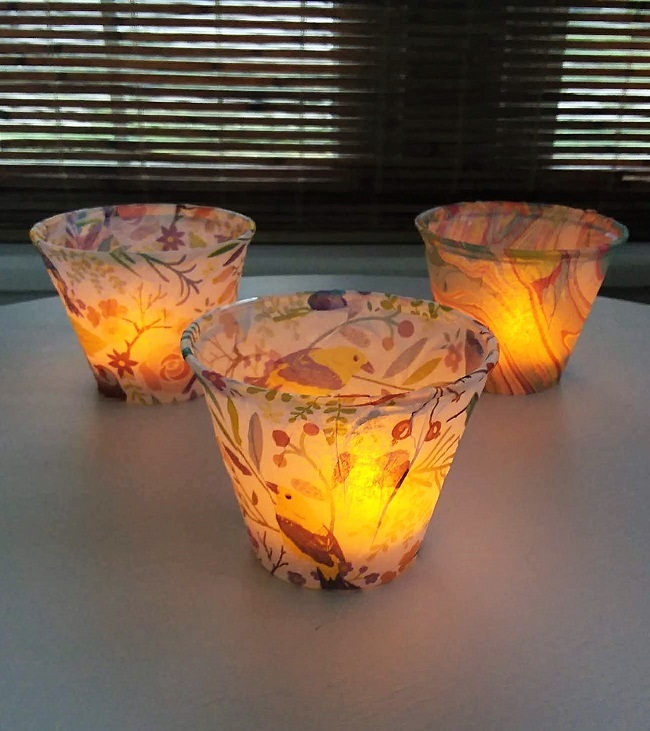
A few weekends ago, two of my great-nieces came over and we made tissue paper lights with plastic cups. The reasons I love this project is because once you’re done you have pretty little luminaries that are safe enough for kids and teens to use on their own. Even in a camping tent.
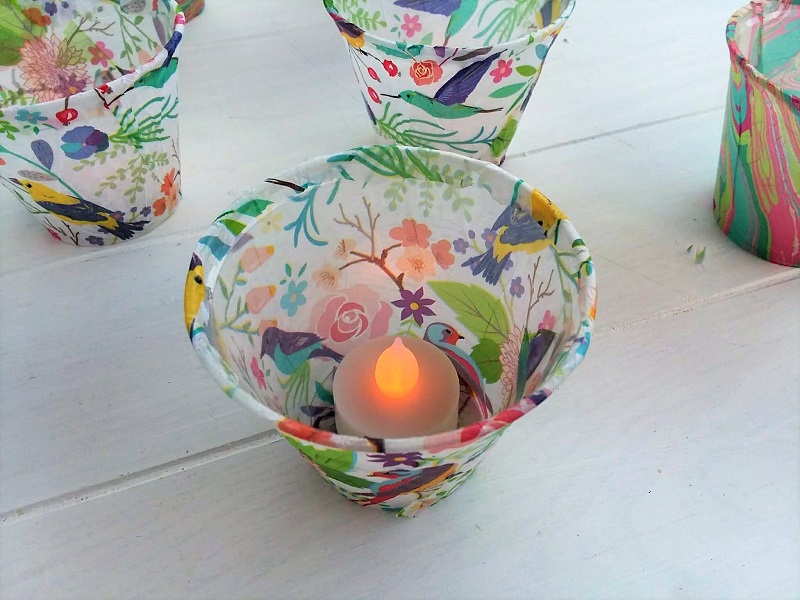
Because they’re made of plastic, there’s no glass to break. Using flameless tea lights means there’s no flame to start anything on fire.
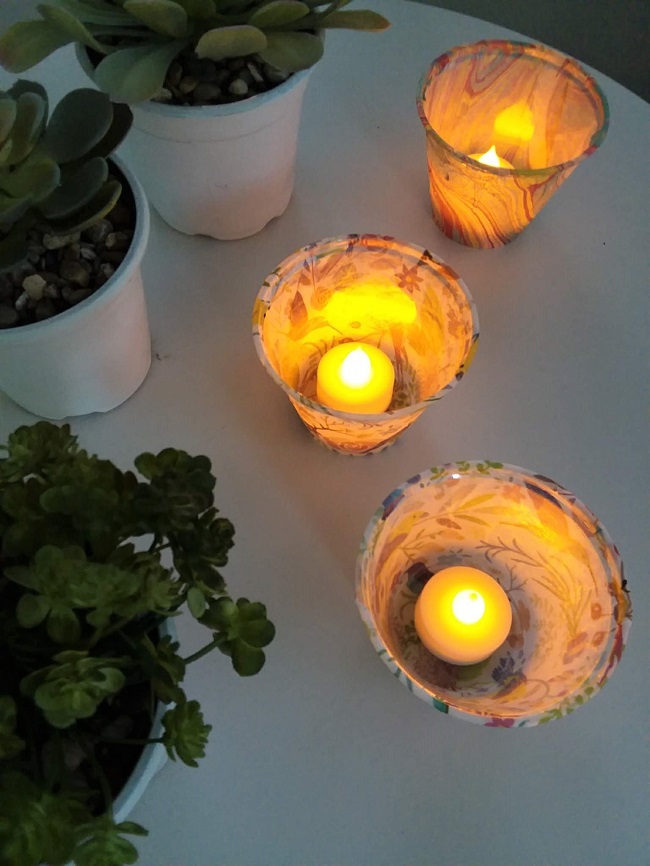
My ideal use for these lights would be for kids plunked inside a camping tent playing card games after dark while camping. The lights would flicker just enough to add fairy-light goodness to whole inside of the tent. Can you picture that as a kid? And doesn’t it sound fun?
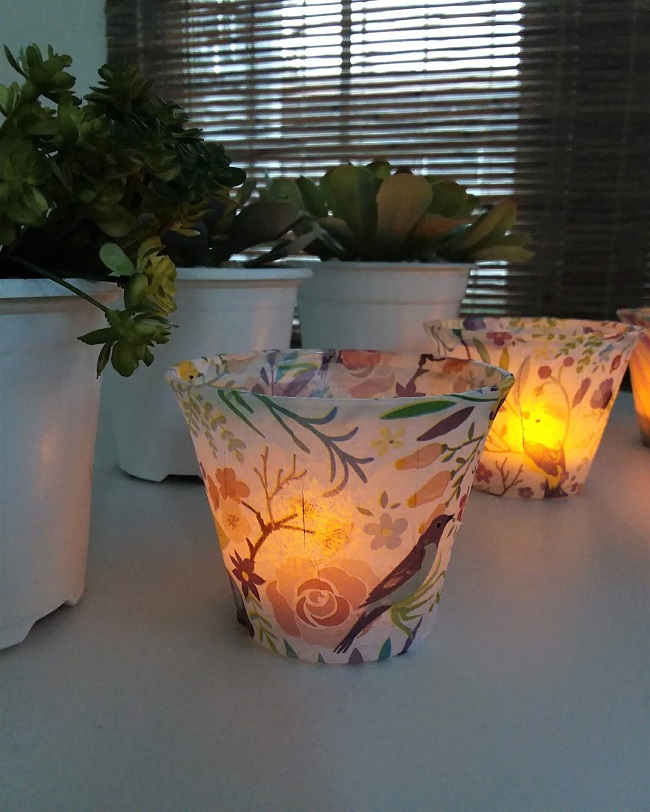
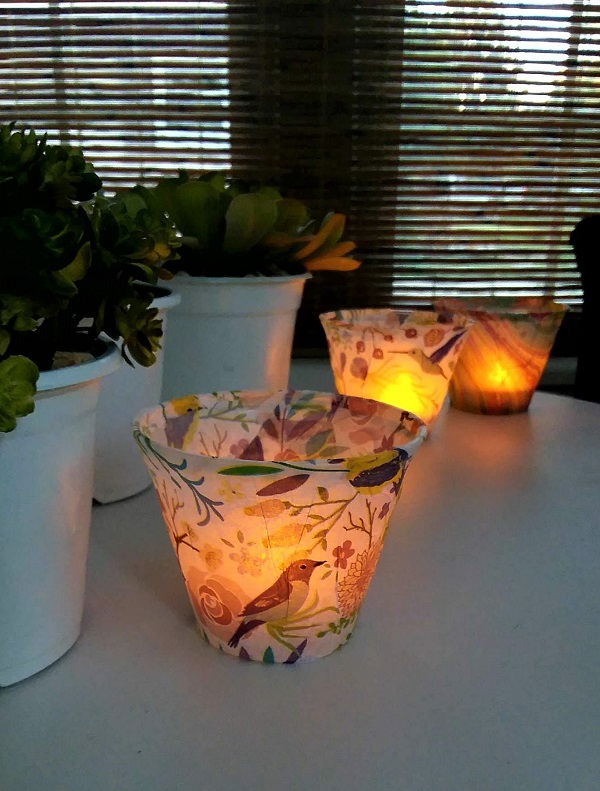
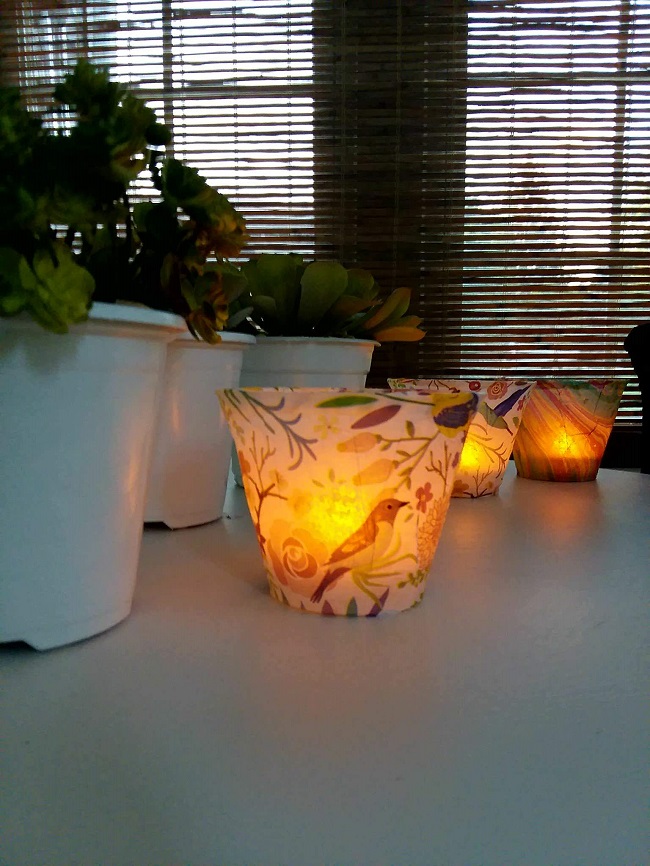
Funny enough though, was when my great-nieces brought these tissue paper lights home, their mother liked them so much, she put them out on their patio at night for ambiance. We’re all just kids at heart, aren’t we?
Decoupage tissue paper lights
Such a simple craft to make…
And that’s no fairy tale!
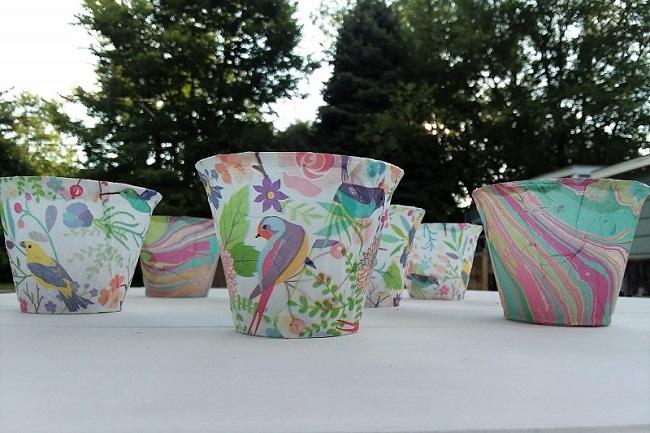
We started our off with trial and error. The first few we made would be classified as experiments. But once we got the hang of it, we made about 20 within one hour. I cut the paper to wrap around the plastic cups. My great-nieces applied the decoupage to the cups and wrapped the cups with the paper. Done!
Some of the items below are affiliate links. If you purchase any of these products through the links, there is no extra charge to you; however, I do receive a small commission, that way I can continue to provide you with helpful content. Read full disclosure, here.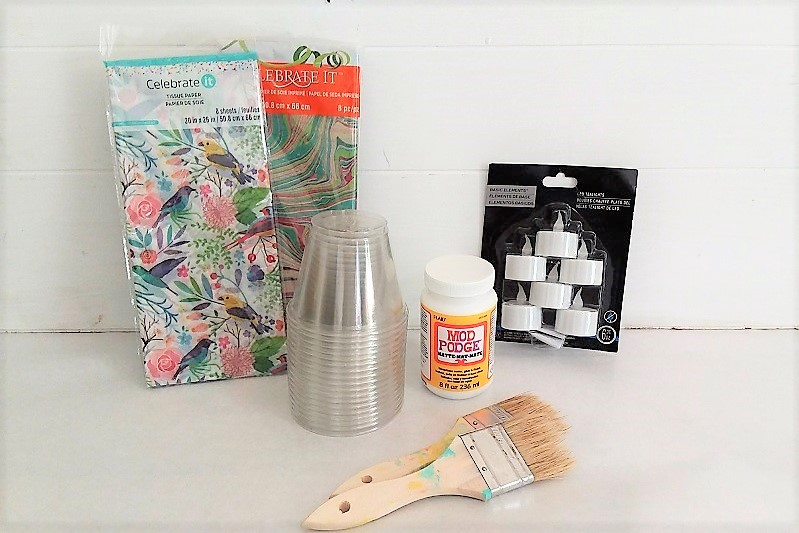
Supplies
These were the supplies we used to make the tissue paper lights. I share some resources for the supplies, but most of these items can also be found at your local department store. You can also check your local party store for a greater assortment of tissue papers (or paper napkins, alternatively. More details on that further down in this post.)
Decorative tissue paper – See this collection of my favorite patterned tissue papers, here.
Clear plastic cups – I used this 9 oz style
Decoupage – I used Mod Podge
Foam brush or 1 inch paint brush
Scissors
8-1/2” x 11” piece of paper (to make the template)
Ruler
Flameless tea light candles – White or amber glow, like these.
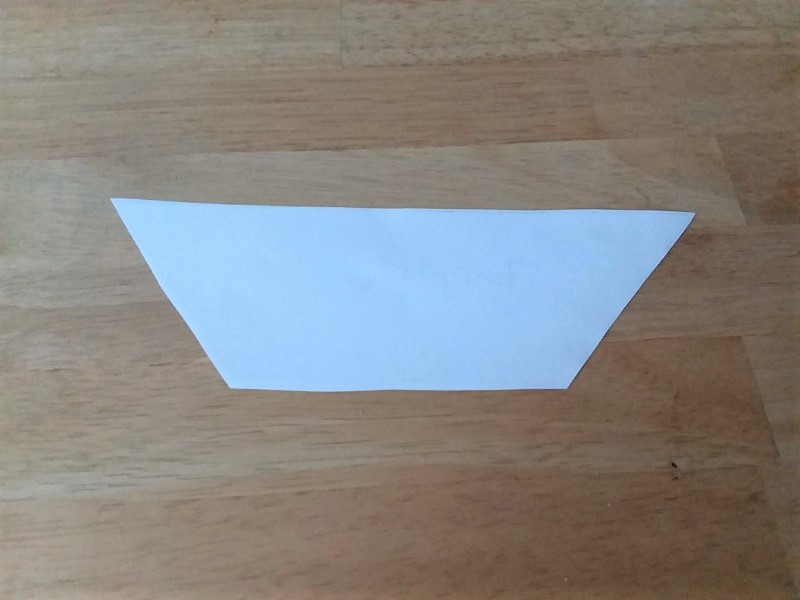
Create a template
To create a template, measure and cut a trapezoid shape from the 8-1/2” x 11” piece of paper. Make the template size approximately 13 x 8 x 6. (13″ across the top, 8″ across the bottom, 6″ height.) This can be adjusted to fit another plastic cup size.
Trace template onto the back side of the decorative tissue paper and then cut out the pattern.

Use decoupage to attach tissue paper to the plastic cup
With a craft foam brush or 1″ paint brush, apply decoupage to the outside of the cup only, and then right away, wrap the tissue paper pattern around the plastic cup. (Do not apply the decoupage to the paper.)
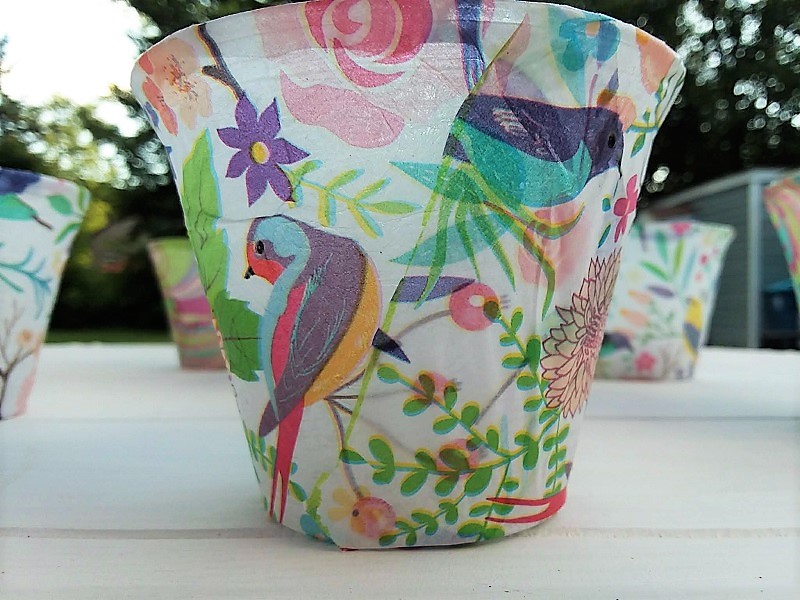
If there is an inch or more of excess paper along the side of the cup, trim it down to about 1/2” and press it down overlapping the rest of the tissue paper. If there is excess paper along the rim of the cup, trim the paper down to about 1/4” and wrap the excess paper over the rim of the paper cup.
Drying time
Allow the decoupage to dry. Then apply another coat of decoupage over the paper and along the inside rim. Make sure to let the decoupage dry and cure according to the label on the decoupage before stacking the cups together.
For storage purposes, I’d be cautious of stacking them together in excessive heat or humidity at any time because they might stick to each other. If they seem to get stuck together, put them if the fridge or a cool room for several minutes and they should easily come apart.
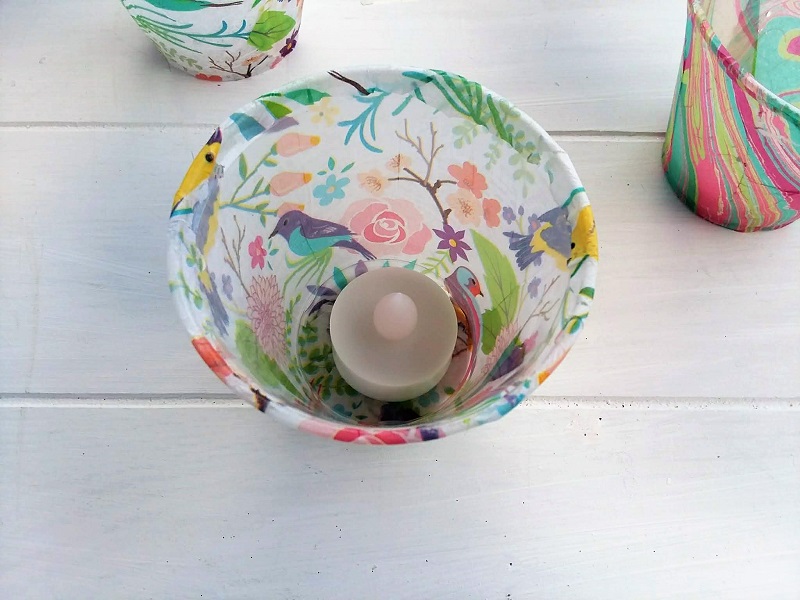
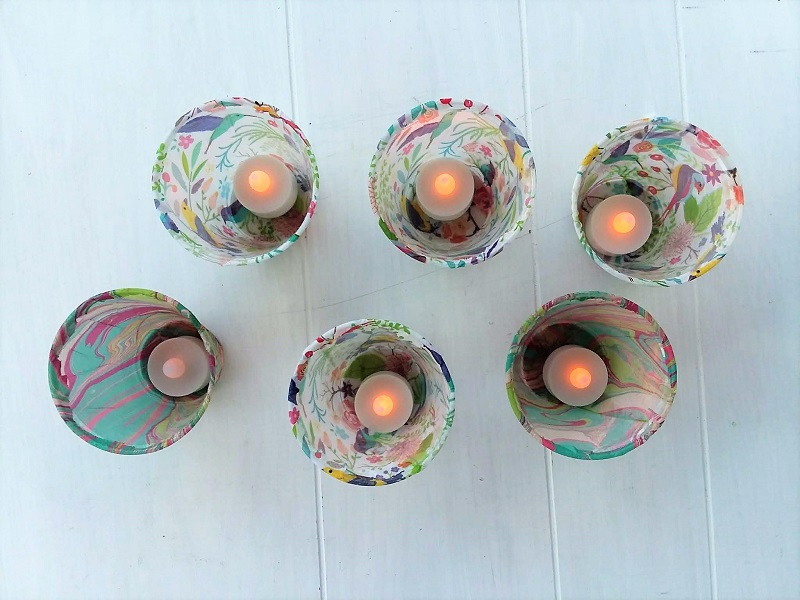
Insert flameless tea lights or flameless candles
Once the decoupage is completely dry, add flameless candles or tea lights. Note: these tissue paper lights are not meant for and should not be used with any real candles, tealights or any thing with real flames.
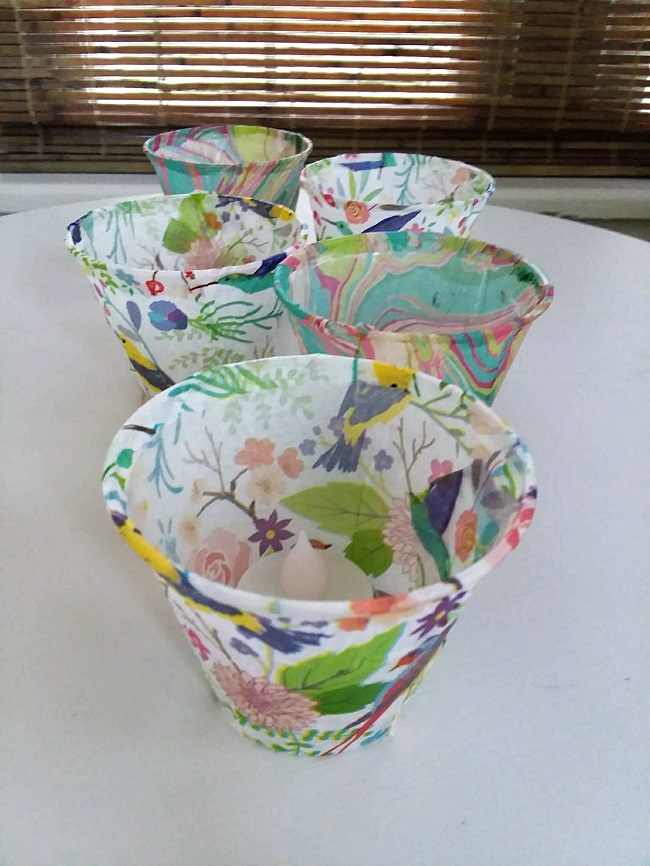
We used two different style of tissue paper that complimented each other. I let the girls pick out the style of paper that they liked when we were at the store.
Other ideas to try when making these
Decorative paper napkins could also be used. But if using paper napkins, I would strongly suggest pealing apart the two layers of the napkin and only using the top layer that has pattern on it.
Punching out two holes at the top of the cup with a hole punch and tying on some twine could turn them into tissue paper lanterns.
Plastic cups and flameless tea lights make for a safer candle project option for tweens and teens, girl scouts, summer camp, or even a teacher’s craft project. These luminaries could safely illuminate a camping tent with soft light and ambiance. And as I’ve discovered, adults like them, too.
More super cool DIY ideas for tissue paper lights:
Doodled tissue paper lanterns from The Artful Parent
Tissue paper fish bowl lights from Juggling with Kids
Halloween tissue paper lanterns from Our Best Bites
Vintage tissue paper lanterns from The Graphics Fairy
sharon duvall says
the tissue paper lanterns look adorable. Unfortunately, the links to the instructions aren’t working for me. Got any suggestions?
Amy says
Thanks for bringing that to my attention, Sharon. We are having the issue checked out.
Cheryl Lawson says
These are really cute and I love your idea for using them when camping. We have a little Casita and camp a lot. I also love to make things so this is perfect. When we were camping in Northern Maine last week, I saw a neat “chandelier” under a pop-up awning that was made of the same cups and little Christmas lights. I’ll try to post a photo. Best, Cheryl
p.s. Tried to insert photo; couldn’t upload to Comments. Darn!
Amy says
Hi Cheryl,
How fun that you have been camping and in Maine, no less, it must be beautiful. I’d love to see that chandelier, email me back with an attachment picture if you’d like. Yes, there were fun to make and so simple. Simple is good, isn’t it?
Thanks so much for stopping by. Have a great rest of your week.
Amy
Michelle Leslie says
Ahhhh Amy they look so pretty all lit up. Love the tissue paper you used, it’s just gorgeous and using plastic cups and battery candles does make it so much safer. And with all the lovely weather we’re having I can see a whole bunch of them on the table when we decide to have our dinner outside.
Amy says
Hey Michelle,
Thanks so much!! I agree, that tissue paper is so cute. We found itat Wal-Mart.
Mary says
Oh my, I never would have expected them to start out as humble plastic cups! What a pretty idea!
Amy says
Thanks Mary. Amazing what tissue paper can do, right?!
Loraine says
I love this craft. I work with Seniors in a Public Library. I just know that they will have a lot of fun making these tea lights.