It’s that Christmas project time of the year again, and because I made twig ornaments 2 years ago and we made a stacked log Christmas tree last year, I thought I’d challenge myself with yet another rustic project with the gifts from mother nature this holiday season.
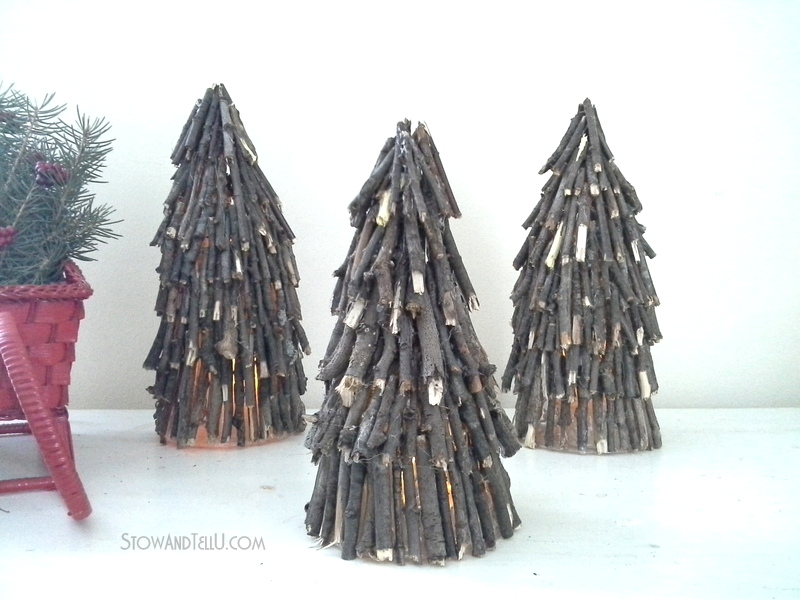
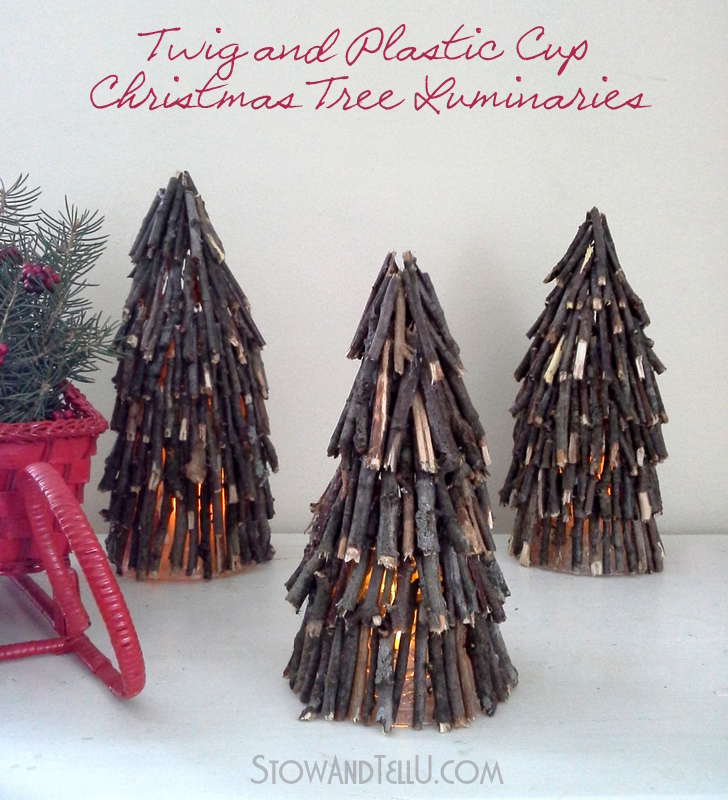 This time it’s in the form of Christmas trees as luminaries using twigs and plastic cups.
This post contains affiliate links. See full disclosure, here.
Plastic cup and twig Christmas tree luminaries
Supplies:
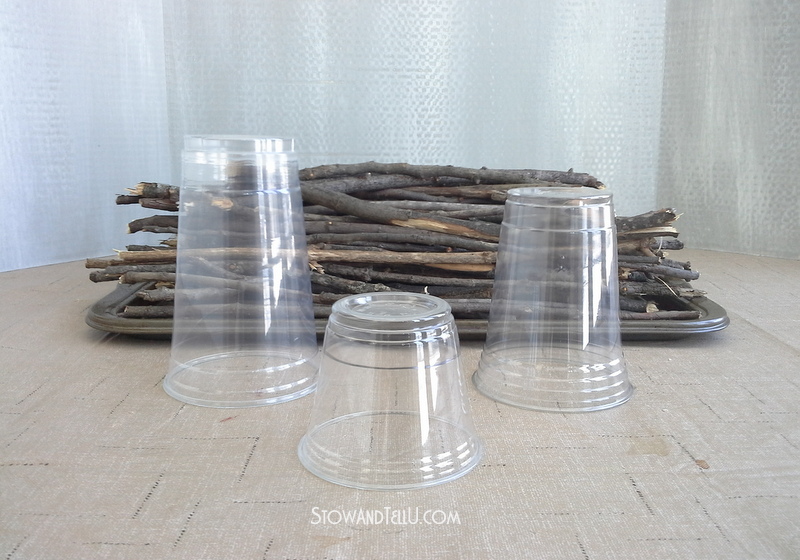
Lots of twigs and branches. You can collect from your yard or get Pre-Packaged 5″ Twigs.
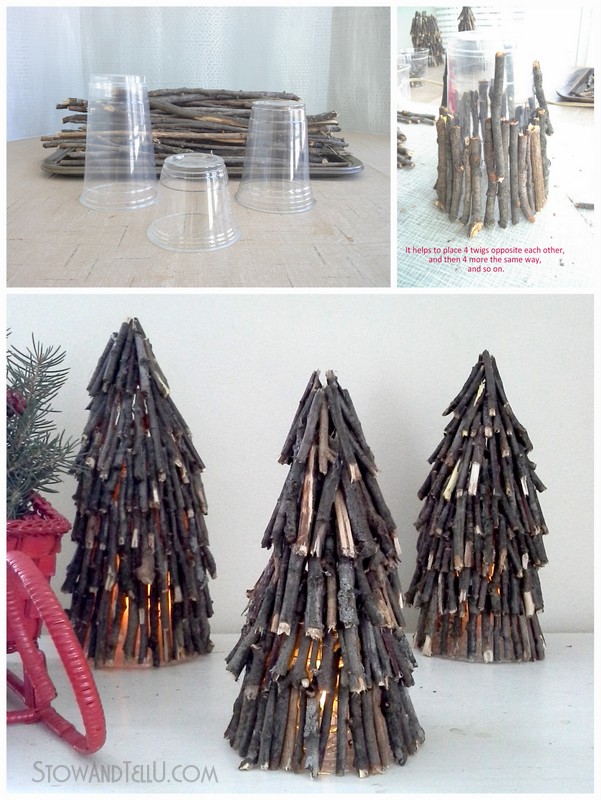
Clear plastic beverage party cups – I went with 3 different sizes
Hot glue gun – or – a fast drying clear glue such as E6000 Quick Grab
Pruning shears – or – a pair of wire cutters
Flameless tea light and/or flameless votives
Several cookie sheets – If you are going to use your own gathered twigs. I used my older ones
Follow these steps:
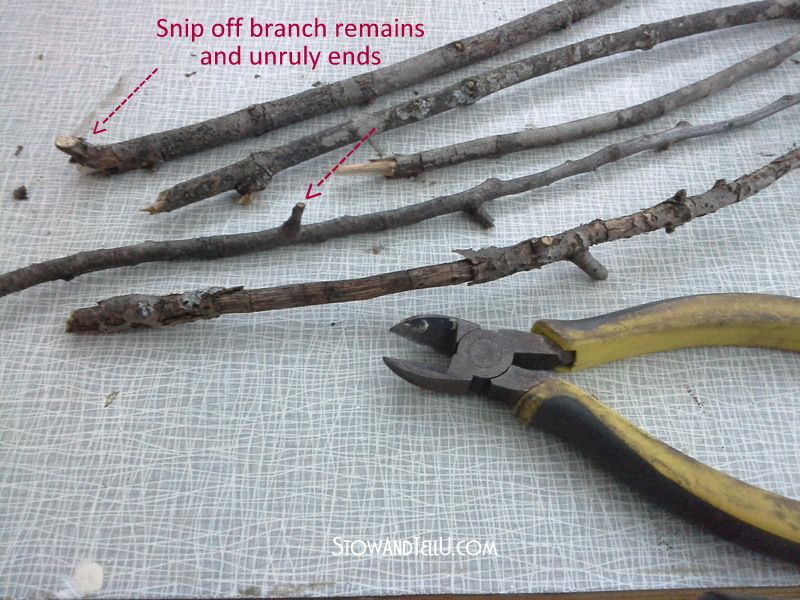
If collecting them from your yard, a park or nearby forest. Look for branches and twigs that are more or less “pencil sized” in diameter, but also collect thinner ones because it helps to have varied sizes to piece together the Christmas tree.
Step 1) Break the branches down enough to fit on a cookie sheet. It helps to snip off the branchy pieces so that all of the branches are like sticks, but make sure to add the branchy pieces right back into the branch pile. (I hope that makes sense.)
Step 2) Bake the cookie sheet full of branches in the oven at 170 degrees F for 1 hr and 15 minutes. Let cool. This step helps dry out all the twigs, so that they’re easier to work with and also kills off any funky stuff living on the branches.
Tip: I broke this project up into several days, doing the baking step on one day, the twig breaking on another and the tree making on another.
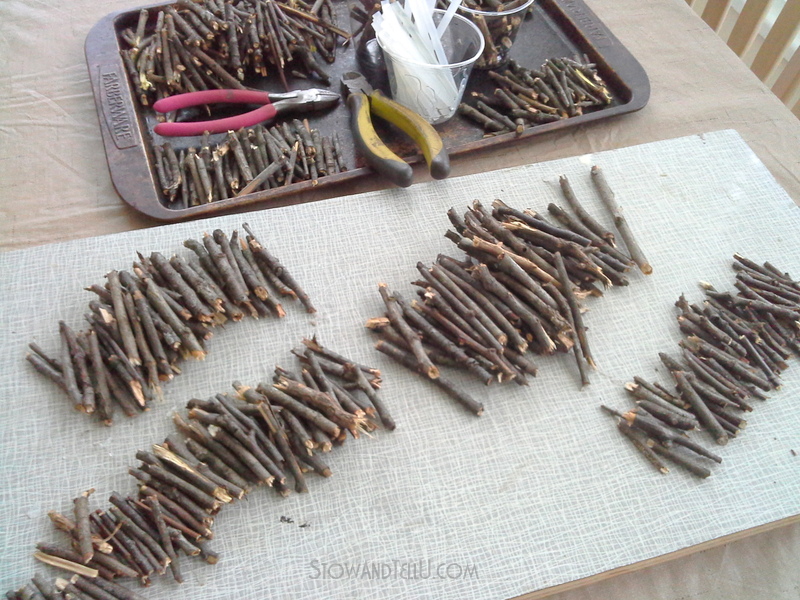 Step 3) Break or snip the branches down to 4 inch (10 cm) , 3 inch (7.6 cm) and 2 inch (5 cm) pieces
This doesn’t need to be perfect: I found that when I snipped off a 2″ piece, I was left with a piece close enough to go right in the 3″ piles, and so on.
How many twigs do you need? I used about 30 twig pieces per layer, give or take, and the higher up on the tree, the fewer the twigs I needed to complete the layer.
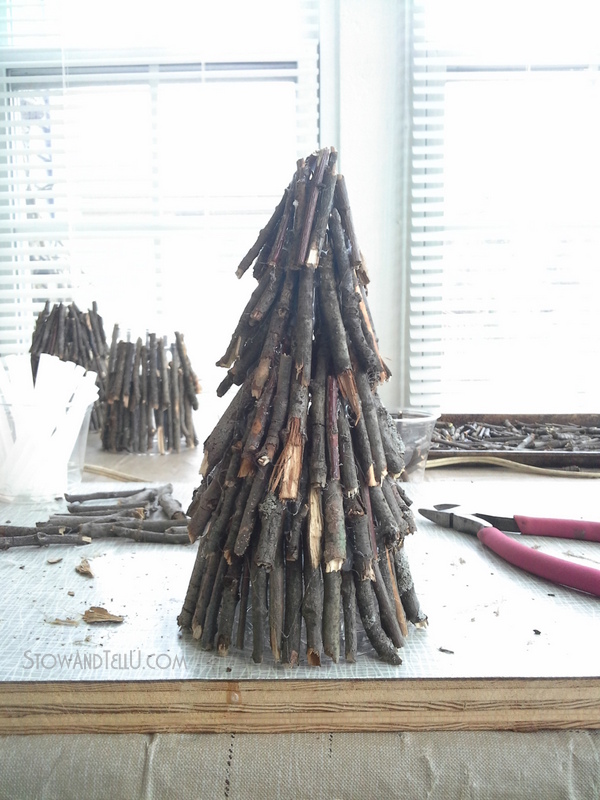
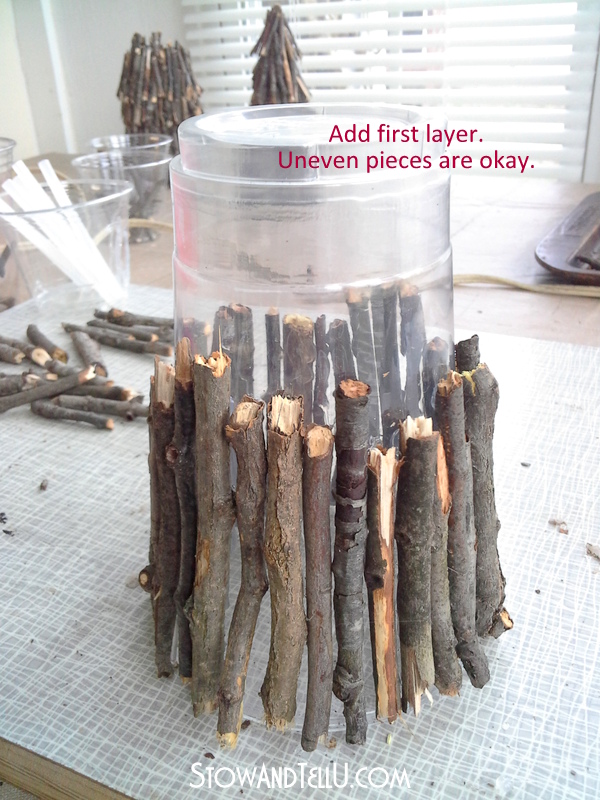 Step 4) Flip the clear plastic cup upside-down and start hot gluing one twig at a time to the plastic cup. I applied the hot glue to the twig some of the time, and some of the time I applied the hot glue to the cup being careful not to hold application near the cup too long. Make sure to follow all of your hot glue gun’s usage recommendations for safety purposes.
Tip: Make sure to leave some space between the twigs so that the light will show through to make it a luminary once the project is completed. (Mine are probably a little too close together.)
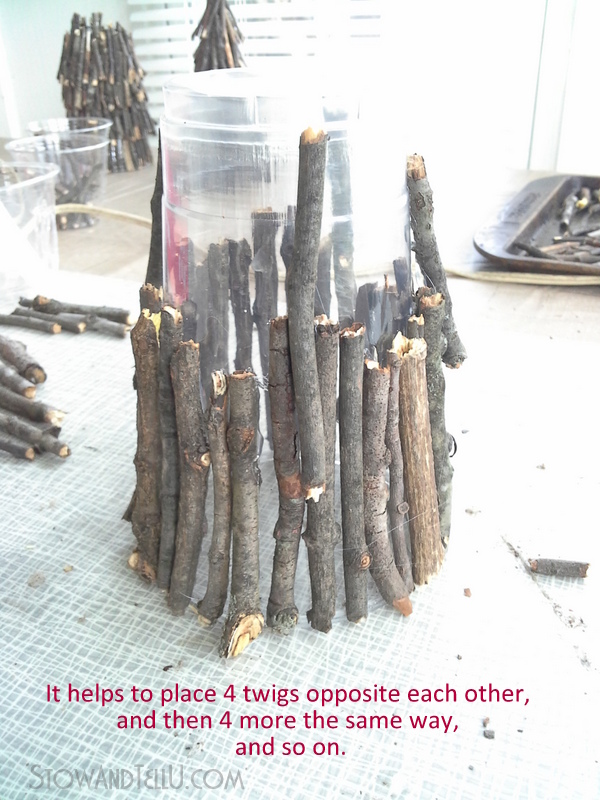 Step 5) When completed with the first layer, start a second layer by overlapping the twigs with enough space to make it look like the next tier of a Christmas tree.
 Step 6) Continue up the tree by repeating step 5 and continuing to slant the twigs inward as you make your way up to the top.
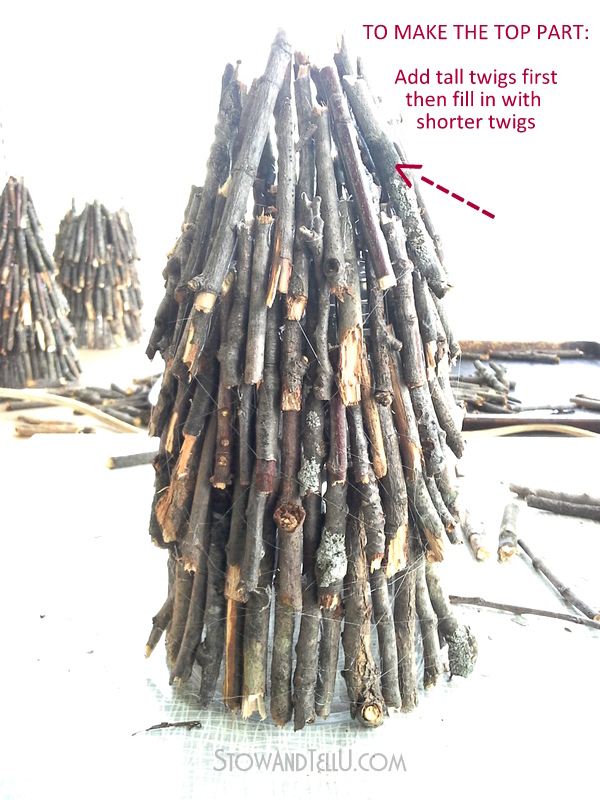
Tip: When I neared the top, I used some of the 4″ twigs to build a frame of sorts, and then filled that in with the smaller pieces.
 Additional tips:
 Additional tips:
- For the smaller cups I used the 2″ and 3″ pieces
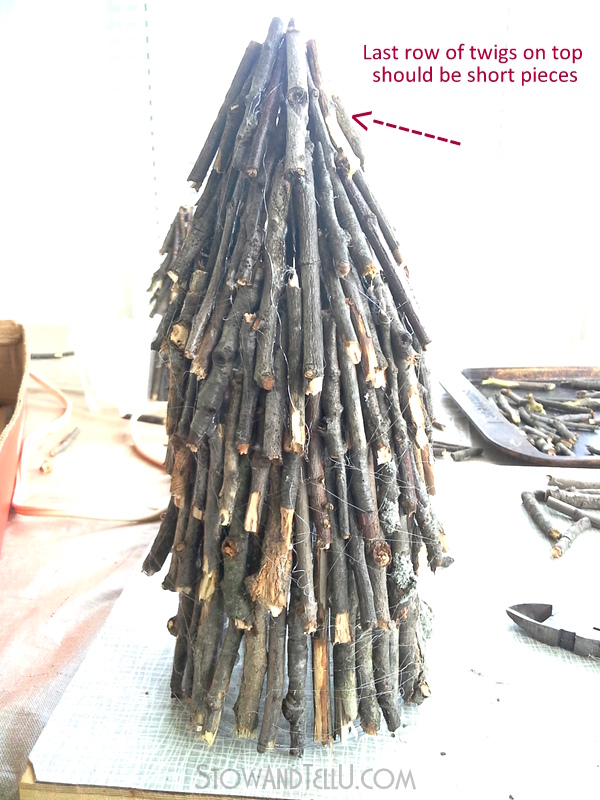
- For the larger cups I used mostly 3″ and 4″ pieces, but some 2″ pieces to finish off the top
- If a gap of space seemed to big, I filled it in by adding some hot glue to the tip of the twig and then sliding it up into the space.
- I tried to mix up the colors, textures, types and sizes of the twigs to achieve a more dimensional look.
- Use a tweezers, or rub a pieces of tape over the projects to clear away all of the hot glue webs when the project is done. I find that the E6000 Quick Hold glue tends to be quite a bit less messy than the hot glue.
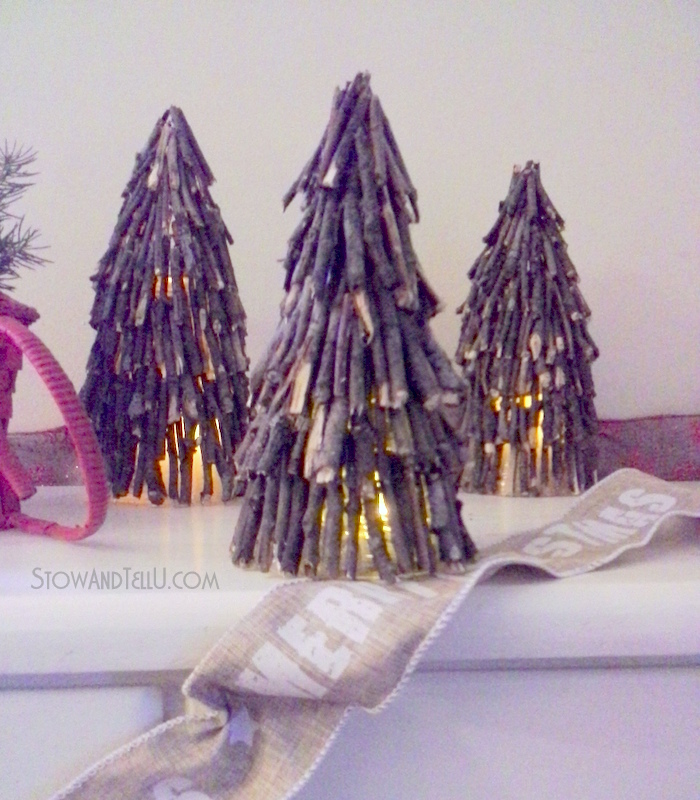 Once these trees were done I placed a flameless tealight under the smaller tree and flameless votive candles under the larger trees.
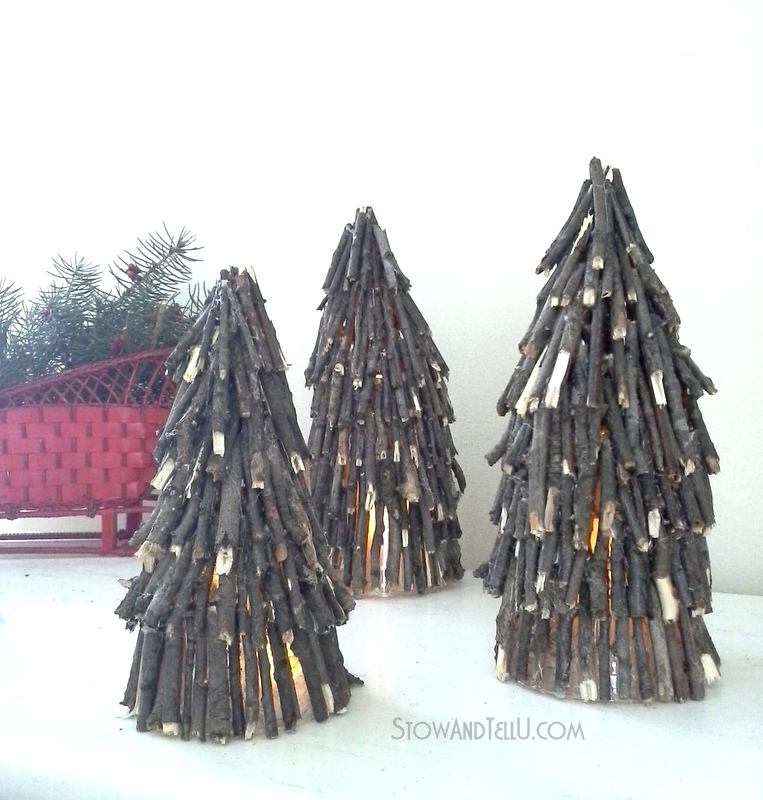
 I was having trouble taking night time photos; however, my favorite part is the variation of textures made from nature and daylight shows that off pretty darn well!
 As I mentioned, I the tendency is to want to fill in all the gaps, but for luminary purposes, leaving slight spaces between the twigs is the ideal.
 It took me about 2 hours to build the first tree, but a little less time, for each tree after that.
 Here’s to being home for Christmas and a happy holiday season to all.
~ Amy
Other Luminaries Craft Ideas to Style Any Mantel or Centerpiece
- Tee Pee Style Christmas Decor Twig Luminaries
- Winter Pine Tree Jar Candles (afternoon project)
- Easiest Ever Tissue Paper and Plastic Cup Luminaries
- Everyone’s Favorite Fisherman’s Netting Wrapped Luminaries
Additional Twig and Branch Craft Ideas That are Easy to Make
- Floating Framed Twig Name Plate (great for a rustic kid’s room)
- Holiday Tree Twig Ornaments
- Woodsy Heart Shaped Twig Trivet
- How to Make Twigs Look Like Driftwood
Karrah - Mrs. Do It Herself says
This is TOO cute!!! I love it!
Amy says
Thank you Karrah!
Malia says
What a wonderful idea and a great way to upcycle twigs!
Sharleen says
Great thanks another one for my patio.. Its just we are having a warm Christmas Amy and setting up outside this Christmas evening. .. I love it.
Amy says
That sounds like so much fun to be able to sit out on your patio for Christmas evening. I bet it’s really cozy and perhaps you even get to star gaze? Thank you Sharleen xo
chris aka monkey says
amy i am loving this as much as i have all of your twig projects, i am bestowing a bachelors degree in twigology on you ha ha i am doing pretty good painting kitchen cabinets slowly but surely may have them done by next summer xx
Amy says
That may have been a smarter field to study, then the one I chose back in my college days, lol. Thanks so much Chris and I’m sooo glad to hear that you feeling well enough to bet back to your diy groove! xoxo
Tuula @ Thrifty Rebel Vintage says
Your twig trees turned out great Amy! I love that you used plastic cups as the base. So clever. I’m wondering, how does one get in on these HT blog hops?
Jill Flory says
How cute! I love using twigs and branches in decor!
Amy says
Yes, I’m a bit of an addict myself, lol. Thanks so much Jill
Marie from The Interior Frugalista says
Very cute! Pinned to share 🙂
Amy says
Thank you Marie xo
Jeanette says
These are so “rusticly” sweet!
Diana says
Great idea Jill and nice, easy tutorial to follow–so creative! Nice to meet you via the Home for the Holidays blog hop 🙂
Tammy says
Love these … Very Cute!
Thea says
This is such a brilliant craft idea for Christmas! I love how they turned out and I love how easy they are to make thanks to your tutorial. Thank you for the inspiration!
Lucy @ Patina Paradise says
What a labor of love. You are much more patient than I am! ;o) They are so rustic and a great almost free nature project!
Marie says
Love the rustic charm – such a great idea! My mantel needs some of these. Thank you for sharing them at the Talk Of The Town Party, Amy. Pinned and sharing 🙂
Amy says
Thanks so much, Marie
Vickie says
Are you using the same size cups for each tree or stacking the different sizes on each tree?
Amy says
Hi Vickie,
I used three different sized cups, on for each of the three I made. I hope that helps. Let me know if you have any other questions.
Thanks so much,
Amy