I’d been meaning to salvage an old clay roaster that is quite worse for its wear. At the same time, I’m updating my kitchen, so I thought I would combine the efforts and sample the kitchen color palette on the clay roaster. Have you ever chosen your own color palette and not been quite sure about it? Have you ever considered sampling the palette on some smaller non-essential item just to be sure you are on the right track? Well that is what I was about to do. In part one of my kitchen update, I chose a color palette of off-whites, bluish greys and reddish browns, though I didn’t get specific with the paint color choices. So to be sure I want to sample them against my wall color: Burnished Clay from Home Depot.


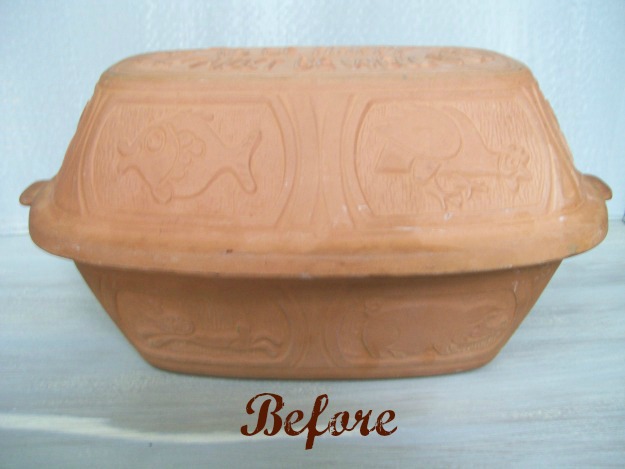
I picked up this clay roaster at the local thrift store a while back. Though it has been dulled with time and much usage, I found the texture and wording to be very interesting and well worth the salvage effort. I have several newer roasters, so this one would be for show only, and maybe a bit of storage, you know, like a hidey-ho for an extra set of house keys, grandma’s secret recipes, $1000.00 cash…
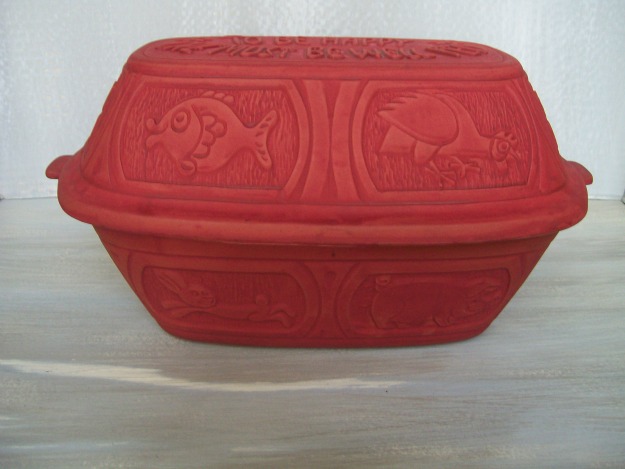
Anywho the inside of this roaster was glazed, but the outside was unglazed pottery, just like any from your garden. So anxious was I to get a coat of paint on this piece, and my very first coat was bright red. I know that wasn’t part of the color scheme, but I was going for a layered look, so I gave it red for a base coat. Already, I was feeling rather pleased as the piece was starting to look more revived and showing the quaint details that I so admired.
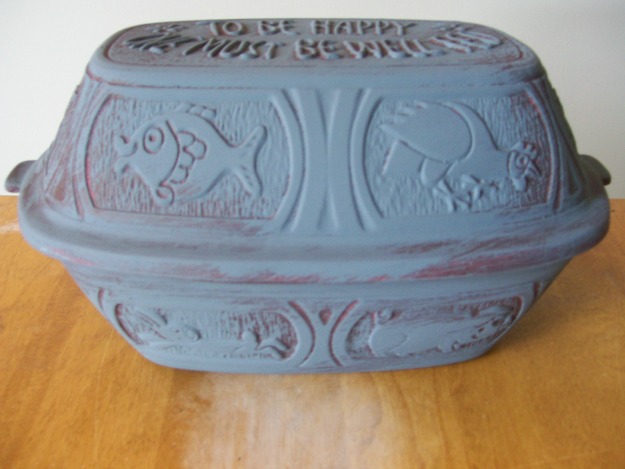
Moving right along and certain that I would be painting on several layers in several colors, I applied a coat of the bluish grey.
I wanted to test out the sanding method, so I sanded it down with sand paper, and then tried sanding with a green brillo pad. I sanded some of it back down to the clay finish. After several experiments with sanding methods, I finally found that fine grain steel wool worked best, especially if just slightly damped with water. Meanwhile, I needed to keep adding paint layers!!
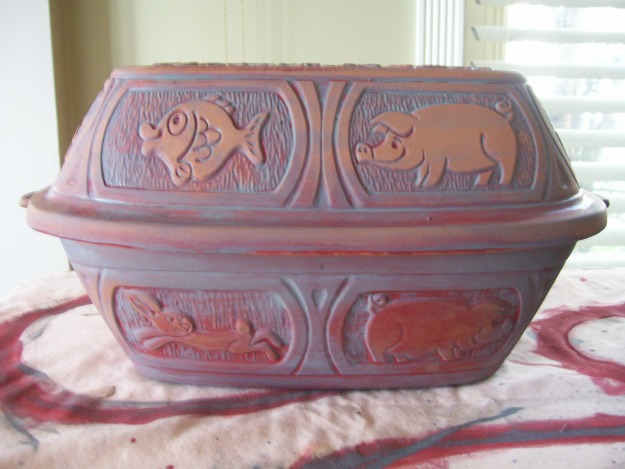
I applied a coat of off-white next, and then a coat of dark reddish brown. After that I gave it another coat of the bluish grey, and finally a very light white-wash, letting each coat dry completely.
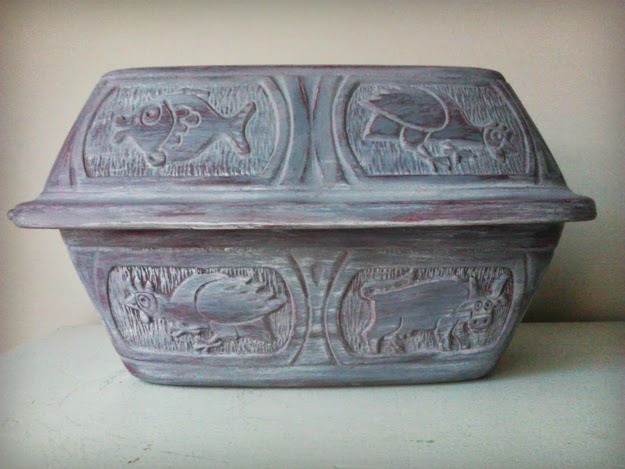
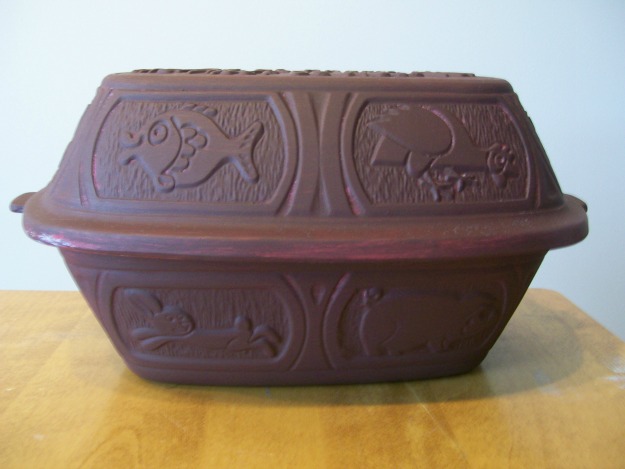
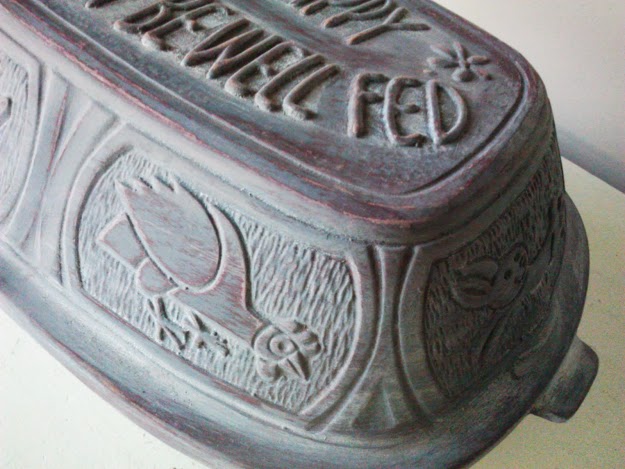
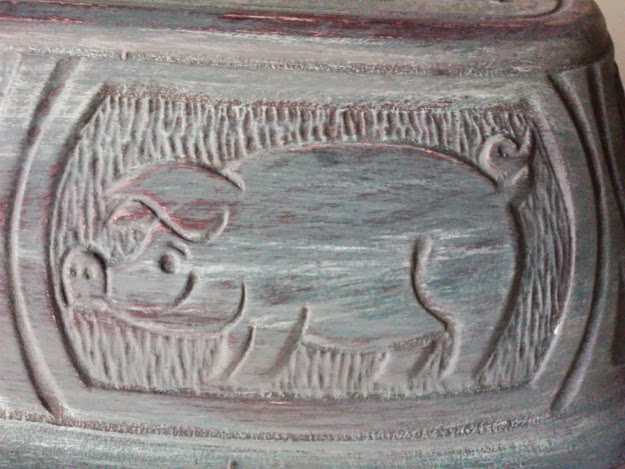
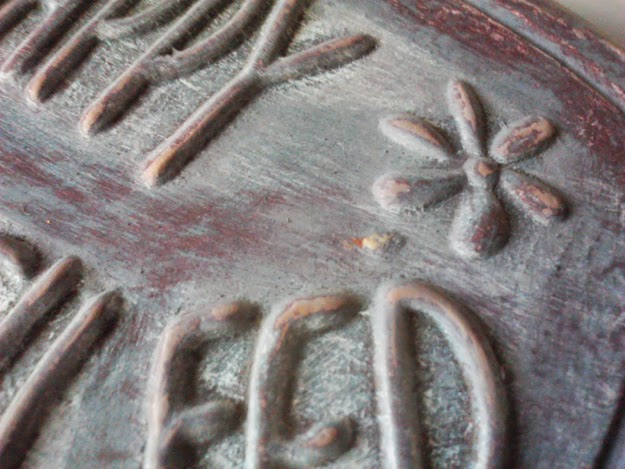
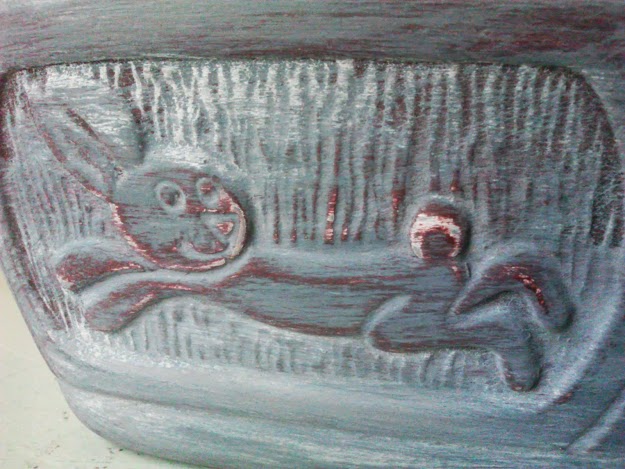
Here is how the piece finally turned out. I really love the way the texture, detail and wording show through, now.
In this shot, you can kind-of see the wall color behind the roaster. I’m pretty happy with how the reddish brown and blue-grey work with the Burnished Clay color on the walls.


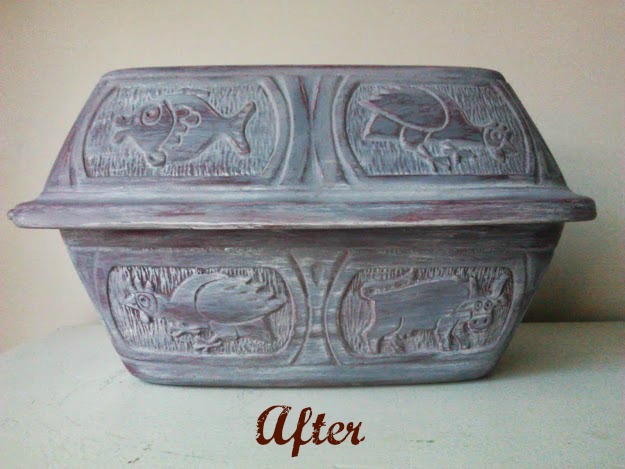
Using a smaller, non-essential piece like this clay roaster to sample my color palette has helped me to feel more confident about my color scheme, and where to go from here. Now, I can use this roaster as a show piece, center piece or best of all a hidey-ho.
Click here for (Kitchen Update 3) Decoupage paint stick magnets
Click here for (Kitchen Update 4) Herbs in a vintage blue Ball jar
Click here for (Kitchen Update 5) Pallet wood over-the-sink-shelf
Mel says
That came out amazing, I didn’t know you could sand terracotta, I love the quote too 🙂
Danni@SiloHillFarm says
Wow! That turned out really cool and I didn’t know you could sand terra cotta either! Nice job!
Sharleen says
Well my moto is paint any thing and every thing. So of course I love it. Is so good to just go for it and experiment. Turned out great. Yes that has got to be a show piece now.
Staying tuned for the next … Sharleen
heather f says
I think your colors look great! What a fun piece to put in your new kitchen.
Vicky @ VeryVic.blogspot.com says
Wow – that came out awesome! I love the technique you used on it. I would have never thought to apply several coats of different colors and sand them to create a style.
SheilaG @ PlumDoodles.com says
It turned out great, Amy! I love all those layers of color.
Tara @ Suburble says
Amy – I love it! I’ve never owned (or even seen) a clay roaster before! They’re fantastic!
I especially love the saying “To be happy, one must be well fed” – fantastic!
Shanna Gilbert says
I love the layering technique that you used!