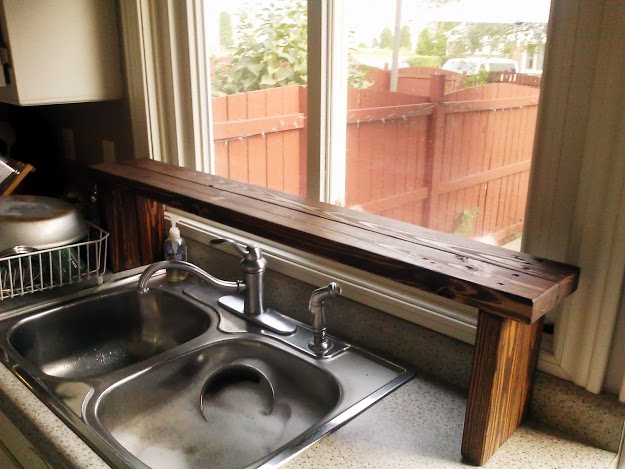
Looking to create more space in my rather small kitchen, I have been longing for one of those nifty over-the-sink window shelves. As my kitchen update is coming along bit by bit, I finally have one!
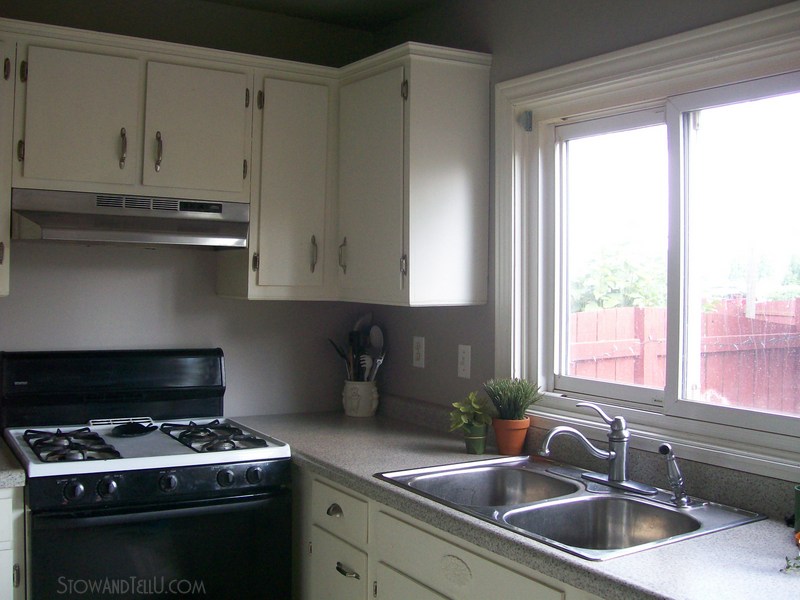
This photo shows just how little kitchen area counter space I have to work with.
This window shelf happens to be made from none other than a salvaged wood pallet. You might be thinking, why would you put an old pallet anywhere near food preparation, but fear not, by the time this shelf got any where near the sink, it had been stripped of any and all layers of it’s not so clean past. This project calls for moderate woodworking skills, which is not my strong point. Thus enter Ken, my hubby, to assist.
 How to make an over the sink window shelf from pallet or skid wood:

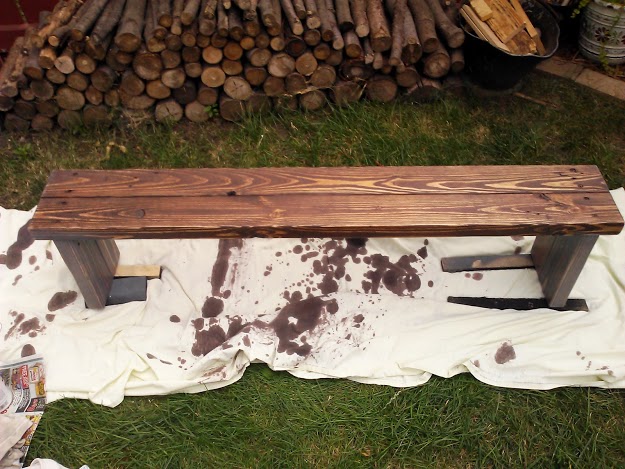
This post will show you the woodworking steps needed on how to make an over-the-sink window shelf from pallet wood. The shelf, shown here with dark stain has been fully completed, except for the final coats of stain that I will be adding to make this piece look COMPLETELY different when all is said and done (click here to see the FINISHED product.) In the mean time, this will show you how to create more space in your kitchen by making a pallet wood, over-the-sink window shelf.
This post contains affiliate links. See full disclosure, here.
Supplies
2 lengths of pallet wood at approximately 48” (for the shelf lengths)
4 lengths of pallet wood at approximately 11” (for the shelf legs)
2 EXTRA pieces (aka: Scrap pieces) of pallet wood cut to about 8” long (used to stabilize the “shelf top” for the gluing process)
Power wood sander
120 – 150 grit sand paper for prep sanding
220 grit sand paper for finish sanding
Liquid Nails or any type construction adhesive for wood
8 wood screws approximately 2-1/2”
Drill and drill bit sized to the screws
2 Wood clamps
Several sheets wax paper
Angle square or Speed square
Stain
Waterproof sealer – I used this one and it has kept this shelf completely stain-free and waterproofed for years.
NOTE: We used the “2×4” wood pieces from the pallet wood as opposed to the pallet wood slats. This could easily be made with the pallet slats in much the same way with a few adjustments. Alternatively, you could use other types of reclaimed wood, or purchase your own.
Measure, cut and sand the wood
Step 1 – Measuring the sink area. Before looking for a skid, do these two things:
- Measure the width across the sink area from outside the outside of the sink edges. We made ours a little bigger at 48”
- Measure the height of your faucet while the faucet is turned on full blast, and then add several inches. Ours measured at about 11”.
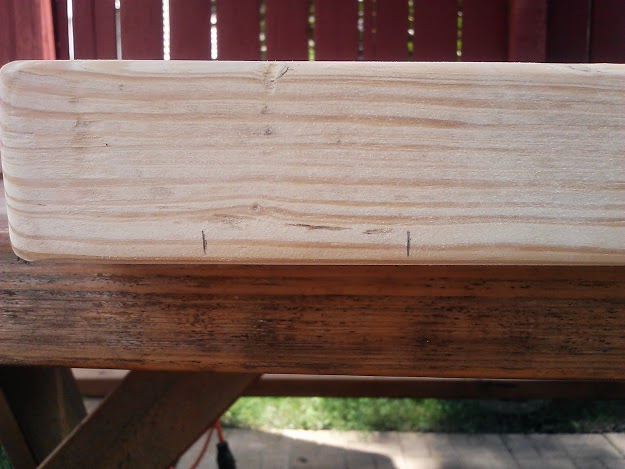
Step 2 – Find a pallet of the right size and dismantle the pallet by pulling out all nails and or screws to prepare for cutting. Cut wood pieces to size and give all pieces a light sanding with 120 – 150 grit paper.
Dry fit and pre-drill holes
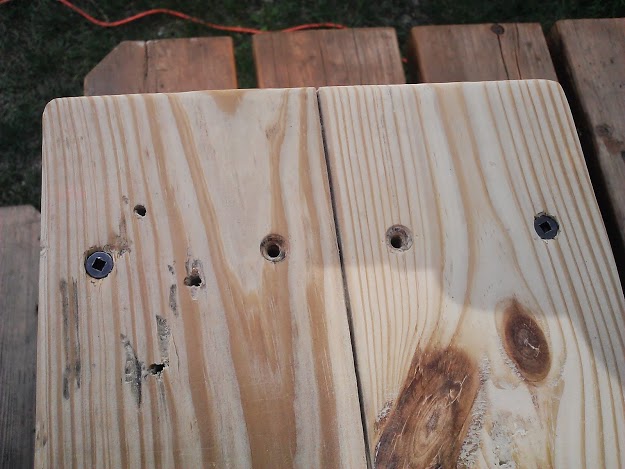
Step 3: Dry fit the shelf legs to the length of the shelf and make pencil marks along the side of the shelf pieces, and then make a four pencil marks on the top of the shelf length in the center of the other two marks. This is where the drill holes will go through to attach the shelf legs.

Step 4: Lay out the two extra pieces of wood that will be used for the liquid nails step. Place one piece at each end of your work table or bench. These should go underneath the “length” pieces or “shelf-top”.
Pre-drill four holes into the wood where marked. You should be able to drill clear through into the “extra” wood pieces.
Glue, clamp, screw and let dry
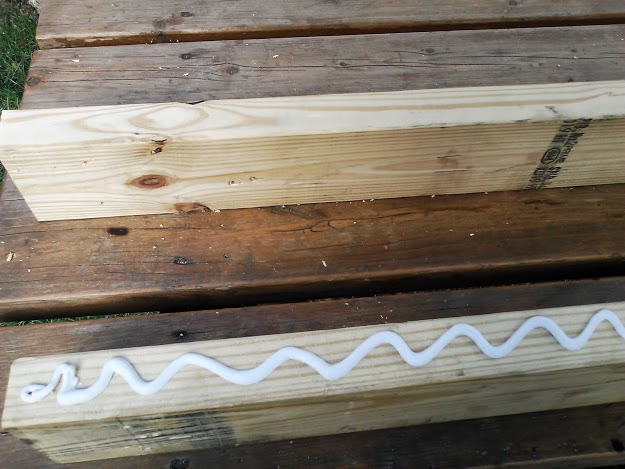
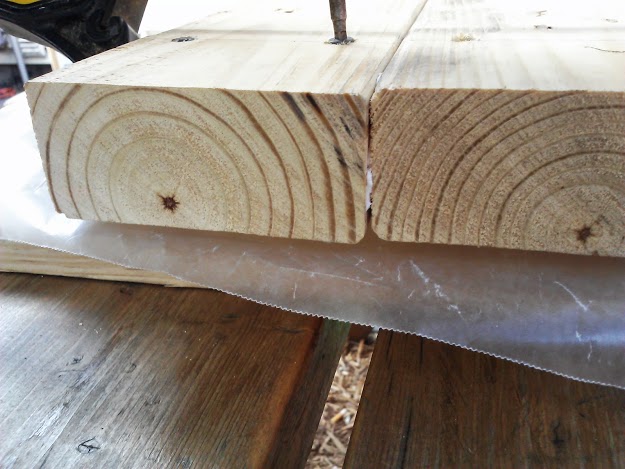
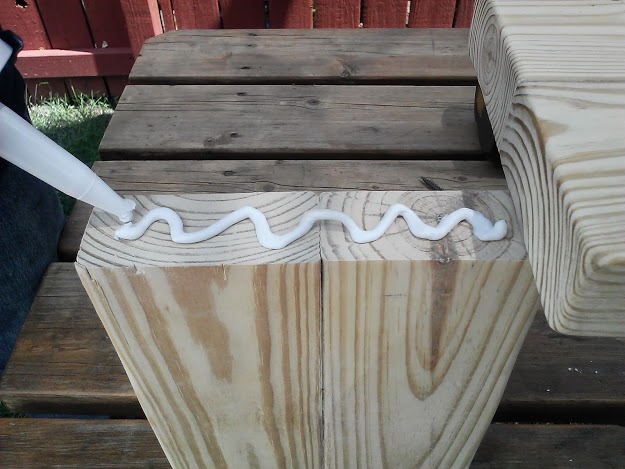
Step 5: Attaching the wood with liquid nails. In this step, and in order to make the shelf depth large enough to be useful, we are gluing two pieces of wood together in 3 sets. One set will be for the shelf top. Two smaller sets will be for the shelf legs.
Have the wax paper sheets ready.
Run a bead of liquid nails along the inner side of one of the pieces of the pallet shelf length and bring both pieces of the shelf length together. Clamp off.
Note:
The purpose of the 2 extra pieces of wood is for stabilizing the “shelf top” while it is drying.
The purpose of the wax paper is to keep the “shelf top” from getting glued to the extra wood pieces, while the liquid nails glue is drying.
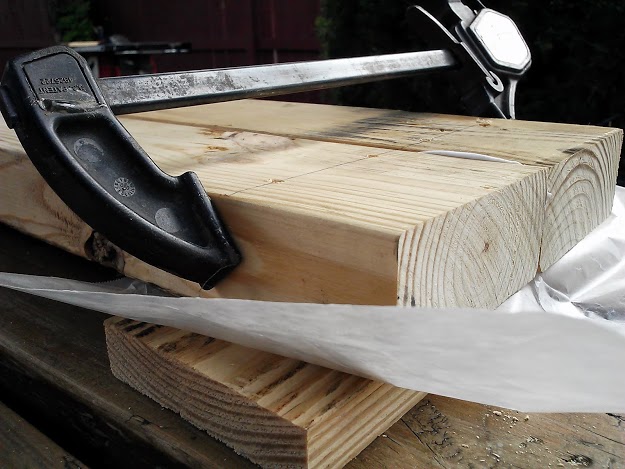
Lay the sheet of wax paper on top of the extra wood piece and run screws through predrilled holes and into the extra wood piece. Do this step on both sides and let dry overnight or per liquid nail directions.
Run a bead of liquid nails along the side of one of the pieces of wood for the shelf legs, attach to the second piece, and then clamp off and let dry.
Unscrew and prepare to attach all pieces together
Step 6: Unscrew shelf-top wood from the two extra pieces and remove the wax paper.
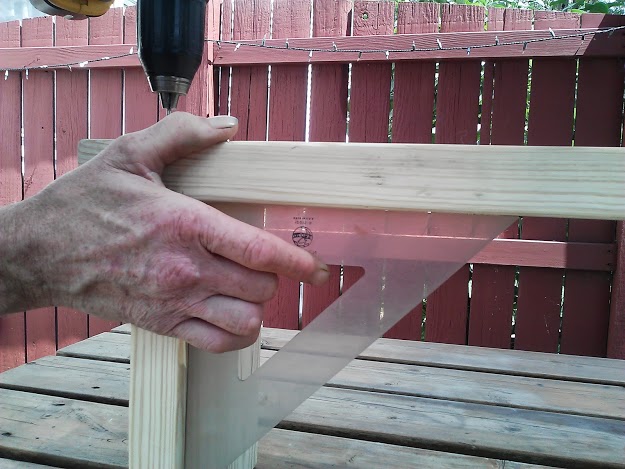
Step 7: Attach shelf leg parts to shelf to part with wood screws.
Run a bead of liquid nails along the top part of the leg piece, and then using an angle square, line up the shelf legs under the markings on the shelf length and attached with screws, be sure to screw down below the surface of the wood. Let dry.
Give the whole piece a good sanding and test for stability
Step 8: Power sand all grimy layers off the wood starting with 120 – 150 grit sand paper and ending with 220 grit paper until you reach the fresh wood layers.
Step 9: Stand up the shelf in the sink area and check for stability. If the shelf wobbles or has unevenness, sand down the longer areas on the bottom of the shelf legs. Continue to sand and test until the shelf leg bottoms are even and the shelf no longer wobbles. (Ken used a belt sander, but a power sander will do the trick as well.)
Stain and seal
Step 10: The final step is applying wood stain and then a waterproof clear coat sealer, this one has worked great for us on this shelf.
Note: Skid sizes and parts vary, so you may have to make size adjustments to accommodate the pieces of wood you are able to salvage from your pallet.
As I had mentioned, I haven’t finished staining this piece, but when I do, I’ll betcha that you won’t recognize it! Stay posted…the over-the-sink window shelf “big reveal”coming soon!! —>
See the updates below:
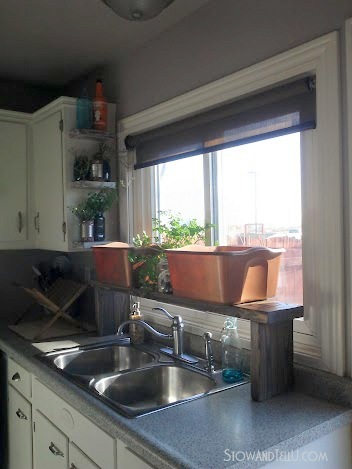
You can see how I finished this shelf with a coastal inspired, sun-bleached technique, here.
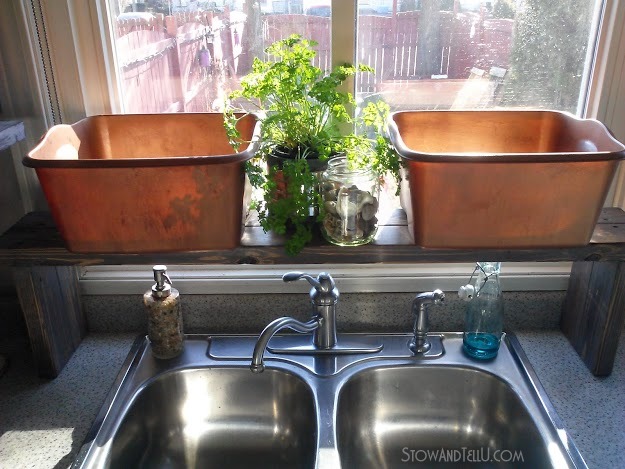
Then, to keep the kitchen de-cluttered and to create even more space, I placed copper-looking dish bins on top of the over-the-sink shelf, and I must say, these dish pans have really helped keep the sink and counter space clean. See the before and afters and the townhouse kitchen makeover reveal, here.
More Shelving Ideas
How to stabilize Single Rail Wall Shelves
Game Room Space Saving Over the Couch Shelf
5 Tips for Using Open Kitchen Storage Shelves
Linking up to:
Anne says
That will be handy! Nice job!!
Amy says
Thanks, Anne 🙂
Danni@SiloHillFarm says
That is just beautiful! (Not to mention functional!) What is it about pallet projects that I find so appealing? I am now eyeballing my sink and window…but I think my window is too high. Great project girl!
Amy says
Maybe it’s the “free wood” that’s the draw, or just the “free” part 🙂 Thanks, Danni
Shanna Gilbert says
I love it! I can’t wait to see it when it’s finished and I can’t wait to see what you put on it!
Amy says
So far, it has been those blue jars with the herbs, I can’t get enough of the fact I have a useful, sunny window ledge!!
Mel says
Wow it is already looking very nice Amy, I can’t wait to see it when it’s done. It will be nice and handy to have a little more storage in the kitchen
Amy says
Yes, Mel, this kitchen is like a miniature, so any extra storage is golden!
Heather F says
What a great solution!! I really love it and think you repurposed beautifully!!!
Amy says
Thank you, Heather! I hope it will give me more storage space rather than a space to store more junk 🙂
Lori Jones says
Love the idea! But what is the thought behind the wax paper???
Amy says
Hey Lori,
The purpose of the wax paper is to keep the liquid nails from drying and attaching the “shelf top” to the “scrap” wood pieces. The scrap pieces are only used temporarily to keep the shelf top in place while the liquid nails is drying.
I know that probably still sounds confusing. I did update the post and I’m hoping it makes more sense now. If you still have questions. let me know. I would be more than glad to answer.
Thanks so much for asking.
Amy