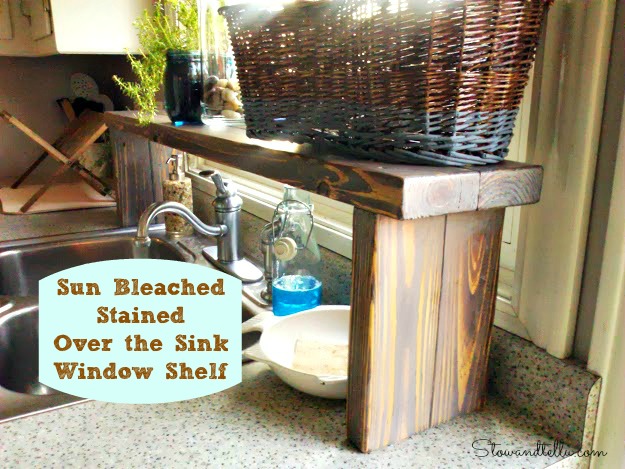
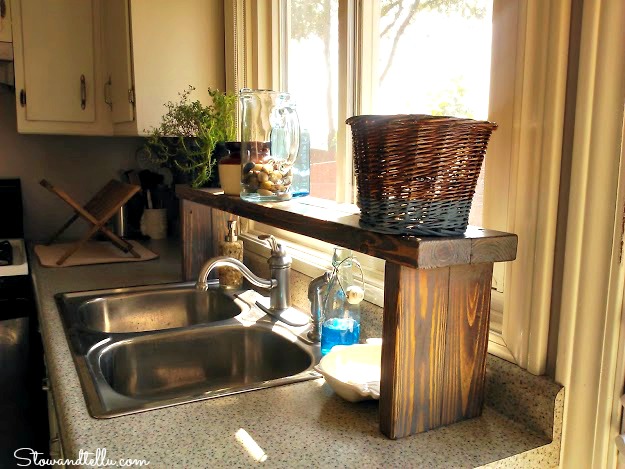
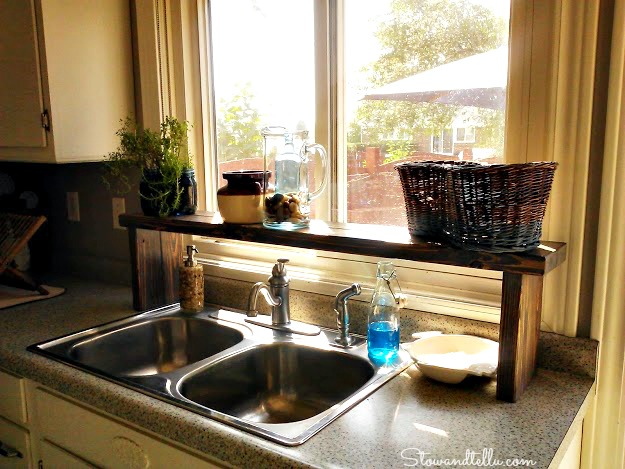
I love the look of sun bleached and weathered wood. It makes me feel like I’m at the beach! In kitchen update 5 I was showing off an over-the-sink window shelf made out of pallet wood that was almost done, except for the final coats of stain.
Well, here is kitchen update 6. The staining process has been completed, and this window shelf now looks like it has been at the beach, too! I’ll spare no excitement; I am utterly thrilled at the beach-worn wood texture this shelf now has.
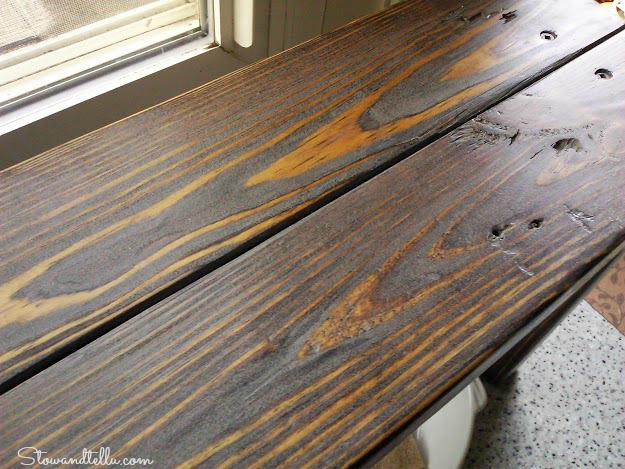
If I had to give it a name, I’d call this process sun bleached and weather staining, but the guy who can show you how to create this look calls it “layering stain for a cool effect.” Come have a look at the finished over-the-sink window shelf and I’ll tell you all about it.

Weather stained wood sink shelf
Here is how the story goes: I was perusing diy projects on Hometalk one day a while back, when I came upon a post called “Layering Stain for a Cool Effect” from a website called BeachBumLivin.com. I thought, “wow, that IS cool! It looks like the weathered wood on one of those buildings you find near a beach.”
Being more of a painter type than stainer type, I thought, “hmm, it’s probably too hard to do,” but I clicked over anyway and found the coolest of dudes giving the most detailed instructions, with a video no less, on how to layer stain for a cool effect.
You can find out more about Shane from BeachBumLivin, here.
You can find BeachBumLivin’s tutorial on layering stain for a cool effect, here. Trust me, if you like re-claimed wood projects with coastal appeal, you will want to check him out, not to mention that he likes to surf, too!!
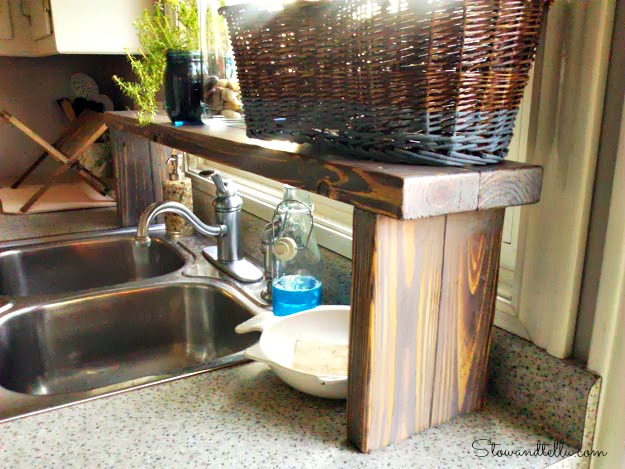
 How to make an over-the-sink window shelf from pallet wood:
With some help from my husband, this over-the-sink window shelf was transformed from a pallet skid, you can see instructions here. From there I just followed Shane’s instructions on staining. The only thing I did different was that I used MinWax Tung Oil Finish instead of polyurethane as the clear coat finish.
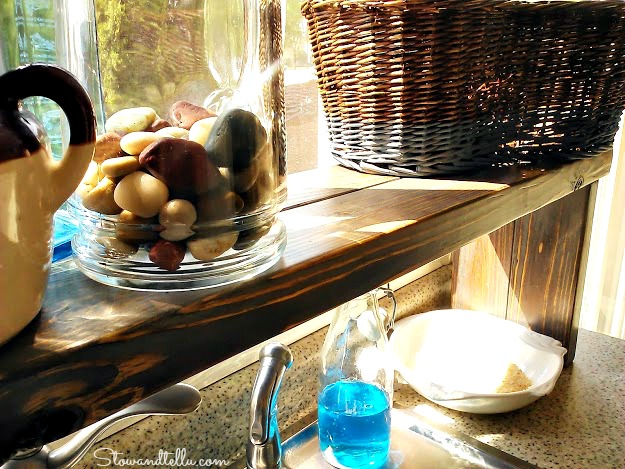 By the way, how do you like that basket? I liked it too! I found this paint dipped basket idea from Like a Saturday. We are now using that basket as a storage catch-all for keys, sunglasses and that sort thing. It has definitely helped keep the clutter off the counter tops.
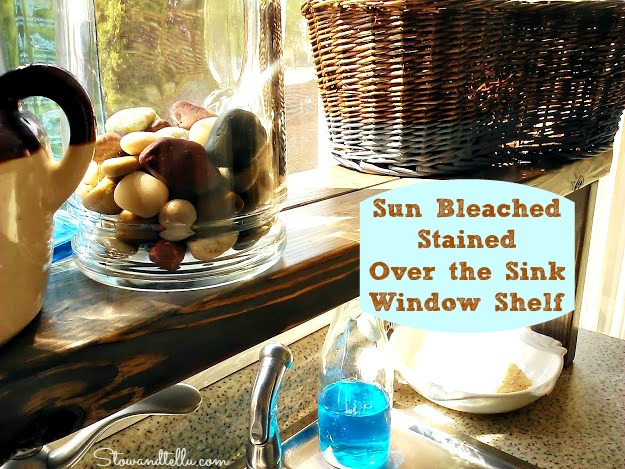 Once again, I can’t tell you how much I love how this ” sun bleached and weather” staining process turned out on the window shelf. It brings me one step further in my kitchen update.
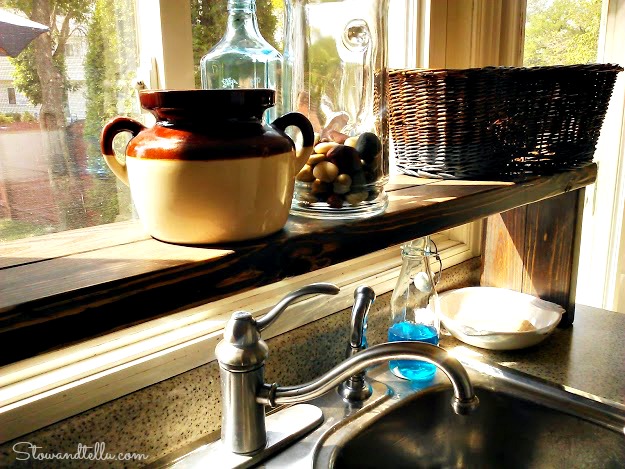
In the kitchen update part 1, it may have been hard to tell exactly where I was going with my plan. I was crossing my fingers that it would start to come together without straying too far from that plan, and I think it’s pretty close thus far. The original colors of light grey, reddish brown, blue grey and off white seem to work quite well together. The pottery from my mother fits right in, as do the herbs in a blue jar.
As the over-the-sink area of the kitchen is just about dialed in, I best start moving on to other areas in the kitchen, but in the meantime, thank you for stopping by, and I hope you are having a great day!! ~ Amy
Linking up to:
Sign up and receive posts by EMail
Sharleen says
Good ideas as usual there Amy. Like what you have done. I’m storming this in my ideas file for Ron. ( Later..on ) like your basket too . 🙂
Amy says
Thank you Sharleen, I’d love to see what else you have in your idea’s file:)
Danni@SiloHillFarm says
I love it all Amy! That shelf is just awesome and I’m pinning it to try! Love the basket too…I have lots of baskets and I have never tried painting one…yet! The smooth stones in the glass pitcher have a very pleasing effect and I guess i would like doing dishes a lot more if I had all of this to look at while I worked!
Amy says
I don’t have a dishwasher, so it has made doing the dished MUCH more interesting:) Thanks, Danni!
heather f says
I think this is getting prettier and prettier. Love the look of the wood and I really love your basket!
Amy says
That basket idea is really cute, isn’t it? Thanks, Heather!
Shanna Gilbert says
Love it! Pinned!
Anne says
It’s so cute! Love the look of the wood. You did an awesome job!
Have a great weekend xox
Amy says
Thanks, Anne, like you I love the beach and that finish makes me think of being there. It’s a win/win 🙂
Mel says
Amy that looks amazing, well done that is truly amazing!
Amy says
Thank you, Mel! I’m really digging it 🙂
Kelly @ Eclectically Vintage says
Great use of space – and loved the wood you used!
Kelly
Amy says
Thank you, Kelly, for stopping by! I love that wood staining technique, too. I’m glad I found it on Hometalk!