Learn how to make a no-sew laptop bag from a repurposed pillow cover. In a few hours time you can diy a unique, protective carrying case for your laptop for just a few dollars. Get the step-by-step directions, here.
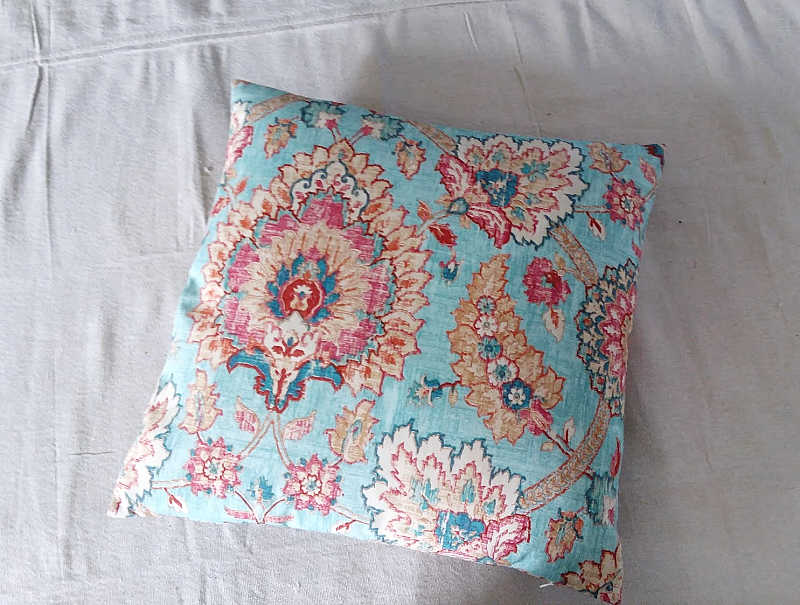
I love a good upcycle, especially if it saves me a little money. When I recently put together my portable office tote, I also knew I needed a laptop bag to keep my laptop safe when stored inside the portable crate. And as a big fan of decorating with pillow covers, I happened to have a lone cover that wasn’t being used, but was still in great shape. And the perfect width for a laptop case.
By combining a decorative pillow cover, a yard of soft flannel, flat braided trim and some sewing glue, I came up with a diy laptop cover that is perfect for keeping my computer protected when not in use. Not to mention, roomy enough to hold cords or other additional laptop accessories.
DIY Laptop Bag from a Decorative Pillow Cover

What you need
This post contains affiliate links. Read our disclosure and privacy policy for details.
Supplies
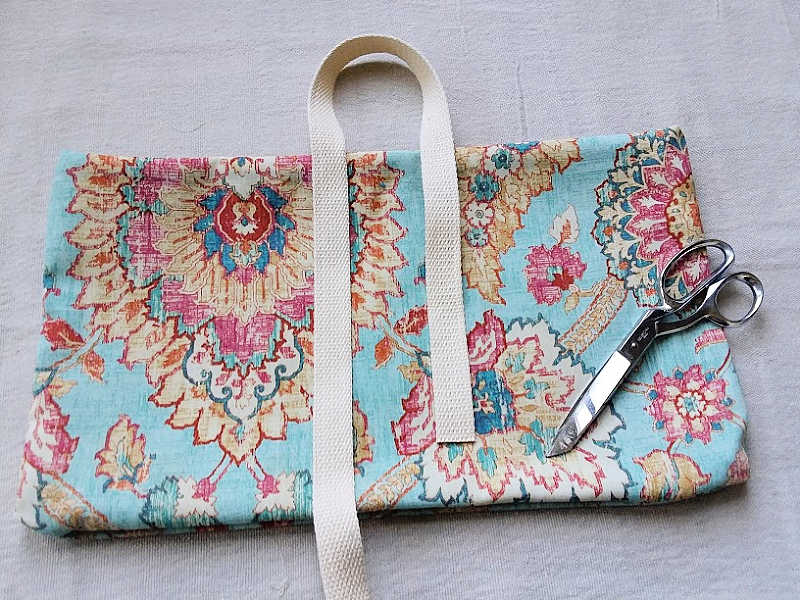
- Decorative Pillow cover. I used the type that has a zipper along one side.
- Braided flat trim aka: Belting Trim (to coordinate with pillow cover fabric)
- Flannel fabric – Approx 1 yd
- Fabric scissors
- Sewing glue – I used this one
In addition you may also want to have:
- Ruler or sewing measuring tape
- Fabric chalk
- Thread in matching color
- Sewing needle
I listed the measuring tape, chalk, sewing needle and thread as optional because when I made this project, I did not use these items. Rather, I eyeballed the measurements and cuts.
In addition, I did not reinforce the bag handles with needle and thread. I am including these supplies in the directions, for anyone who prefers to measure, rather than eyeball and/or reinforce the handles with back stitches (see this video). Note that since the pillow cover should have already been sewn together securely when the pillow cover was made, reinforcement stitches of the fabric seams should not be needed, however, you can add them if you prefer.
Use the following instructions to make your own laptop case from a repurposed pillow cover.
Measure and Cut
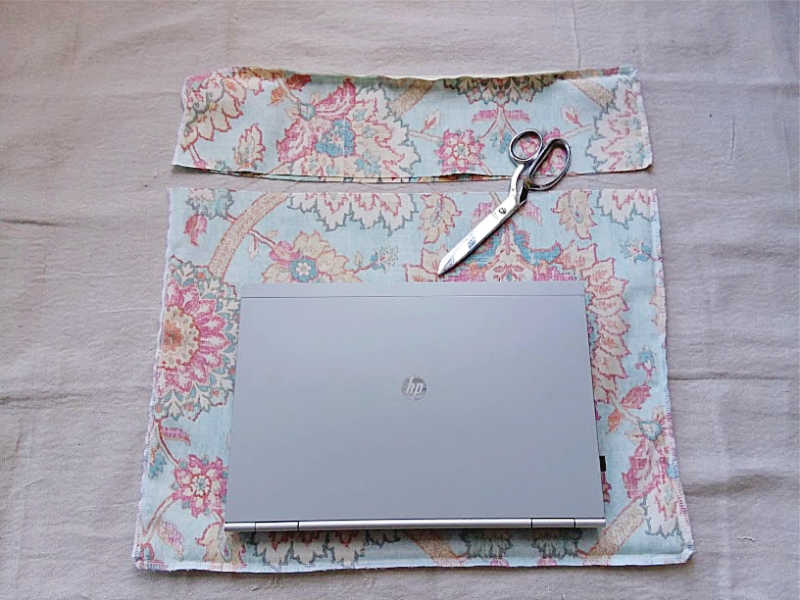
1)Lay your laptop down on your potential pillow cover to make sure it’s a good fit.
2) Reverse the pillow cover so it is inside-out. Lay the laptop back down and either eyeball or measure out about 3 inches of excess fabric beyond the end of the laptop. Make a line with the fabric chalk, or simply cut across the width to remove the excess fabric.
Size the lining fabric
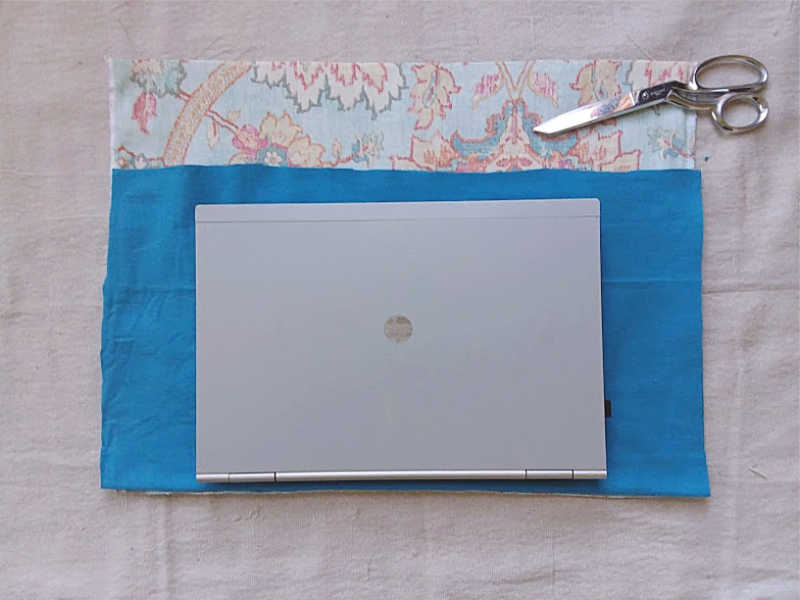
3)Next, to cut a piece of flannel for the lining, making sure the flannel piece is larger than the pillow cover, fold the flannel in half, lay it over the pillow cover and trim it to the same width. Then trim the height so it is about 3 inches shorter than the pillow case height.
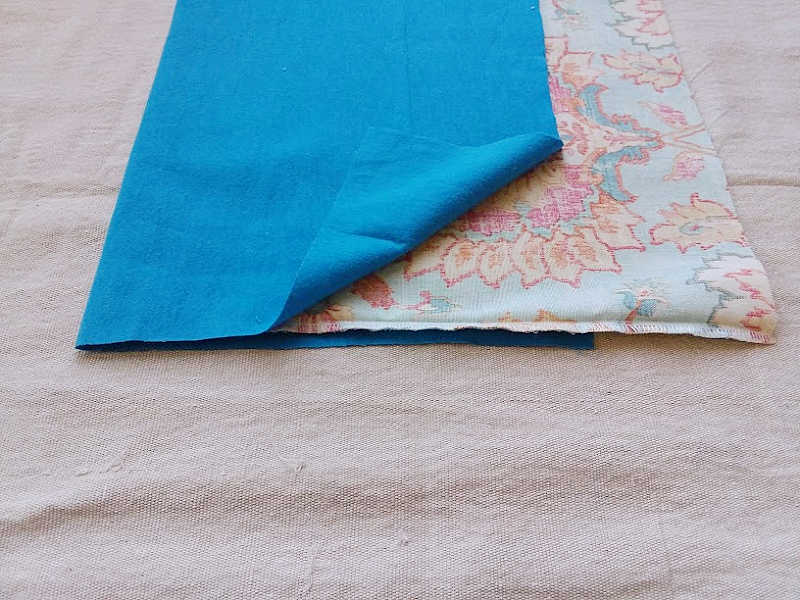
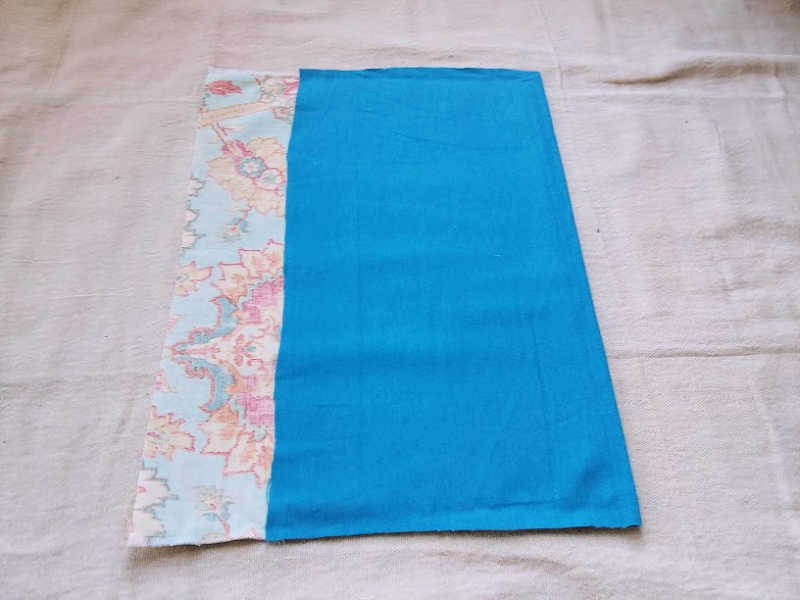
4)Moving on, wrap the flannel piece to the outside of the pillow cover, making sure to line up the width ends.
Stitch together with no-sew fabric glue
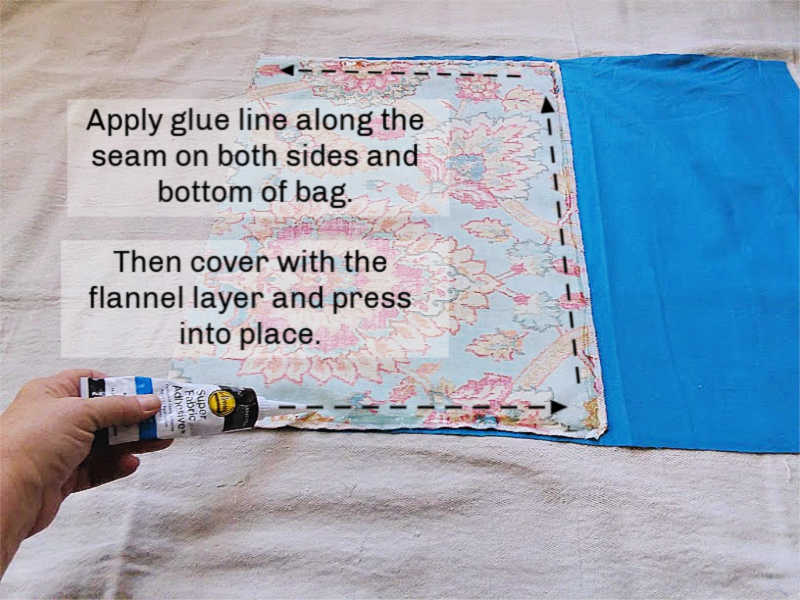
5)Run a bead of the fabric sewing glue along the end, and press the flannel piece to the pillow cover end.
6)Continue on, running the fabric glue along both widths, plus the bottom of the cover.
7)Flip the whole thing to the other side and repeat.

8)Next run a bead of fabric glue along the top piece of the flannel and press down. Repeat on the other side.
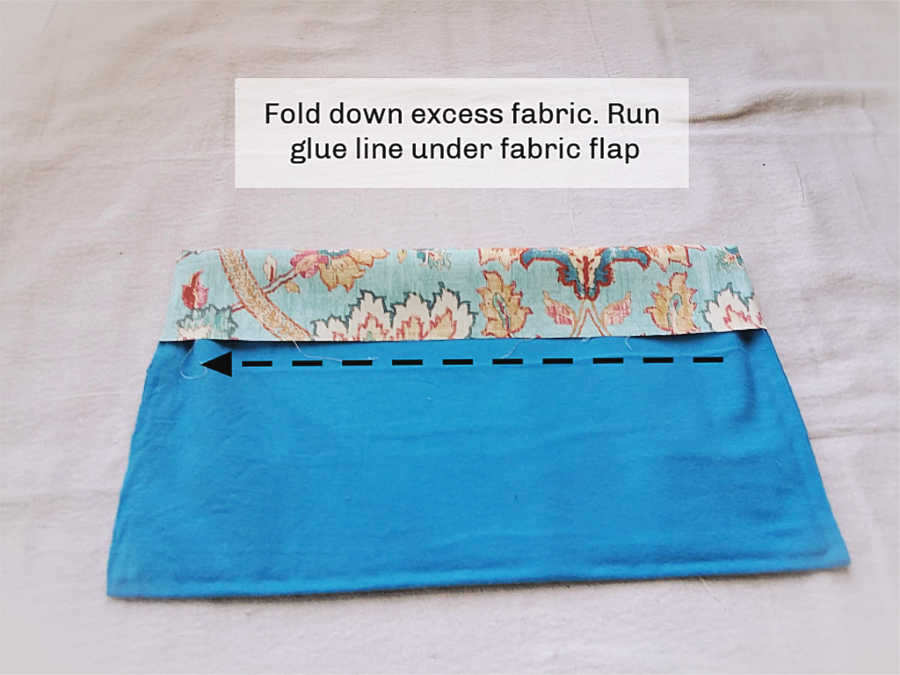
9)Roll the excess fabric down over the top of the flannel. Run a bead of glue along the underside of the flap you just folded down. Let the glue dry completely according to package instructions.
About using fabric glue:
I made these no-sew coffee sack pillow covers several years ago, and found that if used correctly, sewing glue is a great alternative to real sewing, for those of us who like to short-cut. Having said that, reinforcement hand stitching can be done to strengthen your inside fabric the seams, the bag handles, or any other area, if preferred. See this short video on how to make a back stitch to reinforce almost any no-sew project.
Get a first glimpse of your diy laptop cover
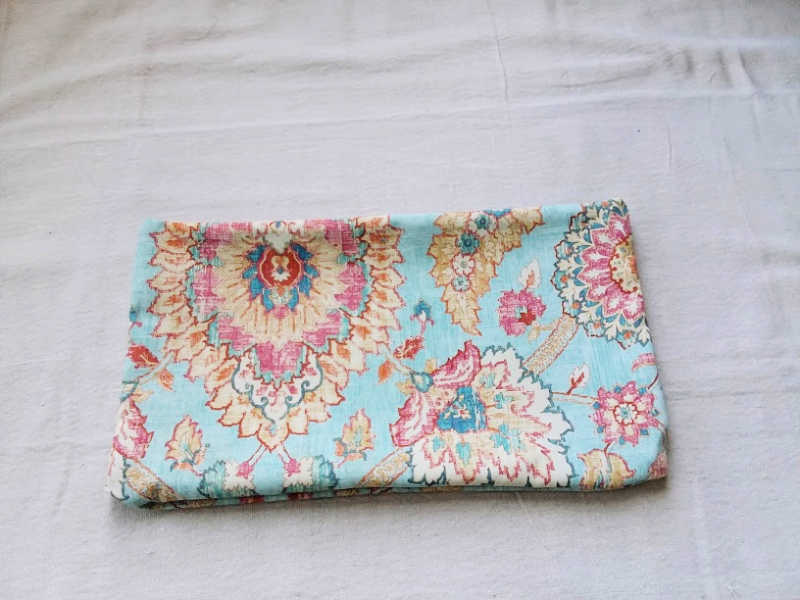
10)Invert the bag so the fabric is facing right side out and see how your cover is going to look, as you are almost finished.
Add the handles
11)To make the handles, center and line up the braided flat rope.
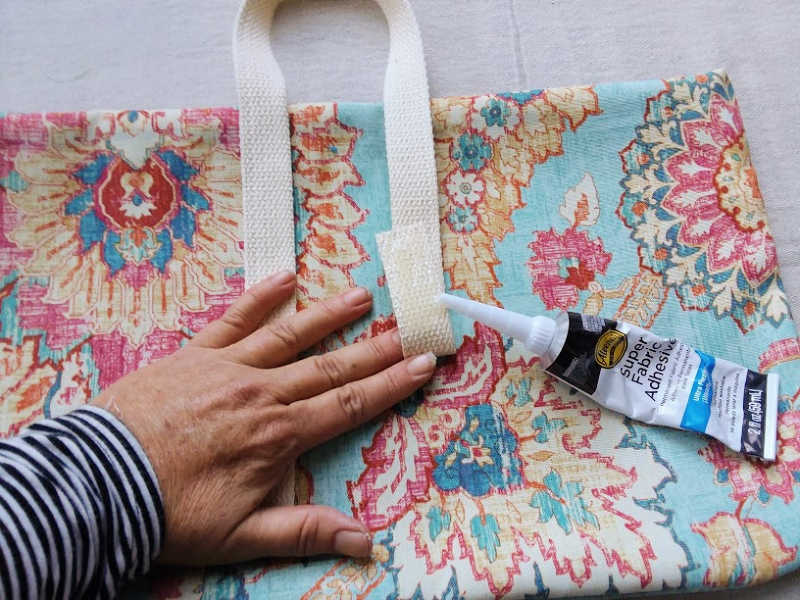
12)Hold some of the trim down to keep it in place, while lifting up parts of the trim at a time to apply the sewing glue. Let dry slightly, then reverse and do the handle on the other side. Make sure to use the first handle as a guide to line up the placement of the second handle.
13)Let the glue dry completely.
14)Optionally you can place reinforcement stitches on the trim of the handles to as an extra precaution. I did not do this step.
Helpful hints for best results
- Wash the pillow cover before starting this project.
- Make sure the sewing glue you use is recommended for the type of fabric that your pillow cover is made of.
- Test the sewing glue on a piece of the fabric for any bleeding or staining.
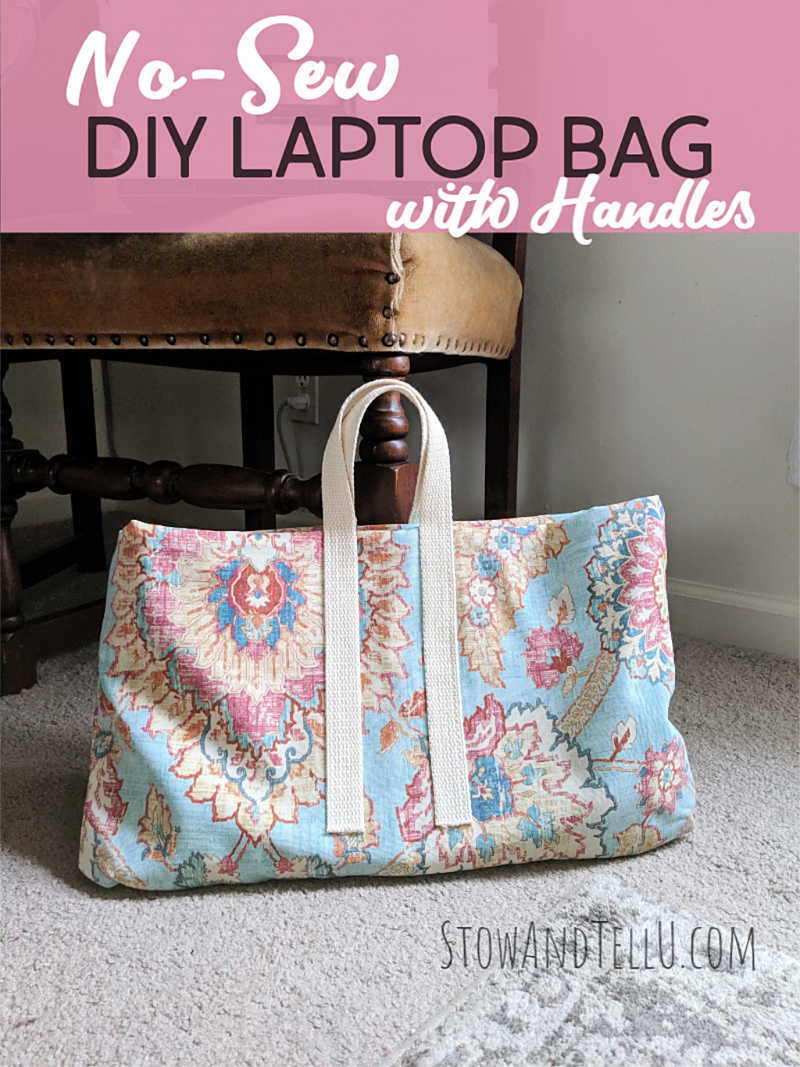
With the right pillow cover, one of these diy bags could be used for more than just a laptop protector. Perhaps a purse, a beach bag, a book bag, a gift bag, or unique planter?
Are you a fan of using pillow covers to decorate? From trendy to budget friendly, check out our resource list of the best places to find and buy pillow covers.
Leave a Reply