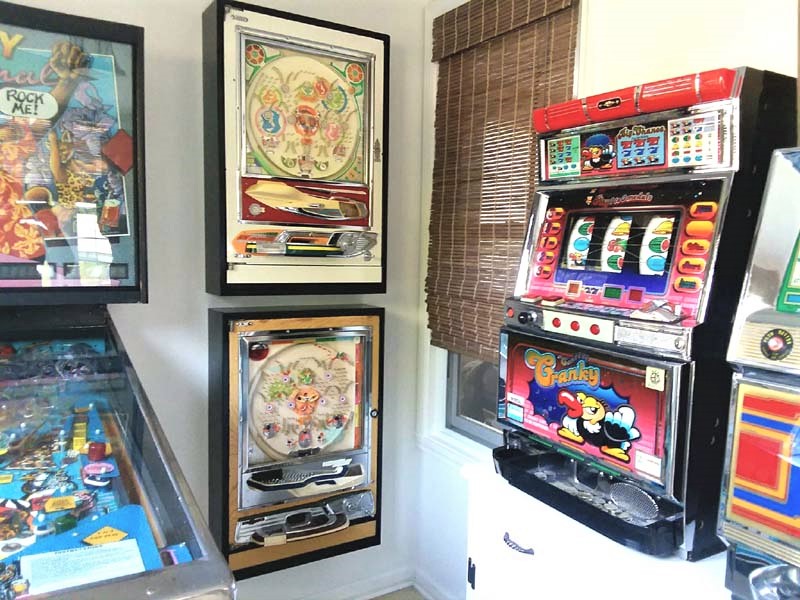
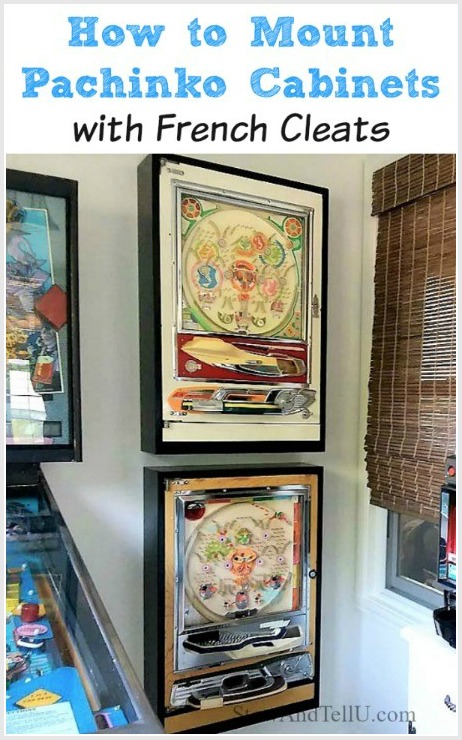
Ken just recently mounted his pachinko cabinets in our small sun porch arcade room. Many years ago he found two used pachinko machines for a steal, and since one of his hobbies is restoring old arcade games, he was pretty darn happy to find these for so cheap. Back when we were doing the townhouse basement, he decided to build two French cleat mounted pachinko cabinets to hang on the wall.
Small room arcade sneak peak
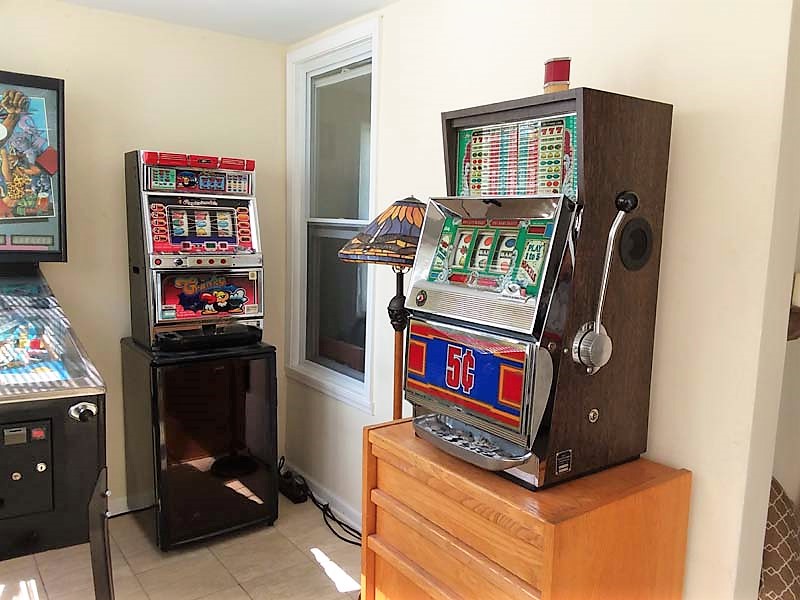
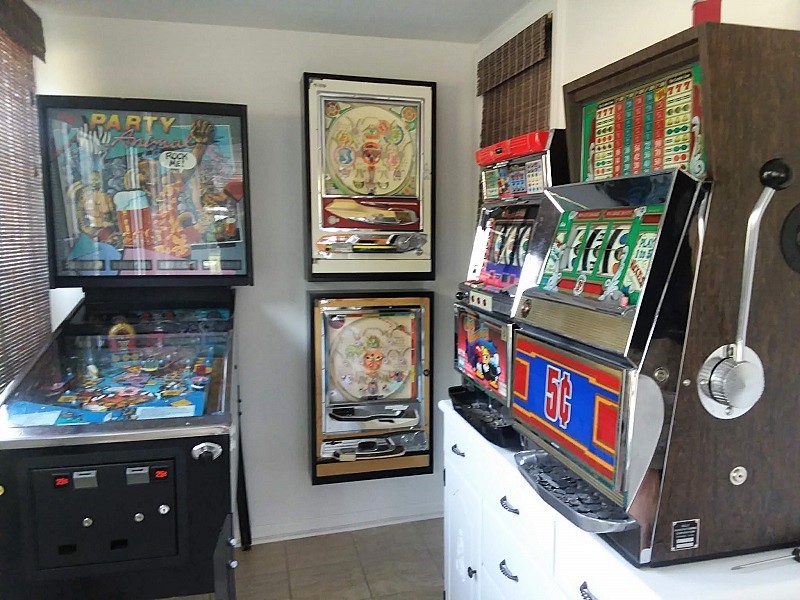
First, let me give you a sneak peak of the sun porch game room in progress. with a few before and after photos. My favorite part of this room transformation is how we were able to replace 2 pieces of furniture with one, creating a more cohesive layout that also allowed us wall space to mount the pachinko machines.
Before
Old room title: “The place where we plopped all Ken’s arcade games when we moved in 3 years ago,” because we realized the basement had some flooding.
After
New room title: “Respectable small sun porch arcade room in the works.” I’m still in the process of making and framing photos and such for walls. You can’t see any wall space in these photos, but there is some wall space that I’d like to give a little life to.
Changes that were made to create a better layout
Removed:
- Mini fridge – moved to another room in house
- Oak style cabinet – removed and donate
- Firefly standing lamp
Added:
- Walls painted in One-Coat White by PPG
- White buffet cabinet, which was my mother’s, repainted and moved from the sitting area side of the sun porch
- Disguised electrical cording (we used white colored extension cords and attached them along the baseboard.)
- Bamboo roman shades
Still to the works:
- Gallery style wall with family photos
- Shelf
- Directional lighting.
<< Click here to see the other side of the Sun Room, which was completed with a budget of $800 >>
While the buffet cabinet does appear to take up more space, the new layout passed the “Ken test.” Meaning he thinks we had just the right amount of space with this layout for it not to feel overcrowded. And since this is basically his game room, until we can move the arcade into the basement, I know he wouldn’t go along with the layout unless he felt comfortable with it. Our other rational is that the game room mostly get used by the kids in our family, and they’re not quite as big as us adults…yet ![]()
Basic steps to make french cleat mounted pachinko cabinets

Ken did his research and found a style of framed pachinko cabinets that he liked, but he decided to incorporate a wooden French cleat mounting system to the frame.
Step 1) To make the cabinet itself, he started with 1” x 8” x 8’ wood, cut down to 1” x 6-1/2” x lengths needed per the outside measurements of each pachinko cabinet. He, cut, glued and screwed the cabinets together; filled holes with wood putty; sanded and then painted with black enamel. Note: He based his frame dimension of 6-/2” base on the depth of each cabinet, making sure to allow about 4 inches extra in the back to make room to place a ball catch for the little metal pachinko balls.
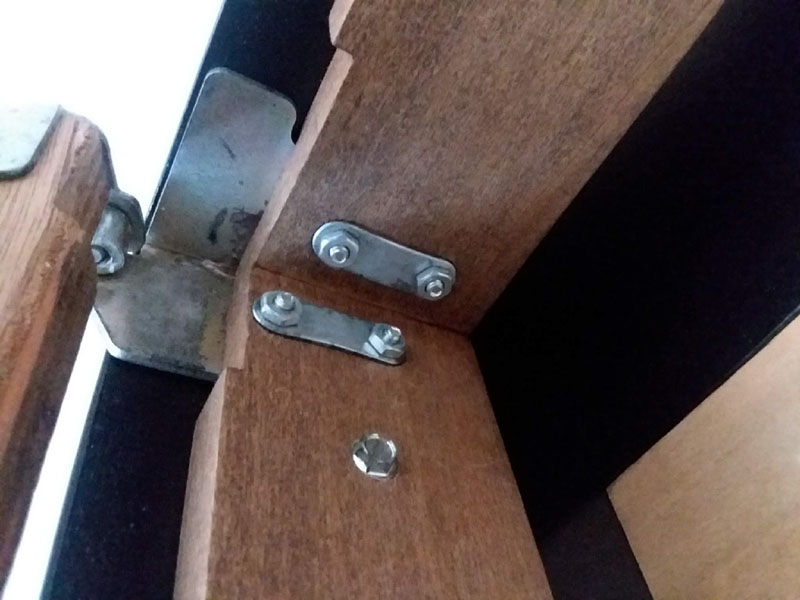
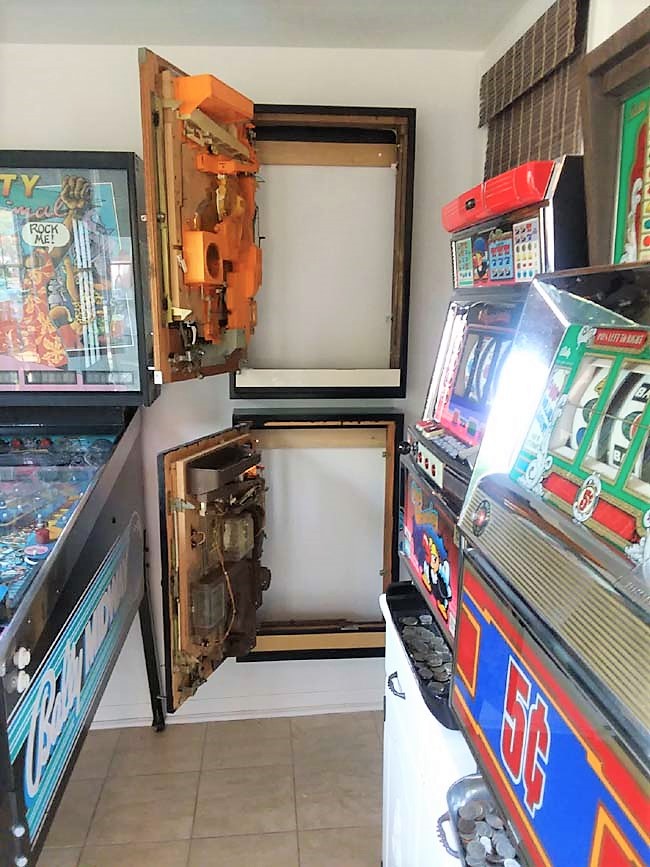
Step 2) Next he bolted the frame to the pachinko machine from the inside in 4 places using hex bolts. Ken screwed 2 bolts on each side, one near the top, one near the bottom. Note: he made sure his hex bolt lengths were long enough to screw into the cabinet frame, but not so long that they would go all the way through the cabinet frame wood.

Step 3) For the French cleat mount, he used a leftover piece of 1” x 8” cut to 1” x 1” x 5-1/2”, with the length cut to fit just inside the back of the cabinet frame. He made a 45 degree rip cut through the center of the wood creating 2 pieces that fit together. The top piece measured 1” x 2-3/4” was screwed into the inside back part of the pachinko cabinet. The bottom piece measured 1” x 2-1/2” was securely bolted to the wall.

Step 4) Then he was able to slide the pachinko cabinet right onto the wood piece attached to the wall.
Now, not only do the french cleat mounted pachinko cabinets add a nice touch to the room, the cabinets don’t wiggle, rattle or wobble against the wall in any way. They don’t budge at all and we feel pretty safe in knowing that they are mounted strong and securely to the wall.

Additional Game Room Inspired Wall Mounted Art Ideas
- The Easiest Way to Mount Game Boards to the Wall (and still take them down for game night)
- Simple Pallet Wood Framed Coffee Sack Art
- DIY Game Room Route 66 Wall Mounted Score Board
Want to remember this idea? Pin or share on Facebook for later —>
Bliss says
Well now…… I used to have a pachinko playing addiction. When I was 13, the people I babysat for came home with one. I swear I sat and played and played forgetting about their kids! I loved it so much that 25 years ago I bought one for myself and it too is built into a cabinet right in our family room. Something happened to it a while back, think it was electronic, and no one has played it for a very long time, you know fixing other things around here was higher on the list. I love the flipper, I love when the balls drop in and the lights go on. Most folks don’t even know what a pachinko machine is, I could live with you guys.
Amy says
Well, I’m glad the feeling is mutual because I could live with you guys, too. ANY DAY!!
Rob Valente says
Hi was wondering if you have a step by step plan to make this pachinko cabinet ? I really want to make one and hang it from the wall.
Thank you
Rob
Amy says
We don’t have a step by step plan for the actual cabinet. Ken found several online tutorials follow to make his cabinets. The only additional thing he did was add the French cleats. I hope that helps.
John says
Nice cabinet. I need one for a Sanyo comet 2. Like your other one Upper one.