Hey all. I’m excited to say that our small sun porch sitting area makeover has been completed to the tune of about $800. If you’ve ever done a room makeover, you know how quickly the receipts start adding up. I didn’t determine a budget on this room. Basically I just knew I wanted to paint it, change out the vinyl blinds and make it more feel more like a sun room. Using a mood board, re-using items and furniture wherever possible and purchasing classic styled larger ticket items were all contributing factors in getting the look I wanted without breaking the bank.

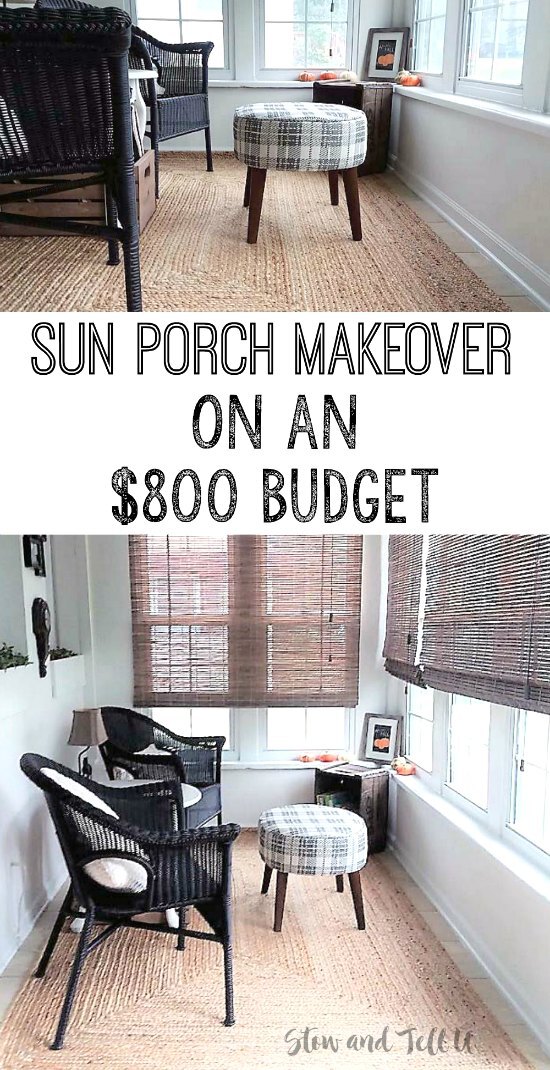
Small sun porch sitting area makeover completed with a budget of $800
Here’s the BEFORE photo–>
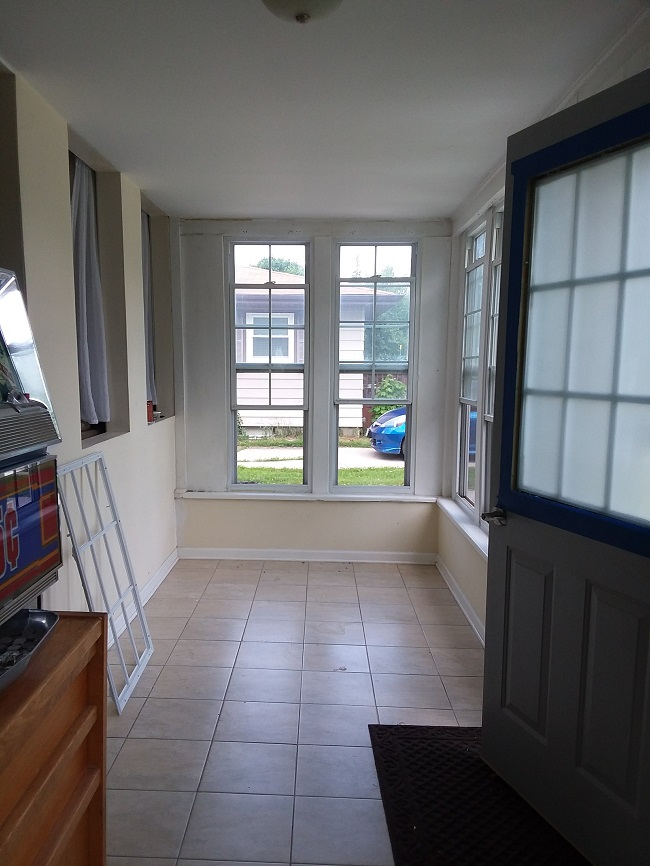
First, let me show you a photo of what this side of the sun porch looked like before the makeover. It has gone through several stages since we moved in. First was an attempt at a dining area, next we turned it into a space for our buffet and china cabinet furniture (to put it bluntly, an area for furniture overflow with a bonus portable greenhouse). See more before photos and the mood board, here. Each stage was an improvement over the previous one. Nonetheless, we have ultimately decided that we wanted it to look and be used as a sun room sitting area.
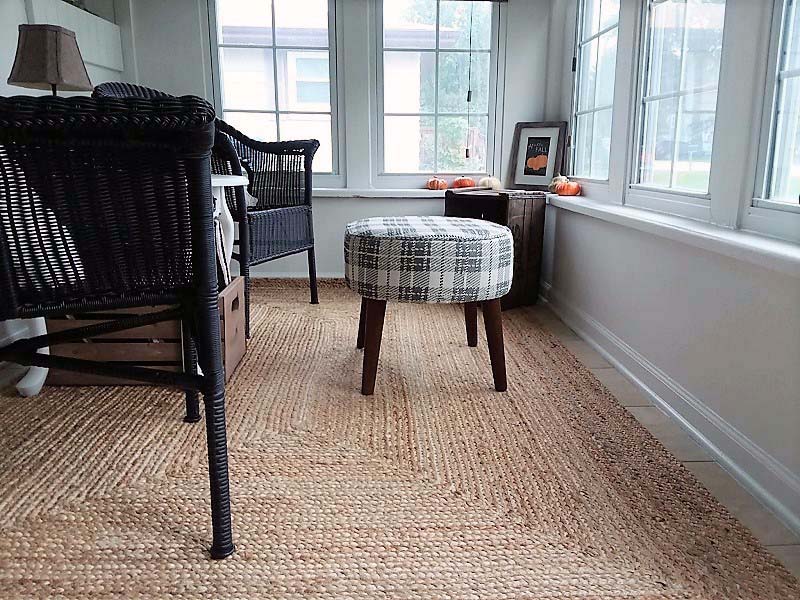
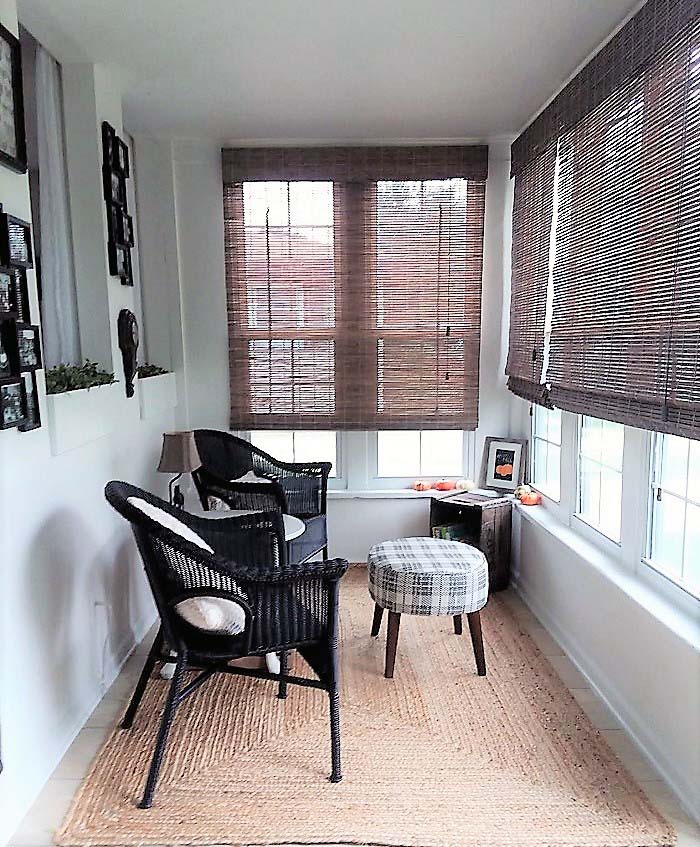
Here is the AFTER photo – taken from the same distance, so you can see all the changes –>
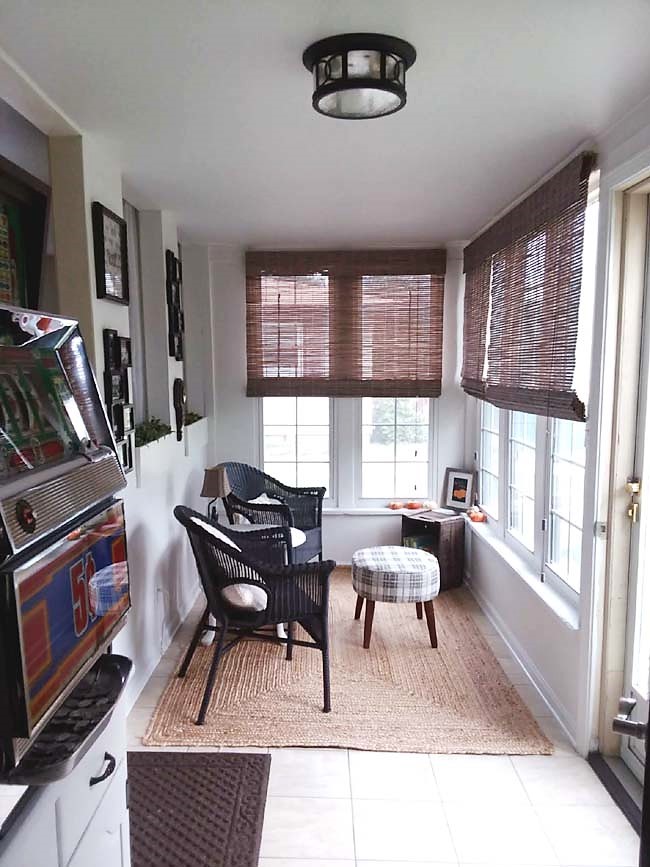
This sun room has 2 sides, divided by the entry door.
<< Click here to see the game room side of the sun porch, still in progress >>
Goal: To create a space that was more useful and welcoming
Our goal for this room was to create more seating space that wasn’t cramped, cluttered or appearing to be mismatched. We acknowledged the fact that the space was too small to fit our dining table, not to mention too far away from the kitchen. In addition, it was only serving as an excuse for keeping too much furniture.

Design plan
I tried to keep this room plan simple by going with a mostly black and white color scheme. I created a mood board (which you can see, here) to stay on target and I think the completed room reflects the mood board just enough to show how valuable using a mood board can be to help one stay on track.
Plan of action
- Move or get rid of the buffet and china cabinet
- Add at least two comfortable chairs, a small table, a lamp and an ottoman
- Replace the window coverings with bamboo shades
- Place indoor planter boxes into the awkward window sill openings that cross over into our living room.
- Add an area rug
- Paint the walls
- Add family photos and some artwork
This post contains affiliate links. Read full disclosure, here.
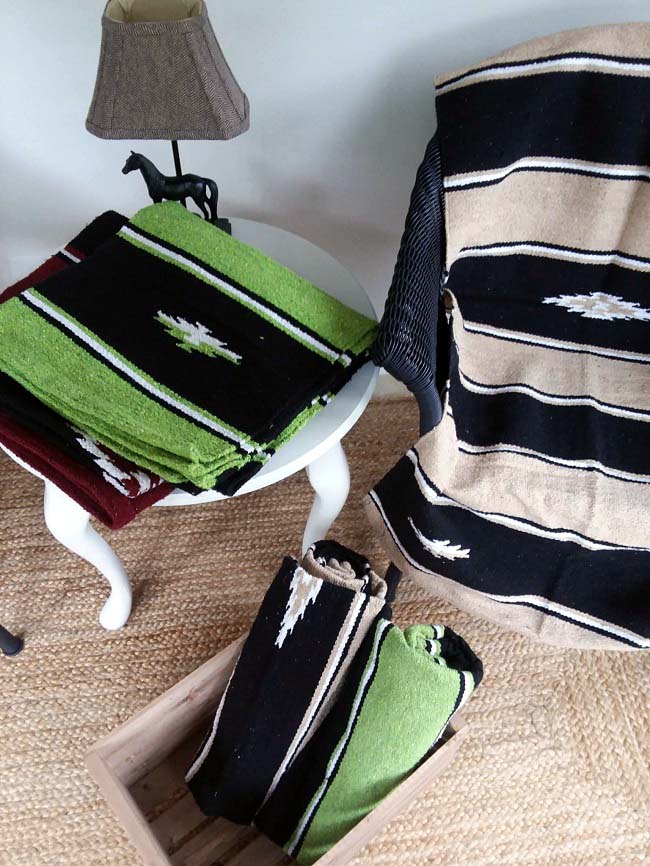
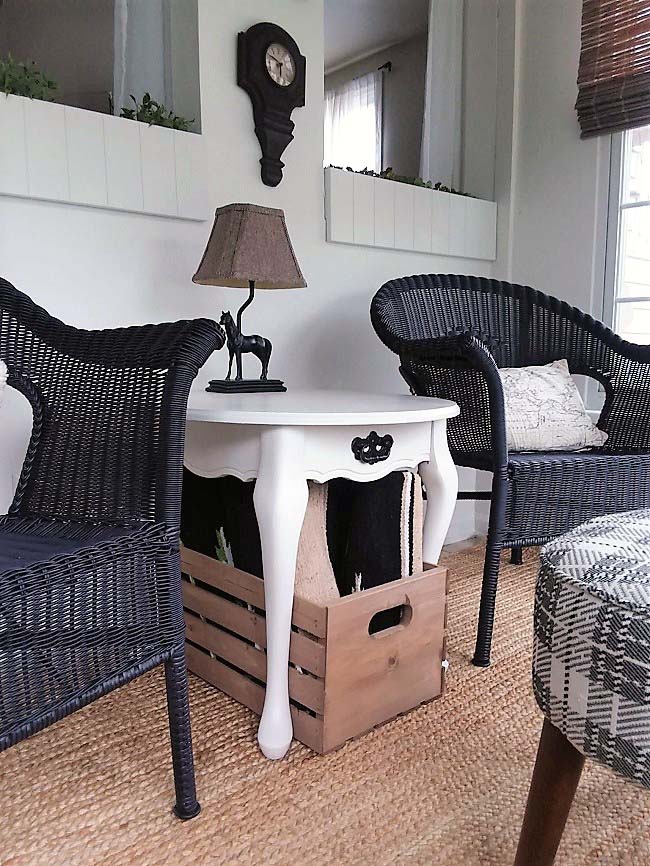
A $10 dollar crate stained and used to hold saddle blankets which are handy to have for picnics and bench warmers among other things.
Design style for the sun room
The best way I can describe the design style is a mix of rustic cottage and saddle club. I pulled some of the inspiration from the entryway/ stairway makeover we did a while back. I also found the horse lamp while shopping around online. Since my sisters and I have had a love affair with horses since childhood, the horse lamp just resonated with me, so it became my jumping off point, (although I will add that I thought it would be a little bit bigger than the tiny little lamp it ended up being when it arrived. Any smaller and I would have called it a night light, LOL).
Beyond that, I tried to focus on a neutral look that would stand the test of time and not be out of style by next year. I will stress that I had to continue to remind myself to KEEP IT SIMPLE. I had to keep going back to my mood board and asking myself, “hey, are you still close to your original target?” Note, I didn’t intend to replicate the mood board look exactly, I just wanted it be able to use it as reference tool as a means to stay on track with the look I was aiming for.
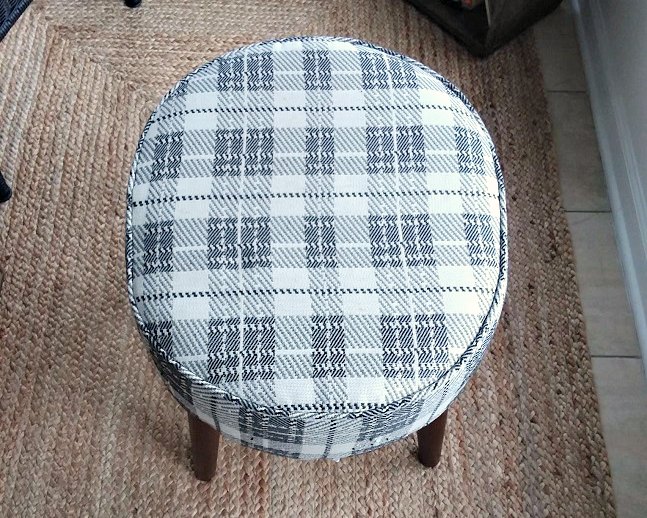
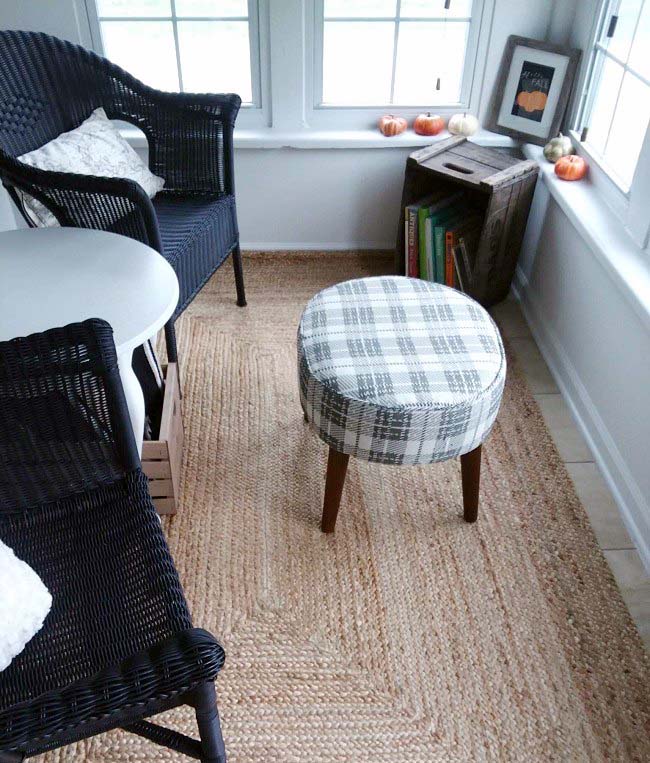
This ottoman was a Target find. I loved that it had a classic style with a modern twist. I purchased two. One for the porch, one for the living room. I was terrified they would look all wrong, but they ended up looking just right with everything else. Ps: My cats think it makes for a great scratch post. Grrrr
New items purchased for the sun porch
- Paint for the walls, ceiling and trim painted white – color Simply White by Pittsburgh Paint
- Paint for the front door – color: Blackhearth by Pittsburgh Paint – see it on our front door
- Jute area rug – Amor from Natural Area Rugs
- Bamboo shades – color Driftwood – from The Home Depot
- Plaid ottoman – found at Target
- Horse lamp – found here
- New ceiling light – from Menards
- Wood crate – found at Walmart
- Saddle blankets – see this collection of saddle and yoga blankets, here.
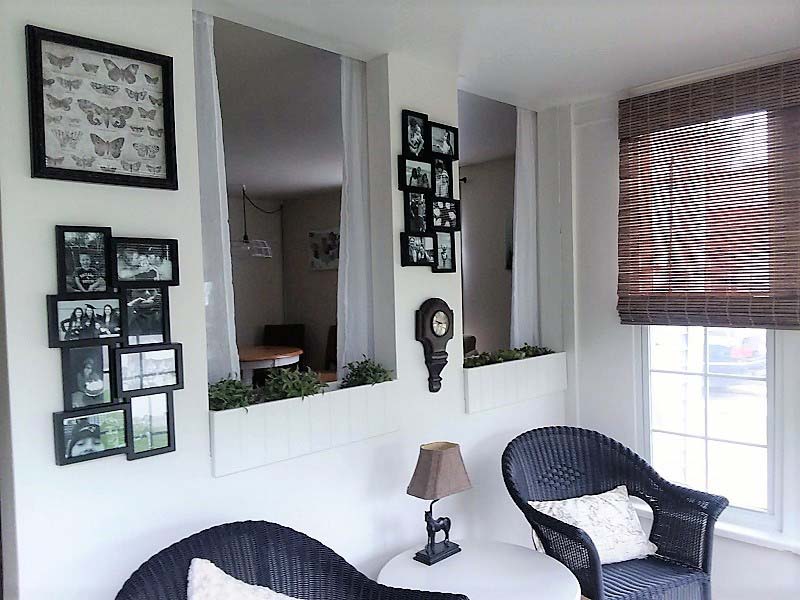
- 2 Black photo collage frames – Wayfiar
- 3 small faux plants – Michaels
DIY Projects completed for the sun room area
- Painted front entry door with window grille
- Indoor planter boxes – built by Ken
- Resin wicker chairs spray painted black
- Small side table (used) – painted the color: Fall Chill by PPG
- DIY Stone filled succulents planters
- Rustic toned stain finish added to the storage crate that sits under the small table
Re-Used items added to the sun room
- Old wooden soda crate – being used in this room as a small corner bookshelf
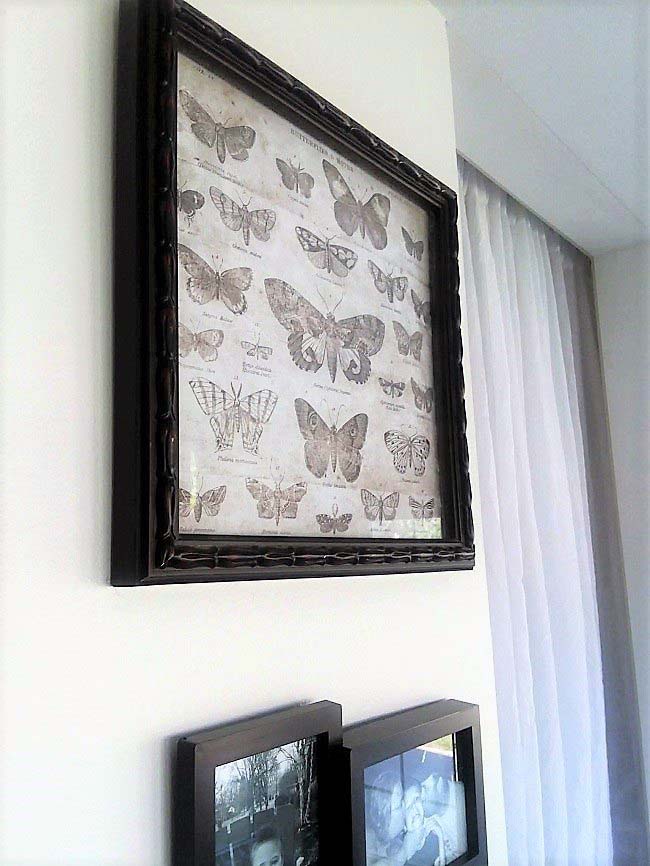
- Wood frame – from my stash, I added a pretty scrapbook paper moth design into the frame
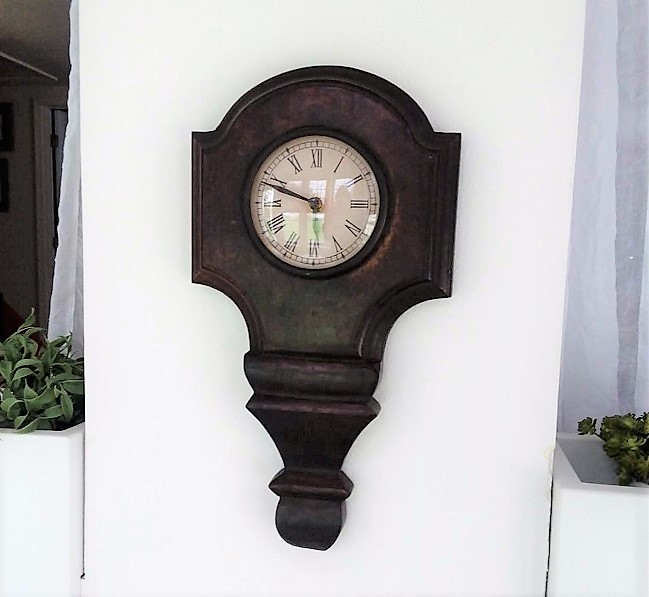
- Wooden clock – thrift store find
- Pillows pulled from another room in my house
Total cost broken down
Note: The paint would have cost more, but I was able to save some money by buying it when it was on sale and using some mail-in rebates.
- Blinds $ 156.00
- Rug $ 139.00
- Ottoman $ 72.00
- Chairs and chair makeover $ 82.00
- Blankets $ 57.00
- Paint $ 46.00
- Lamp $ 38.00
- Ceiling light $ 42.00
- Planter boxes and succulents $ 48.00
- Plants $ 22.00
- Crate $ 10.00
- Other miscellaneous costs I’m sure I’m forgetting $ 88.00
Total $ 800.00
I can officially call this side of the sun porch complete. It has all the main elements I intended for it to have. That being a sitting area with black wicker chairs; an area rug to warm up the space; new window shades and a classic black, white and neutral design. Perhaps I could have emphasized the black and white more by painting both of the storage crates black or white, but I chose to keep them wood toned. We could have gone with white roman shades instead of the driftwood color, to keep it light and bright, but honestly, I like the wood tone of the shades, as well. Moving forward I could add more color to the area with brightly colored pillow covers and/or a potted floral arrangement, etc.
Bottom line, it’s a usable area now with a style that should last a while, and it was completed for a total cost of about $800.00.
Since I was struggling with the look in the living room, I’m grateful now that I switched my focus to getting the sun room done first. Because now, as I am back to working on the living room, I can get a much better feel for how these two adjoining rooms are going to compliment each other.
Thanks so much for reading xo
Amy
LKR says
How have these chairs held up? Have they chipped or flaked? I have some faded brown plastic wicker that I would love to update, but don’t want to invest the time and money for new cushions if it won’t last.
Amy says
Hi LKR,
Our resin wicker chairs have held up well, BUT, we keep them indoors and that makes a big difference. Plus, we don’t use them very often. However, if you keep your chairs outside and uncovered, the paint will start to fade and wear away after some time. You will perhaps need to re-paint them every other year or so.
Three years ago, I painted some plastic Adirondack chairs that we kept outside, uncovered, and through winter. These chairs needed a re-fresh after yr#2.
If you keep the chairs under a porch or awning and bring them in during the colder season, the finish will last longer.
Applying a durable clear coat will help them keep longer, as well, but the bottom line is, they will eventually need to be re-coated within 1-2 years if left outside. Although, they can last up to 5 if kept indoors. Also note, you can touch up small chips and dings (if the finish is good everywhere else) with a MULTI-PURPOSE craft paint in a similar color.
I do understand that you don’t want to waste time and effort and buy new cushions if it would be less trouble to just buy all new. I hope this information helps you to make your decision. Let me know if you have any other questions.
Best of luck,
Amy