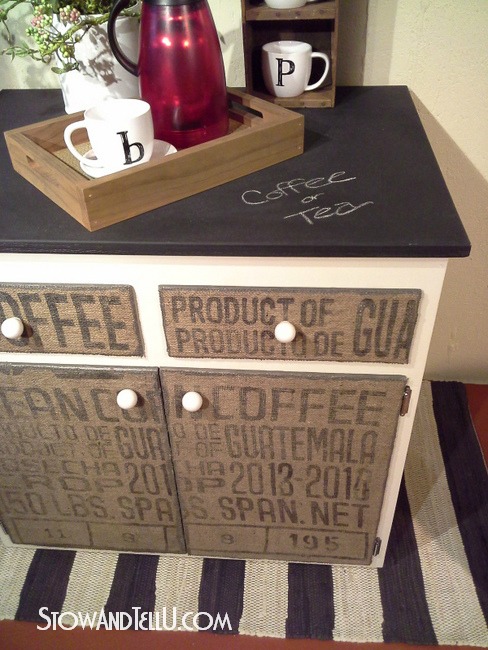
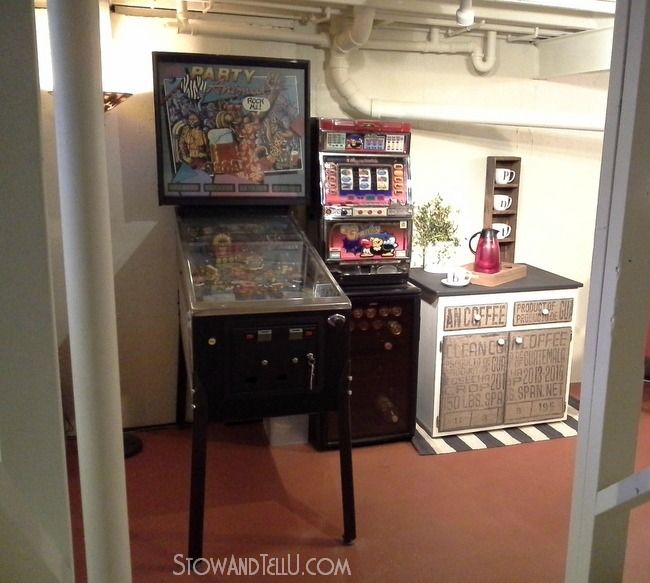
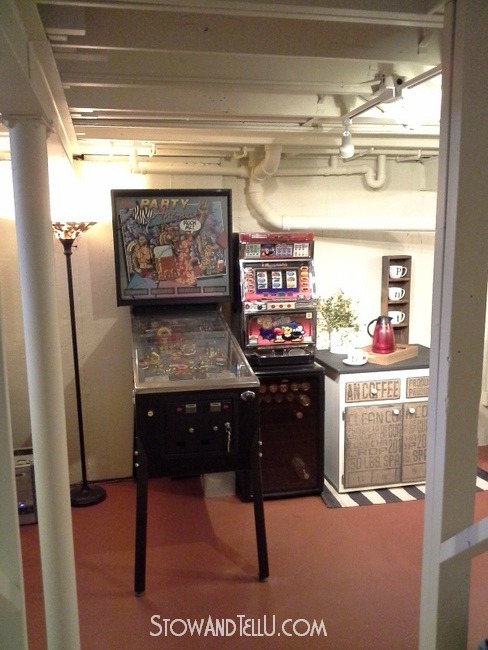
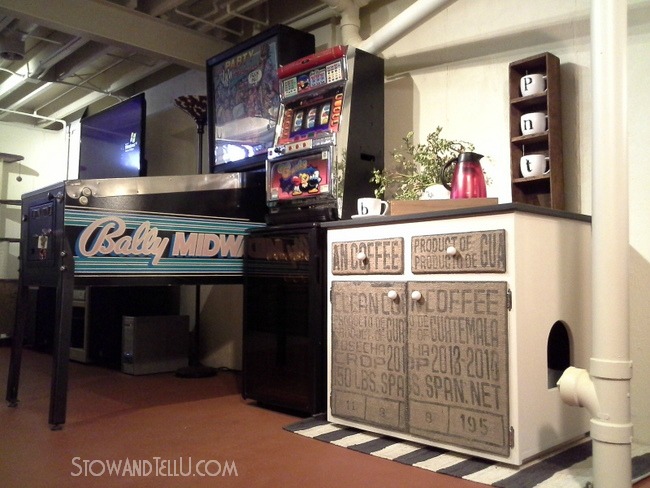
Small spaces often require dual-purpose furniture, so we wanted a piece of furniture with a cozy, game room feel to place next to Ken’s pinball and slot machines. We also wanted to hide the kitty litter box. You know, because kitty litter boxes and game rooms go so well together, right?? Well, for us they were going to have to; thus, we have ourselves a decoupaged coffee sack furniture cabinet which will fool the eye (and our guests) as a coffee station whenever we have company.
DIY Decoupaged Coffee Sack Furniture Cabinet
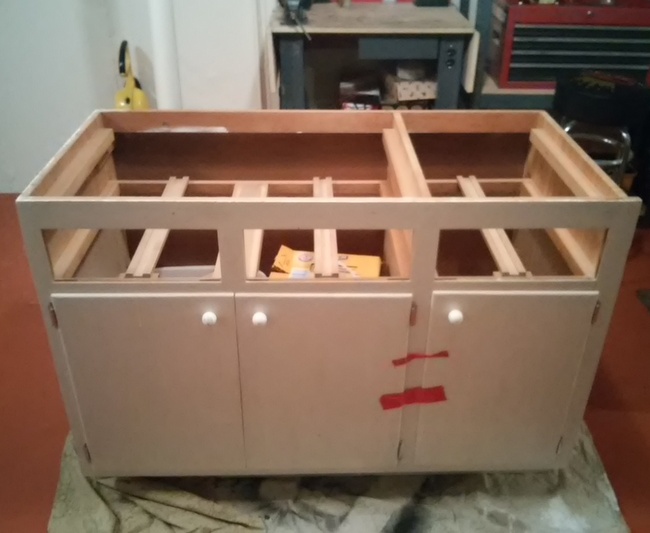
Craigslist has been good to us lately, and among other things, we were able to purchase 2 of these salvaged kitchen cabinets for $10 each. That’s $20 for both ;D —> SCORE
Both cabinets did come with countertops not shown in this picture.

For this project, we used one of the cabinets. Ken thought it was too big for the space, so he went about modifying it by shortening the width.
Next Ken followed these steps from Chaotically Creative to convert it into a kitty litter cabinet.
From there, we painted the cabinet white and continued on with the steps of painting the countertop and covering the drawers and doors with burlap coffee sacks.
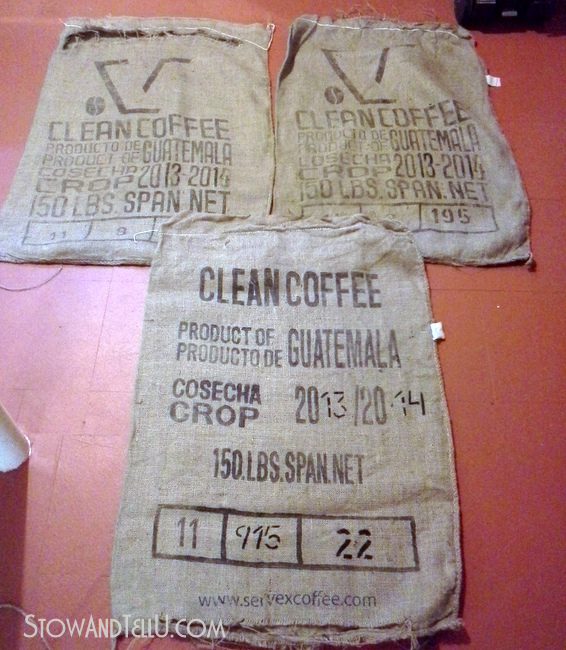
Next, I chose a few coffee sacks from another recent Craigslist purchase and washed and dried the coffee sacks following these directions.
How to decoupage burlap onto a furniture door
Supplies:
Cabinet or dresser painted
Burlap coffee bean sacks
Decoupage (I used Mod Podge Matte)
Scissors
Craft paint in color close to burlap (with any DIY chalk paint recipe)
2 Small paint rollers (one for the decoupage, one for the craft paint)
I used the following steps below to attach the coffee sacks to the furniture door with decoupage.
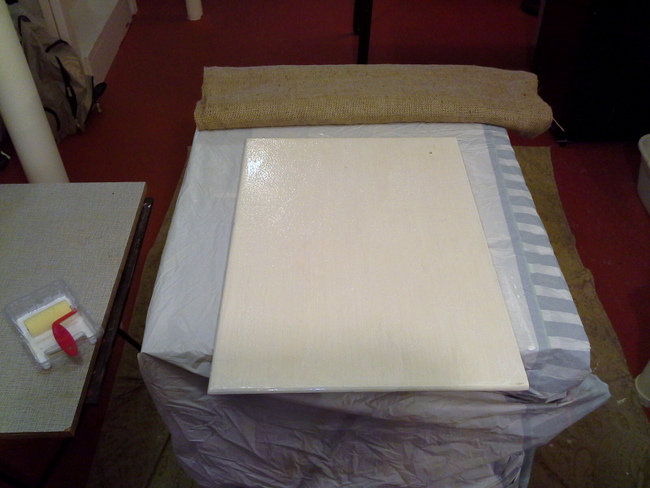
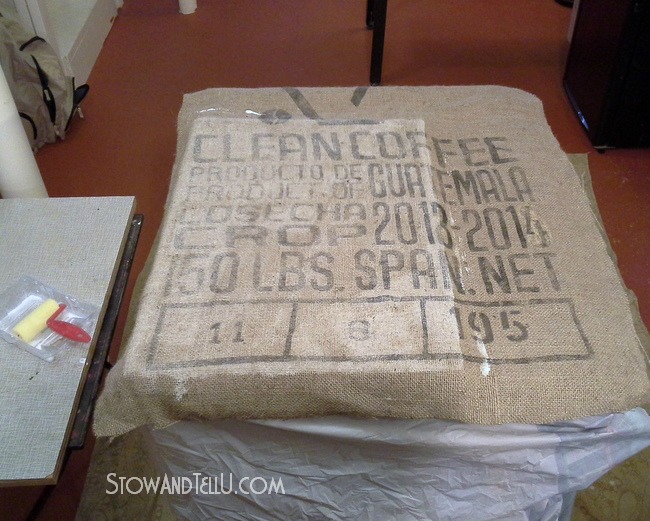
First, I cut the coffee sack down to a workable size with scissors. Then I applied decoupage to the cabinet door. And then laid the coffee sack piece over the door, smoothing it down. I applied several coats of decoupage over the top of the burlap and let it dry a bit.
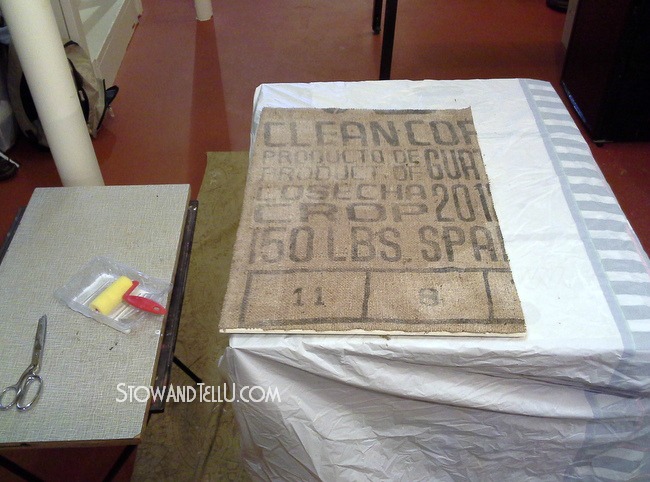
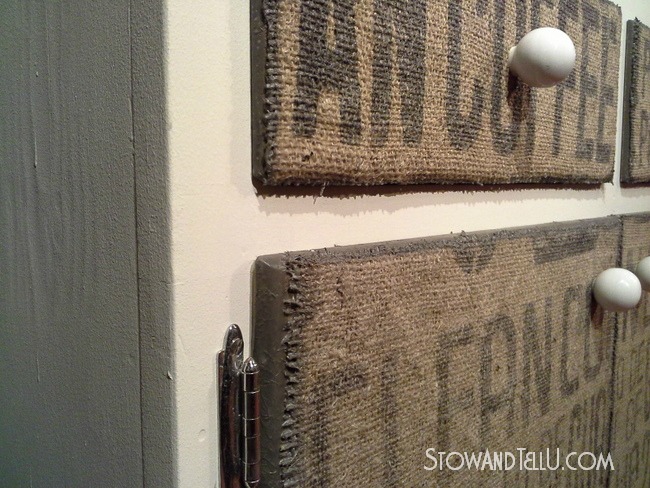
Next, I trimmed off the excess burlap fabric. There was a little bit of fraying, but not much.
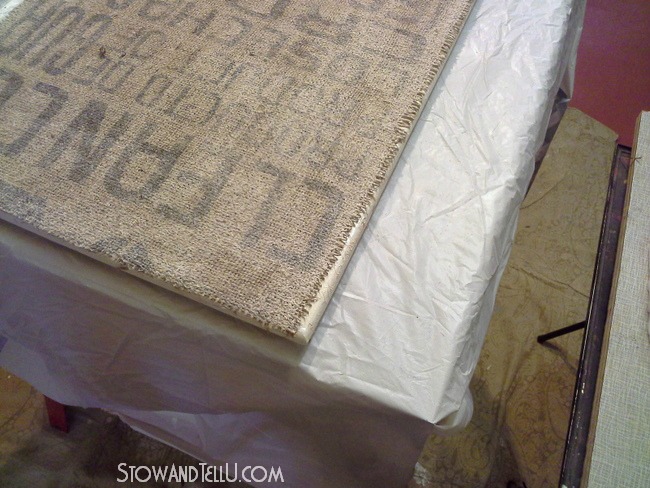
I screwed up on this piece (it was crooked), so I had to re-adjust it, and re-trim it which caused this gap. Most of the pieces just had a small bit of fraying. But it was just enough that the white paint showed through on the edges.
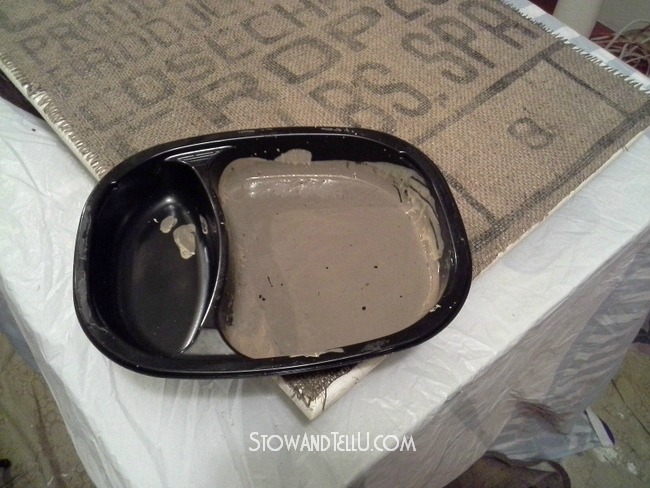
Now it was time to paint the edges to hide the frays. I mixed up a small batch of DIY chalk paint using the colors: linen, woodland brown, and black. If I’m not mistaken they have a craft paint color called “burlap” out on the market, but I didn’t have any, so I improvised.
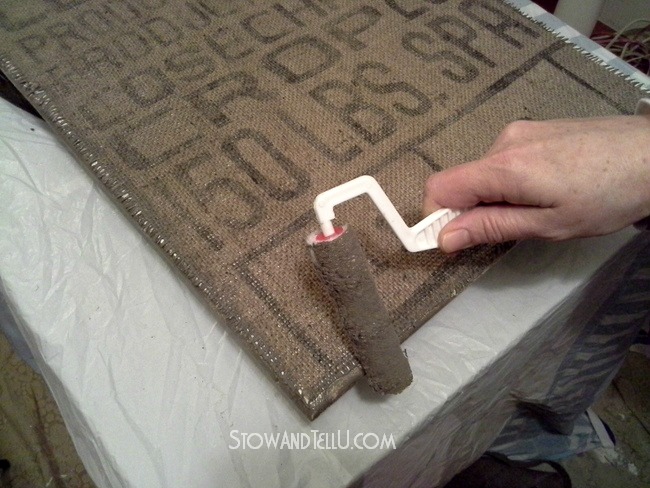
Next, I rolled the paint along the edges with a small roller until I had good coverage everywhere and let the paint dry.
As the last step, I gave the cabinet door several more coats of decoupage, making sure to cover the edges.
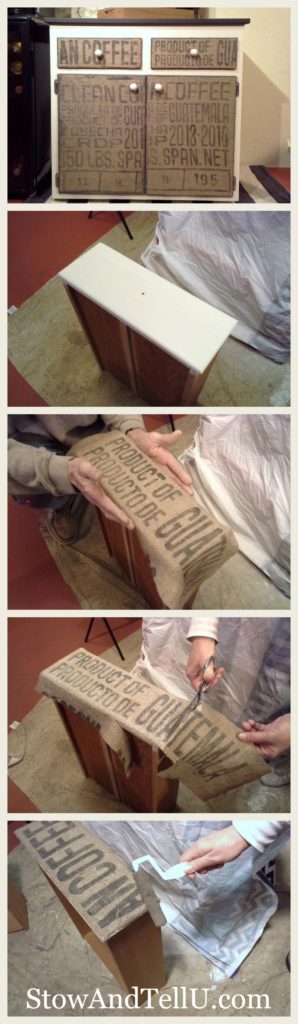
I followed the same steps for the cabinet drawers, per the photo above.
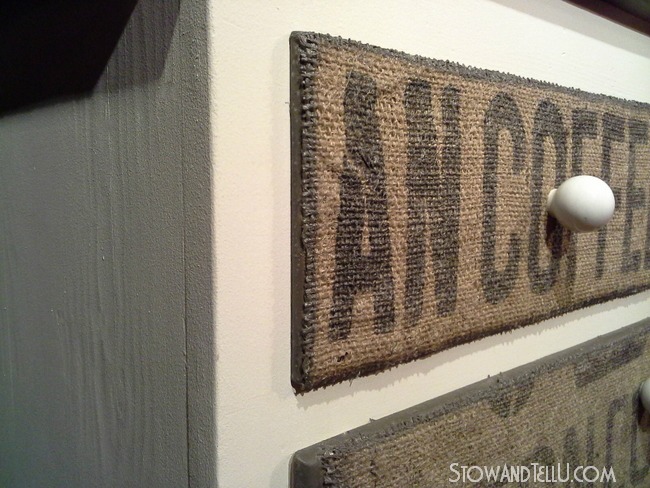
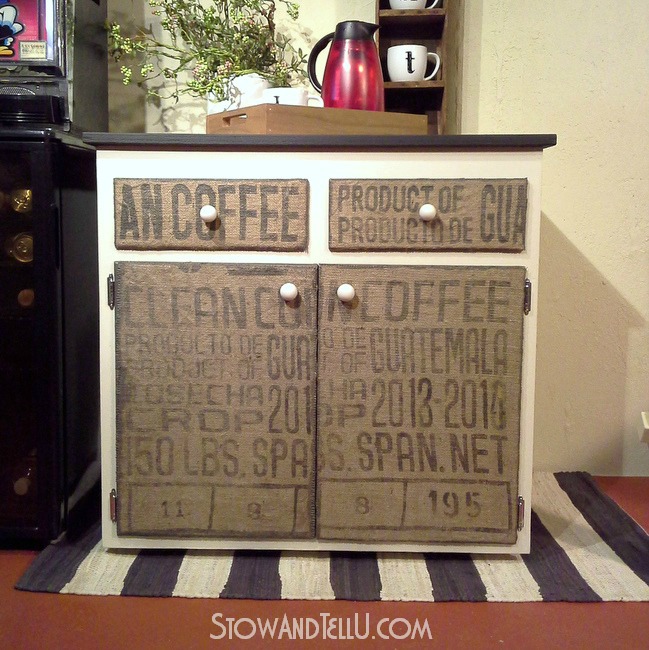
The old, white drawer pulls worked perfectly to accent the entire piece and gives it a touch of rustic, cafe style.
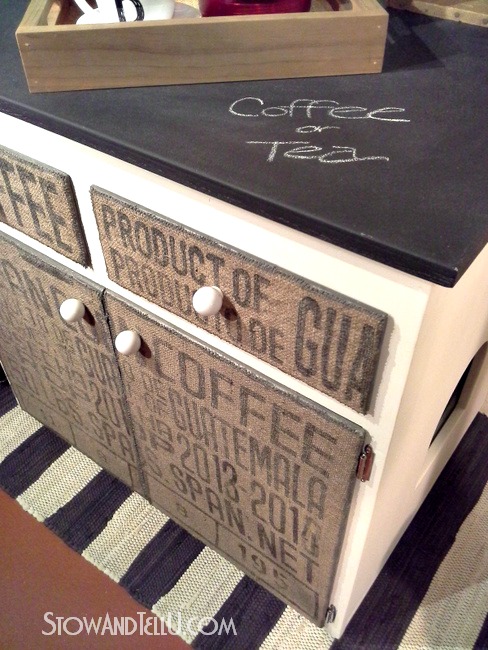
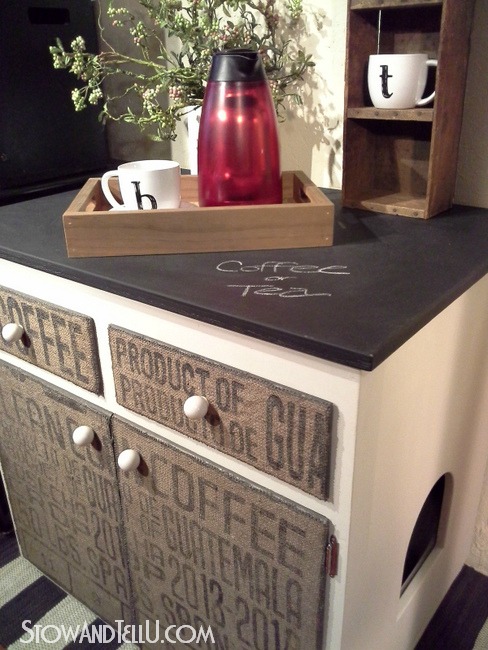
Inspired by this round-up of faux, rustic countertops I posted a few weeks ago, I knew that the faux soapstone or chalkboard painted countertop idea would be a perfect complement to the white and burlap cabinet, not to mention the black accents from Ken’s gaming pieces.
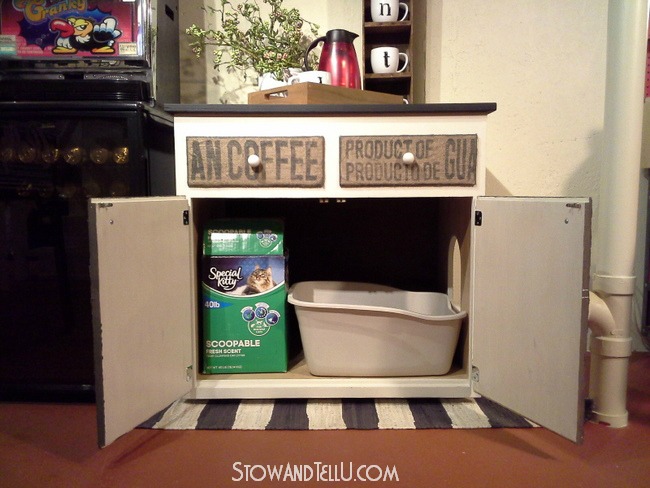
Let’s not forget the incognito kitty litter cubby.
Our Kitty has taken very well to his new “digs”.

It’s hard to believe that after over a year when we started the basement update, we have come this far. Although we aren’t finished, yet. I am thrilled that our hard work is paying off and the basement is starting to look like a livable, perhaps even enjoyable place to hang out!
You can see all basement update posts, here.
You can see all burlap project posts, here.
Thanks ~ Amy
Linking up at:
Thrifty Decor Chick/ Before and After

Anne@designdreams says
That is so fabulous!!! Great job Amy!
Cheryl in Wisconsin says
Amy, this looks great, you did such nice work! Plus, an attractive way to hide the cat box is always valuable.
Perhaps this can be forwarded to Kitchen Crashers, or any other show that promotes the demolition of someone’s kitchen via sledgehammer. It’s simple to identify a new way to use old cupboards! Here’s proof!
Shanna Gilbert says
I love this piece Amy! Such a creative idea for the coffee sacks!
Feral Turtle says
I want to come hangout with you in that basement. You guys have done so much work Amy and it shows. I love this idea and I can’t believe what I thought was a sign is actually part of your cabinet! Amazing idea! I bet your cat loves the privacy too!
Tuula @ The Thrifty Rebel says
I love how this turned out Amy! It looks really amazing! Great way to hide the kitty’s litter box. I agree with Cheryl. Those shows that demo everything and throw it all into a big dumpster have always bothered me. This is such a great example of repurpose, reuse, and upcycle. Fabulous job!
Danni@SiloHillFarm says
What a great and functional piece! I love the burlap and finishing off the edges with the burlap colored paint gives it such a smooth look! Thanks for the great tutorial. I wish we could have cats, but they kick off Sam’s asthma. Great work Amy!
Sharleen says
Fantastic. Love this idea and the way you did it Amy. Looks really good. Love the basement. Thank you so much for sharing how you did this with us. Great transformation and love the colours. Especially the top !, well done. I want one !
Bliss says
Awesome and pinned.
Ashley says
I actually love that your paint on the edges is a little darker. It makes those gorgeous sacks stand out in the prettiest way. You did an awesome job! And I love that you have a pinball machine in your basement lol too cool.
xo Ashley
Diana says
So innovative and creative–it’s not often that you see such an original idea on the internet! I LOVE your burlapped cupboard and am trying to find something to try it out on!
Marie@The Interior Frugalista says
Amy I absolutely love your decoupaged coffee sack coffee station! I going to feature it this weekend at the DIY Sunday Showcase Party!
shelly andrade says
This is absolutely the neatest cabinet transformation ever and encompasses two of my favorite loves all in one piece ~ kitty’s and coffee, who’d a thunk? If the design isn’t cool enough, you also made it double duty for the kitty litter ~ brilliant! I am so going to do something like this at the top of our stairs. Our cat is psycho kitty. I’ve never seen a cat throw litter around like she does.
Amy says
Shelly, our kitty is pretty bad at that too. I will say, keeping the box inside a cabinet is making a difference, for SURE!! So glad you like the piece and thank you for stopping by ~ Amy
Kat says
What a great makeover, absolutely love your transformation, lovely job!!
Amy says
Thanks so much for stopping by, Kat!!
Jessica says
OMG I am in love with this! I have a bunch of burlap sacs that I have been holding on to for the perfect project…this is excatly what I needed to get going! I would love it if you stopped by and linked up to my party! It runs monday 10pm eastern to 10pm sat!! Have a fab weekend!! thank you so much for creating this beautiful piece! Found you at pink when!
Jess
Amy says
Hi Jessica, I hope you get a chance to make one, too. It wasn’t nearly as hard as I thought it was going to be when I considered trying it. Thanks for the invite, I’ll stop over and link up tomorrow ~ Amy
Mary says
Great idea. I just purchased some coffe bean sacks.. Didn’t know I should wash them first.. duh! Thanks for the step by step. Can’t wait to try it out.
Amy says
Mary, I wasn’t sure, either, but since I had some luck with washing burlap both by hand and in a washing machine, yet Bliss had recommended NOT putting coffee sacks in the washing machine, I figured that it would be pretty safe to hand wash coffee sacks. I think it’s still a matter of choice, and not a must, but washing them does remove some of the smell and soften then up. Thanks so much for stopping by ~ Amy