Do you like making your own ornaments? I usually try to do one handmade ornament per year. One of my favorites was the rustic twig Christmas tree, so this year I decided to try a variation. Instead of twigs, I went with moss, but kept the card board base because left over cereal boxes are virtually free. For a bag of natural moss and some glue, I think these ornaments turned out pretty darn cute.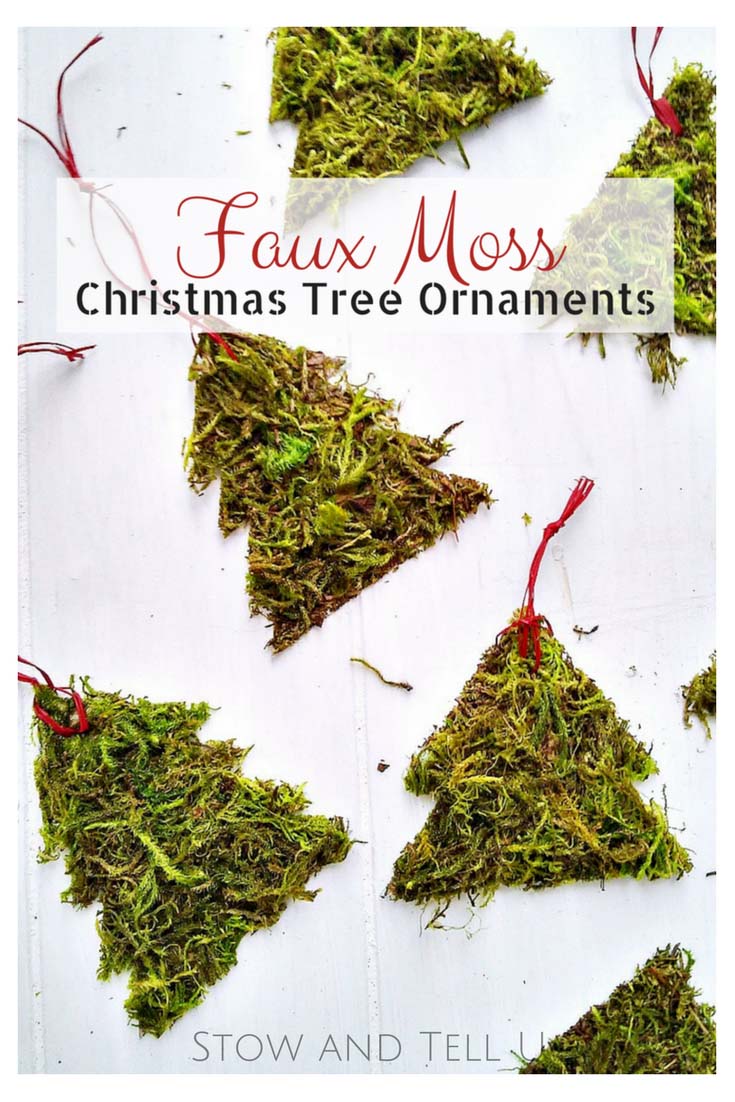 This post contains affiliate links, see full disclosure, here.
DIY moss Chirstmas tree ornaments
I think these would be really easy to do as a group craft or bulk gift project. I created a template for the three types of tree shapes. You can download the FREE template from our resource library, get ACCESS to the library, here.
Supplies:
Card board from cereal boxes or similar. Optionally, I recommend using a green card stock, if possible
Christmas tree stencil – Grab the template from our free printables library, see details, here.
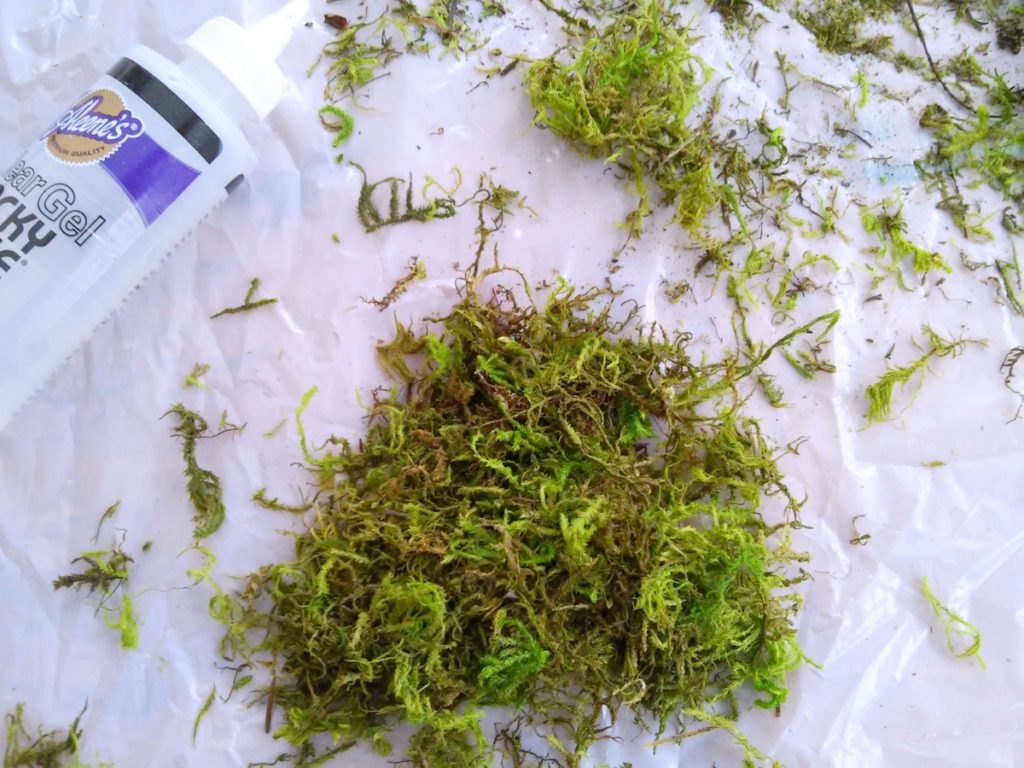
Clear craft glue – This fast drying glue is my one of my favorites.
Moss – I used loose, preserved moss
Craft paint and foam brush (Use a paint color that is bark or mossy in color)
Scissors
Pencil
Twine, raffia or string
Single hole puncher (optional)
*Also optional: Use 2 or 3 twigs (or card stock) to add a tree trunk
Making Moss Ornaments: Follow these 11 SIMPLE STEPS
1 – Cut out the tree shades from the FREE printable tree template in the Printables Resource Library, get ACCESS to the library, here
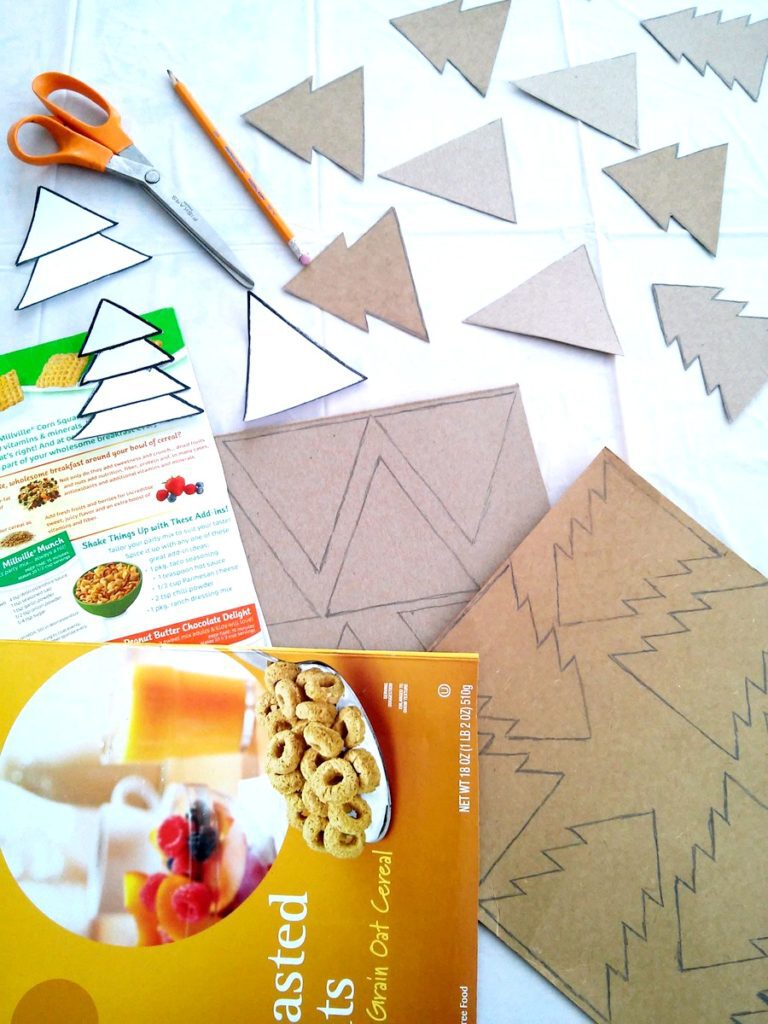
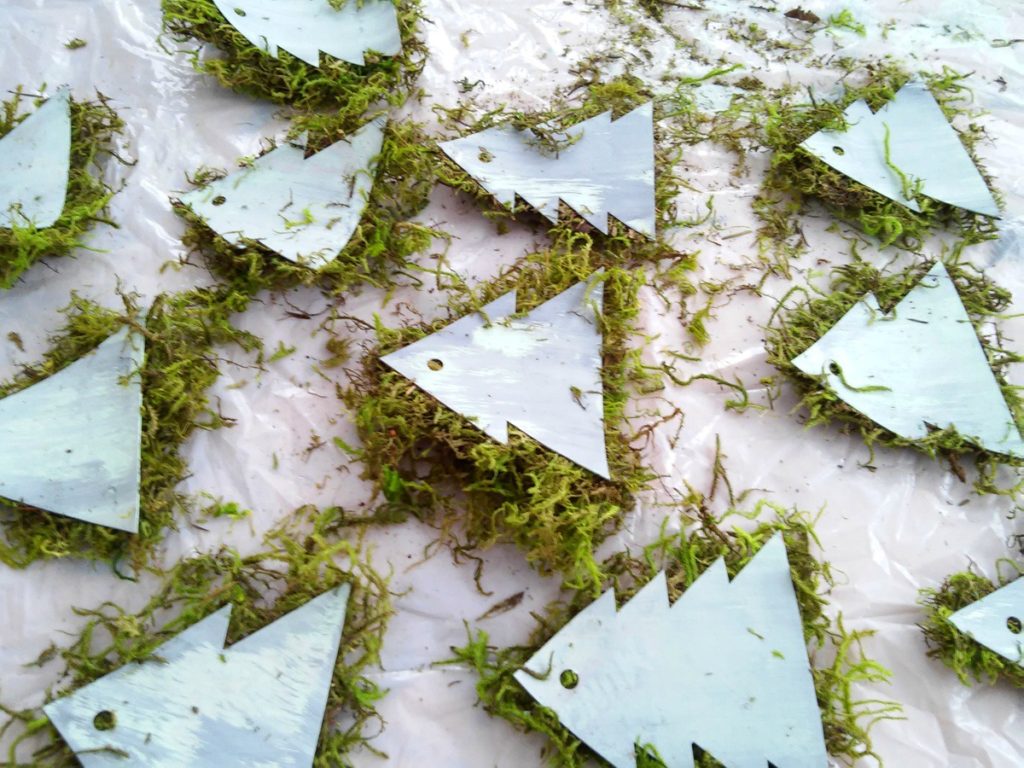
2 – Trace the shapes onto GREEN CARD STOCK (recommended method), or trace them out on card board, as I did.
3 – Cut out the card stock (or card board) Christmas trees.
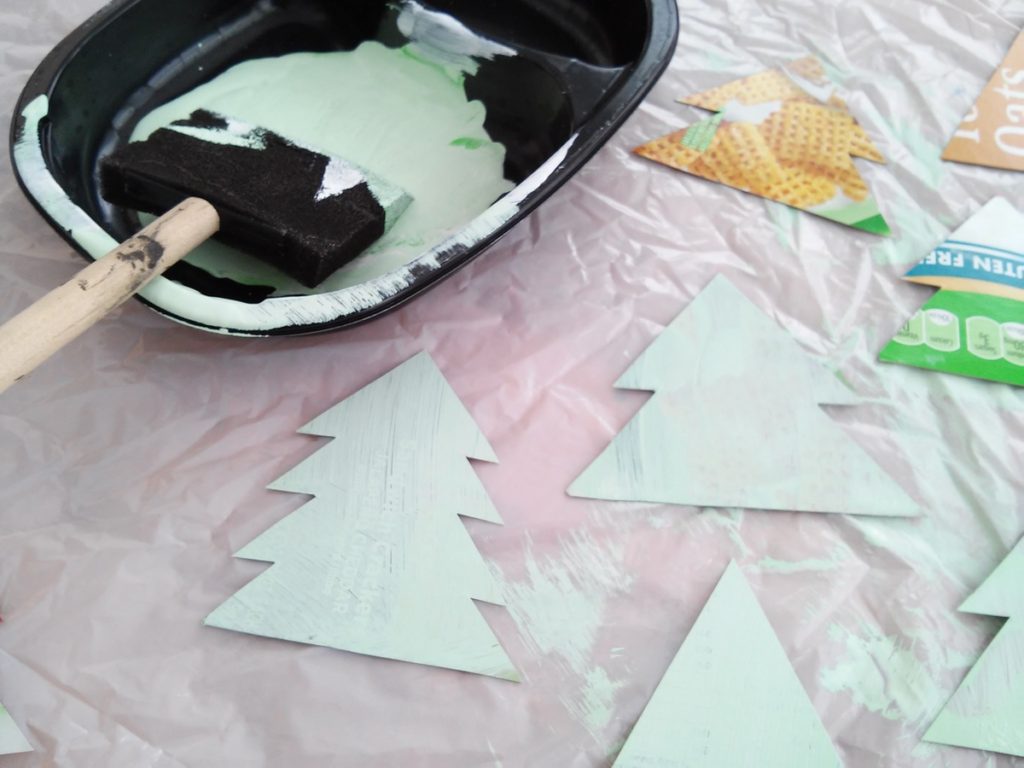
Note: I used a green/ gray paint mix and only painted one side. After making my first batch, If you are going to use cardboard, I recommend painting both sides of the card board and using either a bark colored brown or mossy green craft paint instead of the color shown in these photos.
4- Paint both sides of card board trees, let dry. (You can skip this step if you use the card stock).
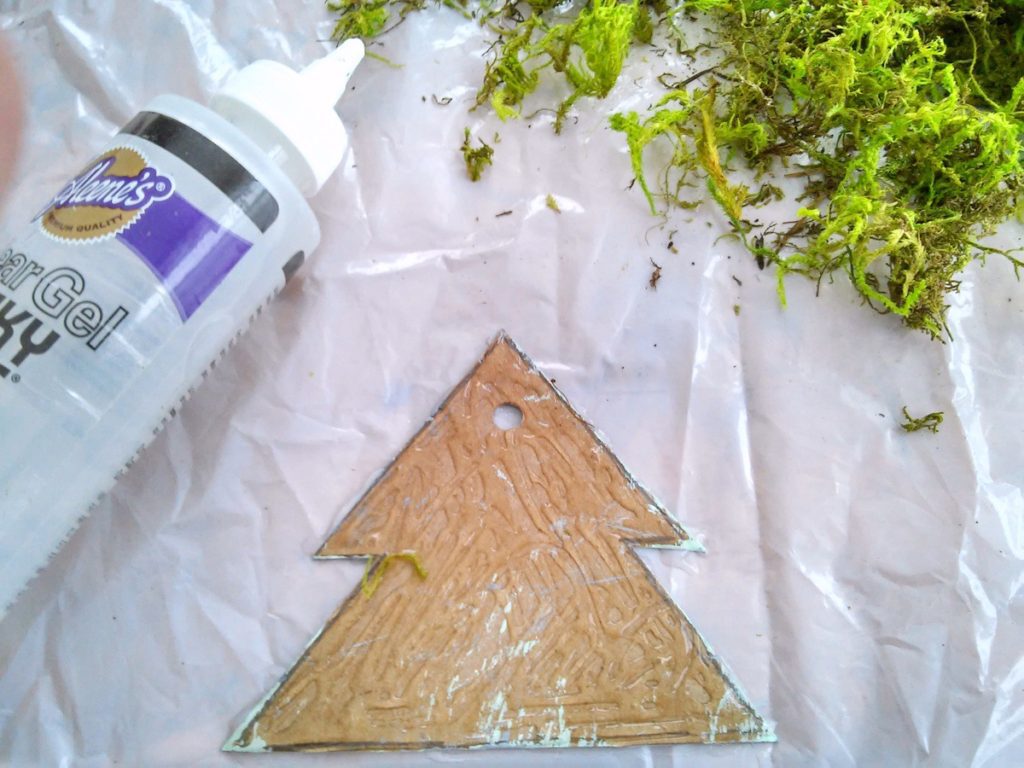
5 – Use single hole punch to make hole for twine hanger. Don’t make hole too close to edges. If you don’t have a hole puncher, use a pencil, as shown here.
6 – Pull some moss out of the bag and pull it apart into smaller clumps.
7 – Apply glue to one side of the card board, then place clumps of the moss on top of the glue.
8 – Press down on the moss to squish in place.
Note: If you paint the card board a bark or moss toned color, you won’t have to be as heavy handed with the moss as I was with these. Because I used loose type moss, some of the moss will shed off. A moss mat or sheet could also be used, but I really like the look of the loose moss, personally.
9 – Turn ornament face down to dry. Card board should straighten out when dry. (Note, I had a little problem with the card board curling up a bit because it got wet from painting. That is why I recommend a greenish toned card stock.)
10 – Once completely dry, trim off excess moss with scissors by following the shape of the card board trees. Optional: If this doesn’t seem quite finished looking to you, glue a few twigs or some dark brown card stock to the back side to create the look of a tree truck.
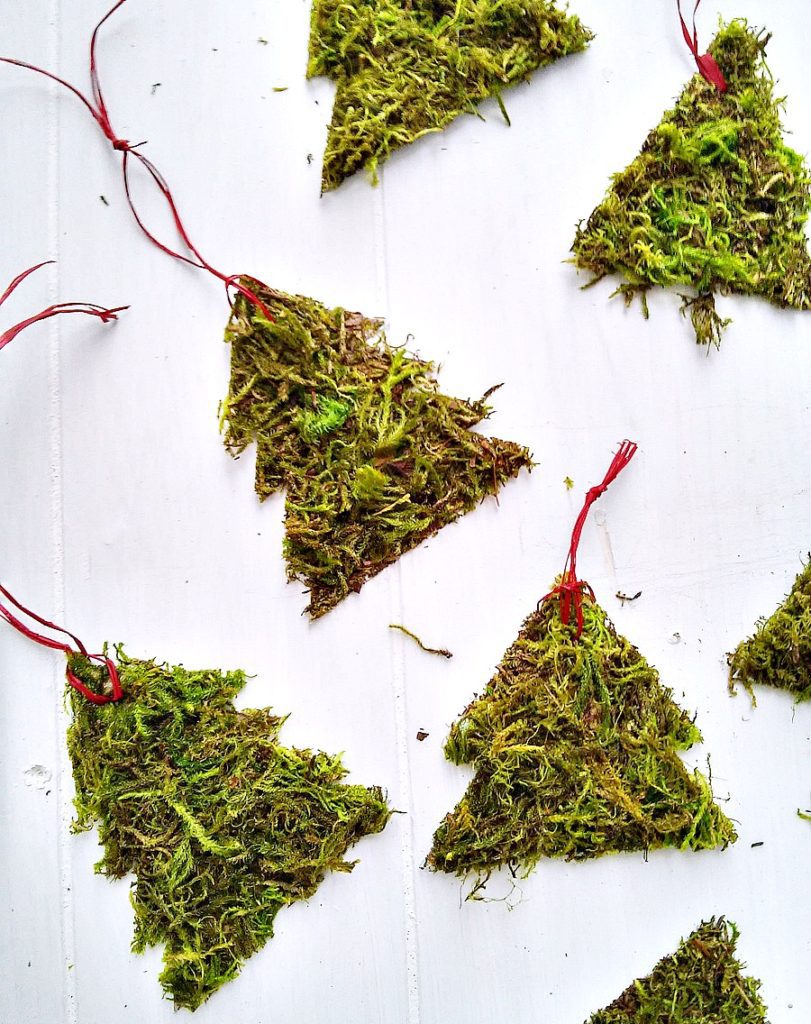
11 – Re-poke hole for hanging with a scissors or pencil. Insert string, twine or raffia to make an ornament hanger.
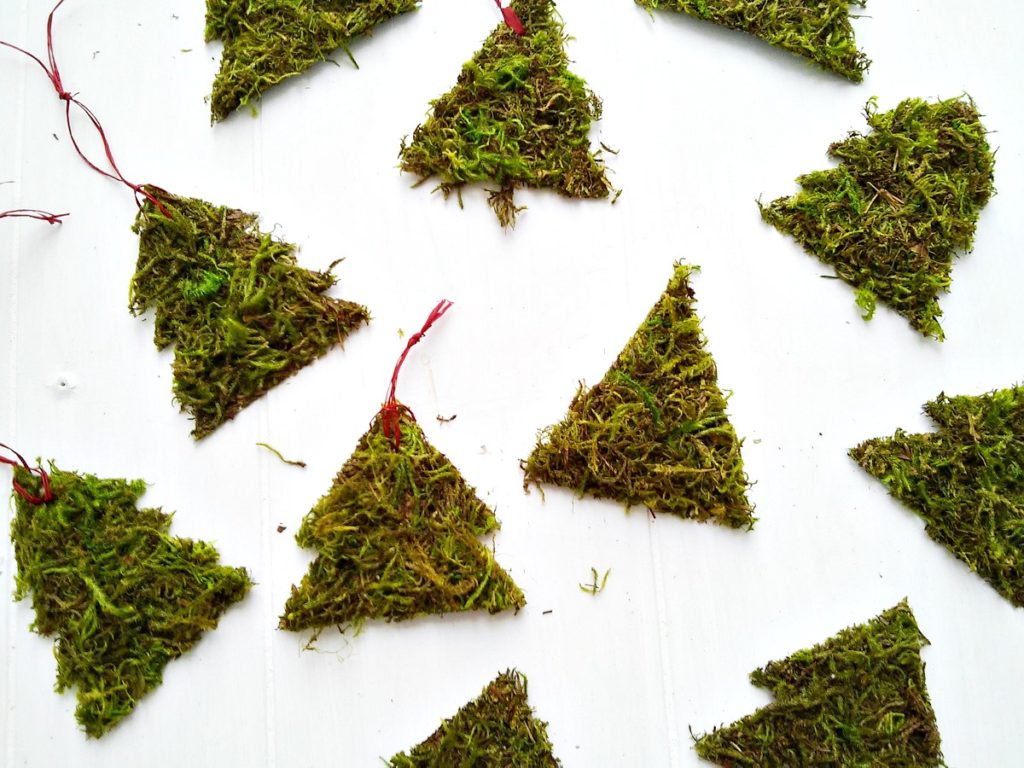
It’s a simple, rustic handmade holiday gift idea, and I think it would make for a fun group-craft project because it’s easy, inexpensive and doesn’t require a lot of materials.
Consider writing a message on the back side, or use a gift tag and write the gift receiver’s name on the back. Put one at each place setting for a party table. Attach them as embellishments to your wrapped Christmas gifts.
Simple DIY Holiday Decor
- 6 Christmas Crafts Inspired by Nature
- Twinkling Twig Christmas Luminaries
- Colorful Thankful Wreath FREE Printable
- 5 Minute Winter Reindeer Art
Scroll on down for the Creative Christmas Link Party, where you’ll finds plenty of holiday ideas to get you decorating for the season.

Anne says
These are adorable!!! So cute Amy! Have a wonderful weekend xox
Donna Harvey says
Hi Amy Great idea! I’m making an Old Fashioned Christmas Tree that little Tree will work great Thanks
Amy says
And have fun making your Old Fashioned Christmas Trees, Donna. Sounds fun!!
chris aka monkey says
amy very cute and easy, but I’ve got you beat with two kids 3 and 4 lol and 3 dogs these would have to be put on the top of the tree with the crystal ornaments xx merry Christmas
Sharleen says
so cute Amy. you are always so creative.. I just wish i could find some of that moss where i live.. 😀 I love nature crafts..
Libbie says
I love the rustic/natural feel of these!!
Amy says
I should have given these a twig “tree trunk”, for just a little more “rustic”. Thanks Libbie
Kristi says
So totally cute and I love that they are easy! I’m definitely going to give this a try.
Amy says
Easy ornaments are the best kind, right?
Thanks so much Kristi. Have a happy Thanksgiving.
Amy
Kathy A says
Love these trees. I scored a sheet of stickum-on-the-back moss @ Goodwill. Think I might keep it simple and trace a cookie cutter! I seem to be the only one in my Ladies Aid group at church who LOVES making Christmas ornaments. Survived our bazaar and they want to do it AGAIN! Maybe I’ll have time to make a few! Thank you!
Florence @ VintageSouthernPicks says
Amy, these are adorable, and I love that this is such an easy craft! Cardboard is plentiful around here. Pinned. Visiting from BF group.
RandiG at FrugElegance says
Wow, absolutely love these!! I can see them being fabulous accent on gifts boxes & gift bags too. Plus, the person who receives one can then hang it in their home too.
Visiting from Blogging50 😉