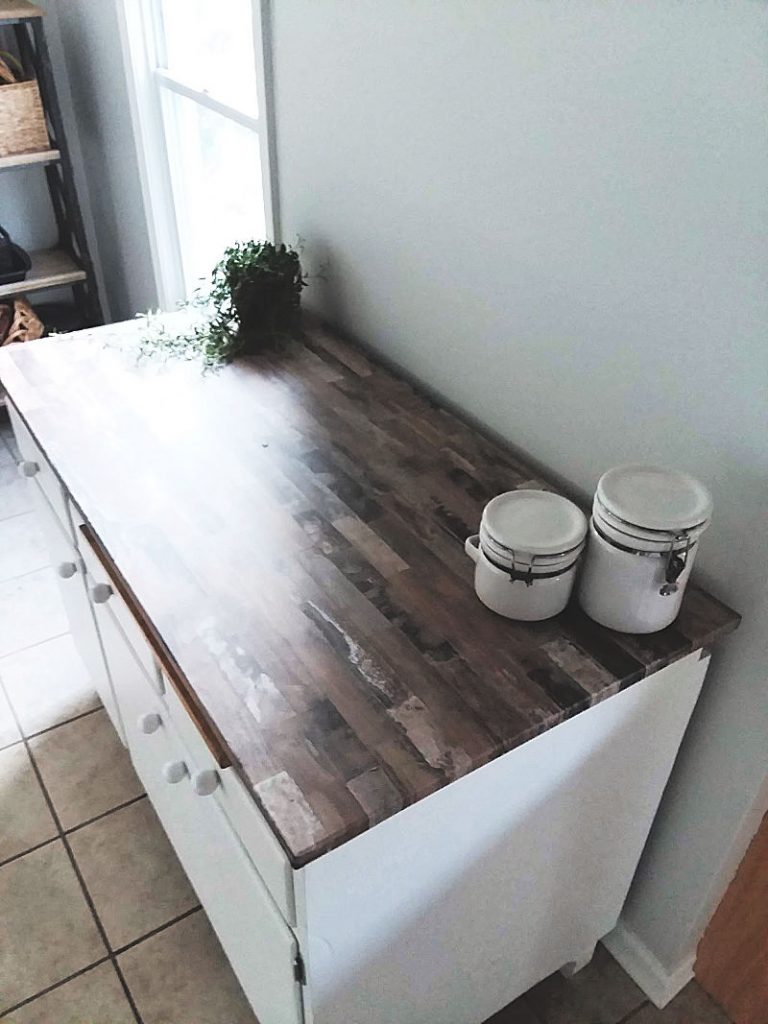
Do you have an unsightly counter top or table top that you’d like to cover without a lot of hard work? We had a worn-out kitchen sideboard countertop that looks like rustic wood, now. Oh, and this was one of the easiest and cheapest updates I’ve done in quite some time. No help from Ken. Follow these step-by-step directions for how to create a faux wood countertop using peel and stick removable wallpaper. This will help you cover a counter top or plenty of other kinds of “tops” pretty quickly. And it will look cool when you’re done. I pinky swear.
My son and his girlfriend were coming into town for a visit so I finally committed to painting the kitchen. Gone are the lime green and yellow walls that we have been living with since we moved in, replaced with a subtle light gray.
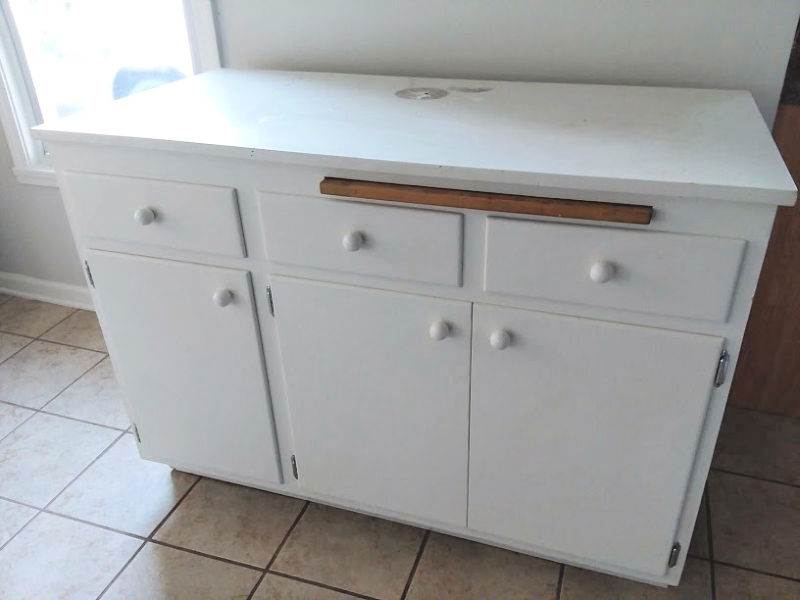
We’re not ready for a full kitchen update at this point but the counter top of our current kitchen sideboard was stained and unsightly, to say the least.
I purchased some peel and stick removable wallpaper that had the appearance of rustic wood for another project, but never used it.
So, I decided to try and cover the sideboard countertop with it now. While I wouldn’t say it’s a long-term, permanent solution for a kitchen top surface, I will say, it was a breeze to apply, it’s waterproof and should last us quite some time to come.
How to Make a Faux Wood Countertop with Peel and Stick Removable Wallpaper
This post contains affiliate links. Read our full disclosure, here.
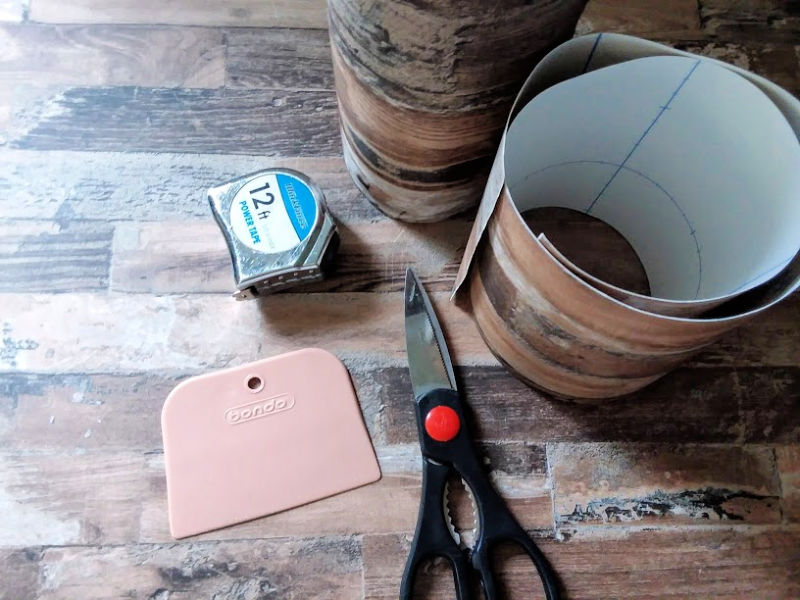
Supplies
- Removable Peel and Stick Wallpaper – Honestly, most removable papers should work. I went with this one
- Measuring Tape
- Scissors
- Utility knife
- Pencil
- Degreaser – I really like Simple Green
- Sanding sponge (optional)
- Wallpaper smoothing tool – for smoothing bubbles, corners, and overlaps
Prep Surface
Clean surface – Scrape off any residue and/or lightly sand with a sanding sponge. Next, clean with dish soap and rinse well to remove soap residue. Then clean with a degreaser, I like using Simple Green. Then, once again rinse well to remove residue. Let the surface completely dry.
Clean hands
Wash hands thoroughly before starting. I found that removing and readjusting the wallpaper worked without issue, but it can’t help to give your hands a good scrub before starting to make sure your peel and stick surface stays as sticky as possible and free of the natural oils on your hands.
Measure and Cut the Faux Wood Peel and Stick Wallpaper to fit the Countertop
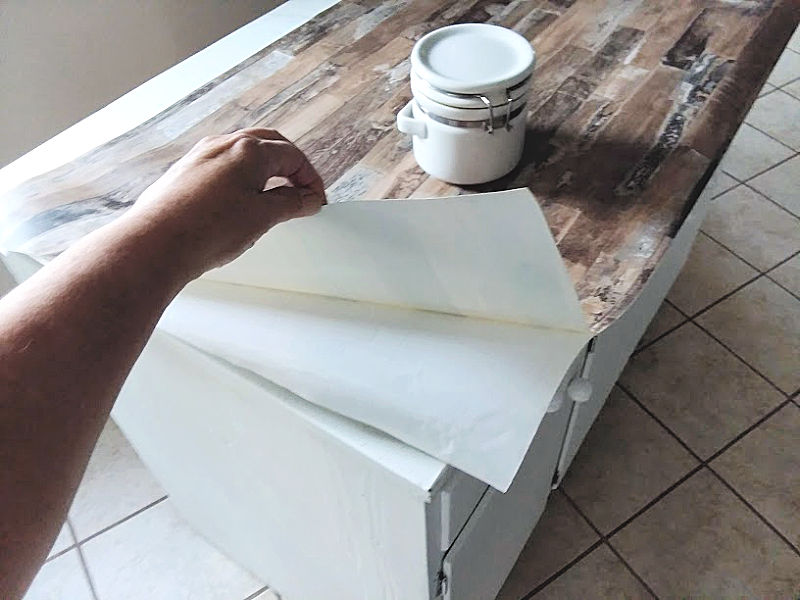
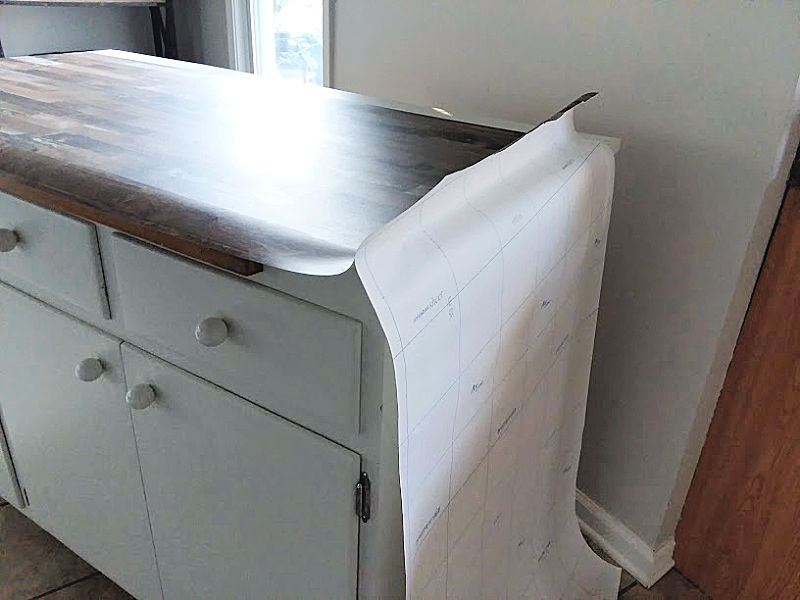
- Unroll the wallpaper and lie it flat on top of the counter to let it rest in an unrolled form.
- Place the wallpaper so that it hangs off the front edge with enough wiggle room to be able to wrap it and attach it underneath the front edge. Note: Wrapping the front edge will be done more toward the end.
- Moving right along, place a few heavier items on top of the film to weigh it down. I used a set of ceramic flour and sugar containers.
- Move the wallpaper to place by folding the end of the paper under the lip of the counter. I did this for both the side I was starting on and the front of the counter.
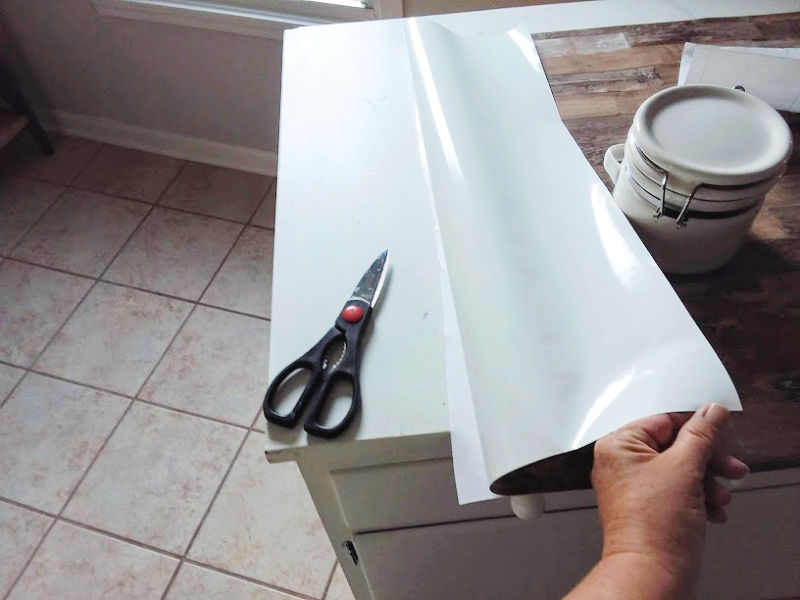
- Trim off the excess on the opposite side using a utility knife, making sure to leave a bit of excess for wiggle room. In my case, I had excess on the opposite side. If you are doing a larger countertop, this may not be the case, so you wouldn’t have to do this step.
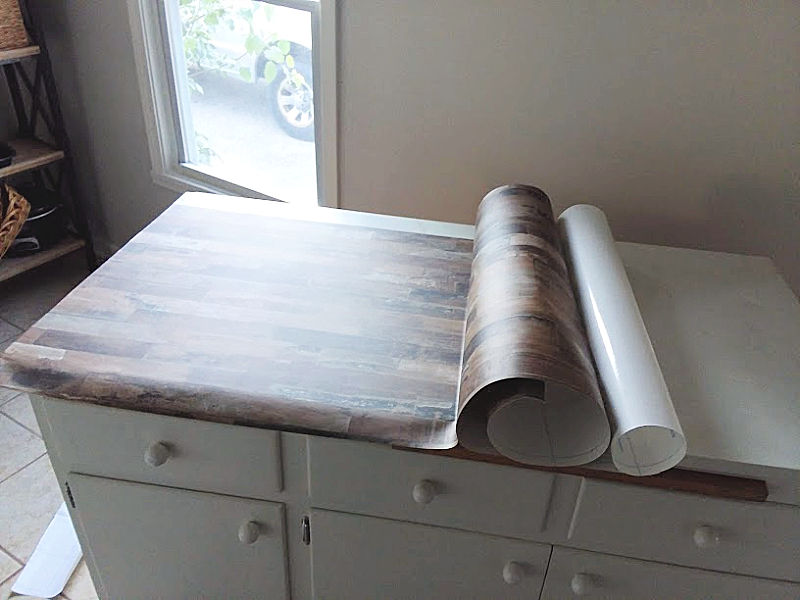
At this point I had a sheet of the peel and stick wallpaper trimmed to size with enough overlap to wrap around the countertop ends on all three sides. I also used the two ceramic containers to keep the film in place.
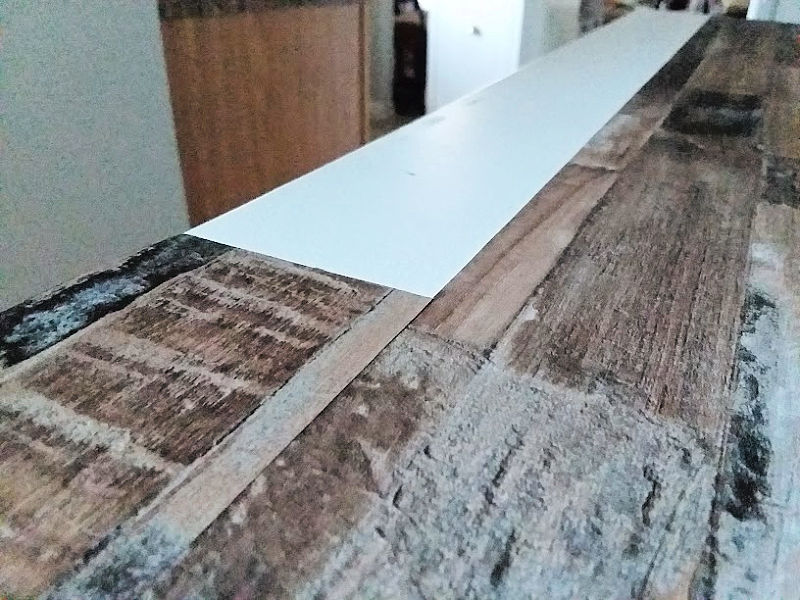
Additionally, since the width of the roll was not wide enough to cover the full depth of the countertop, I will be using the excess from the roll to cut several more pieces to lay along the backside of the countertop.
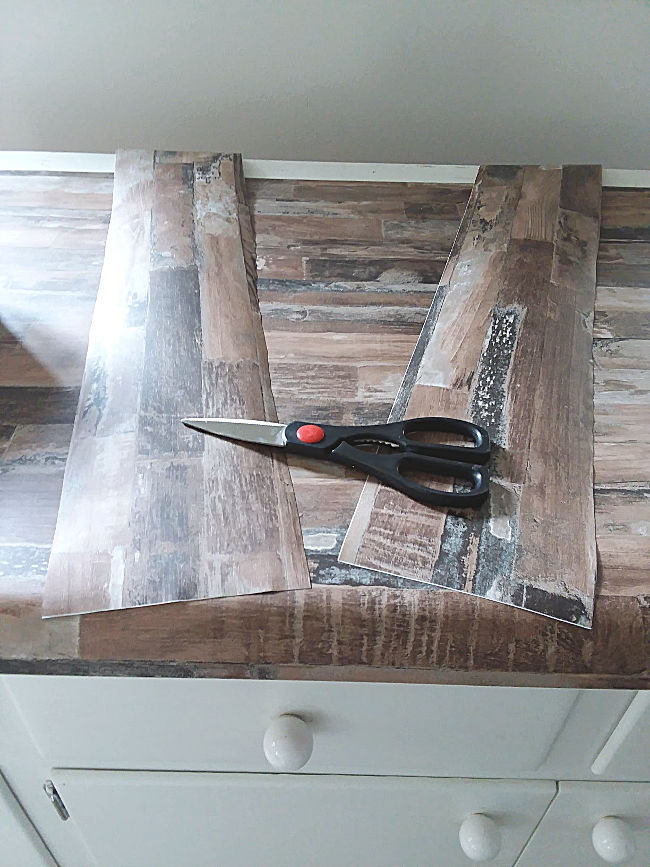
- Cut pieces from the remaining part of the roll to cover the back portion of the counter top (optional- this step may or may not be needed for your project). I cut two pieces both about 6 – 8 inches wide and about 20 inches long to cover the back portion of the counter top.
These pieces could be adhered first, before the larger piece, but I choose to adhere them after I adhered the larger piece. Put these pieces aside if you’re adhering to the larger piece first.
Adhere the Peel and Stick Wallpaper to the Countertop
- Starting at one end of the countertop, pull the wallpaper away from the counter.
Related: Boho Style Wallpapered Coffee Table
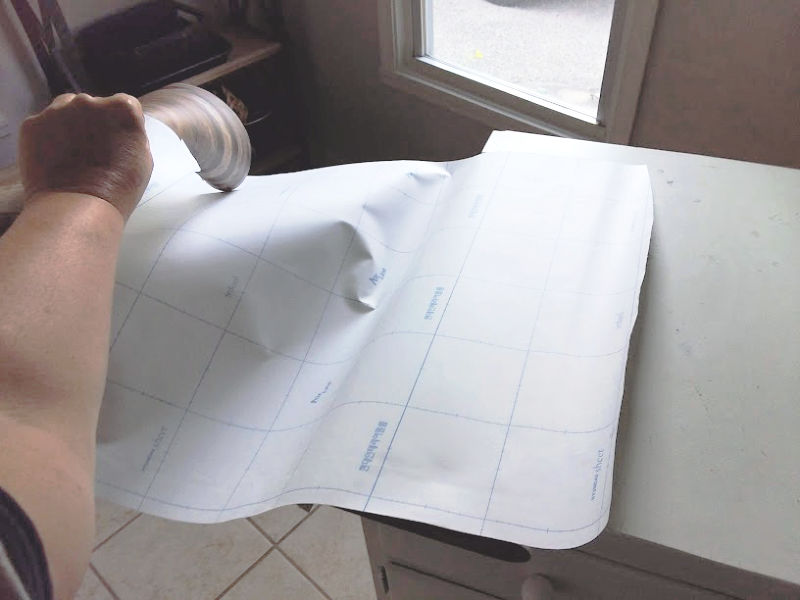
- Peel away about 6 – 10 inches of the backing and cut the backing off with scissors.

- Gently lay the wallpaper back down onto the countertop and smooth with hands. A wallpaper smoothing tool may be needed at this point depending upon the brand of peel and stick wallpaper used. If so, use the tool to smooth out any bubbles or ripples. The brand I used laid down so nicely, I didn’t need the tool, but it’s a great tool to have if needed.
- Next, remove the weights or in my case, the ceramic containers.
- Then flip the entire sheet of wallpaper away from the countertop toward the end so that you can pull away another 12 inches or so of the backing.
- Once the backing is pulled away, flip the wallpaper back onto the counter top and smooth it down. (The backing does not have to be cut at this point, just peeled away a section at a time).
- Repeat the above step until you reach the opposite end of the counter top (or the end of your roll).
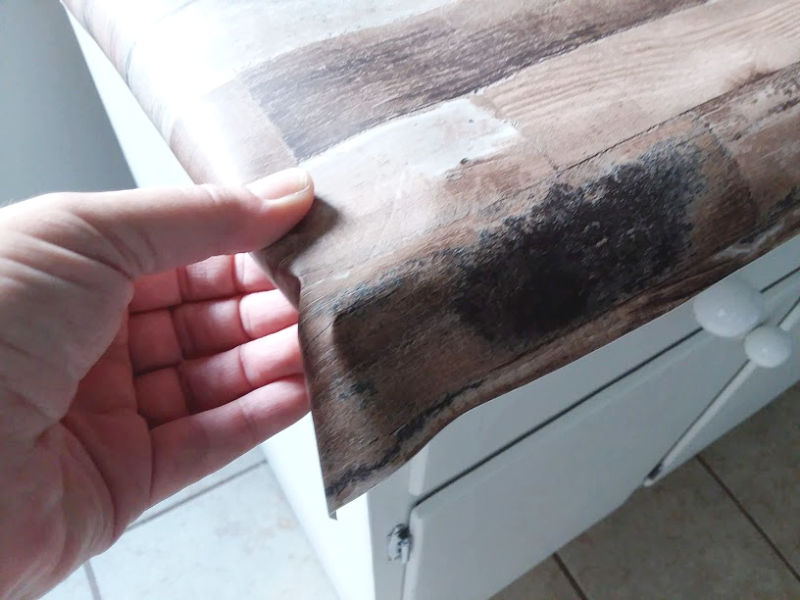
- Pull the remaining part of the backing off, then roll and smooth the wallpaper around the edge and underneath the counter top. Trim excess underneath with a utility knife if needed. Also Note: If you’d rather leave the whole role intact, you could probably do it that way, then trim off the end after you’ve adhered the rest. Cutting to size beforehand can be a little tricky if you don’t want to cut it too short.
At this point, the wallpaper should be adhered from side to side under the counter top edges, but should still be un-adhered along the front of the counter top.
Attach the wallpaper to the front and corners of the counter top
Note: There are many ways to do this. My way may be confusing, but it was the easiest way I found to form the edges.
Note#2: Doing one corner at a time works best.
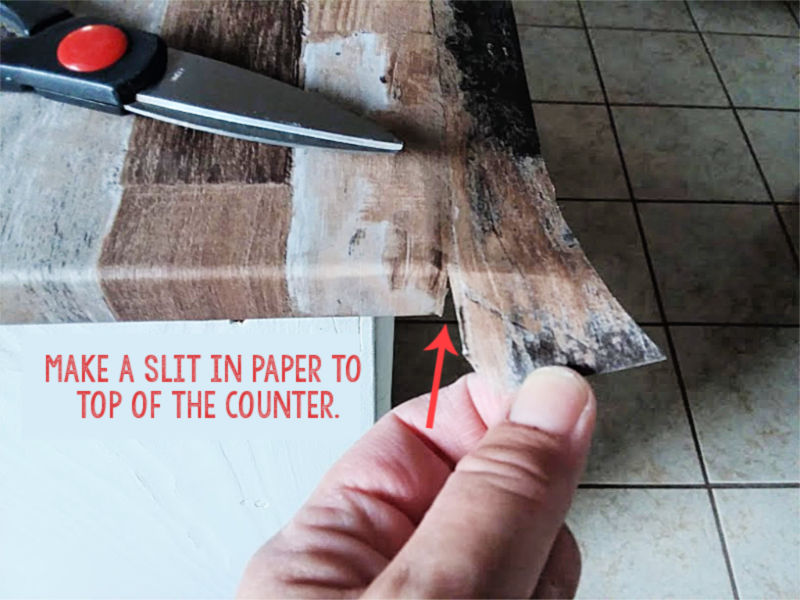
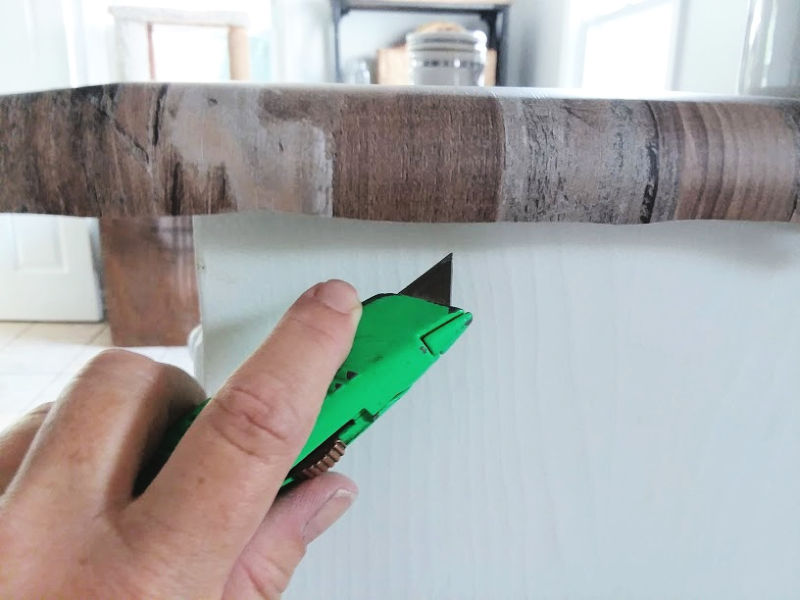
- At the corner of the counter top, use a pair of scissors to make a slit from the underside to the top front of the counter.
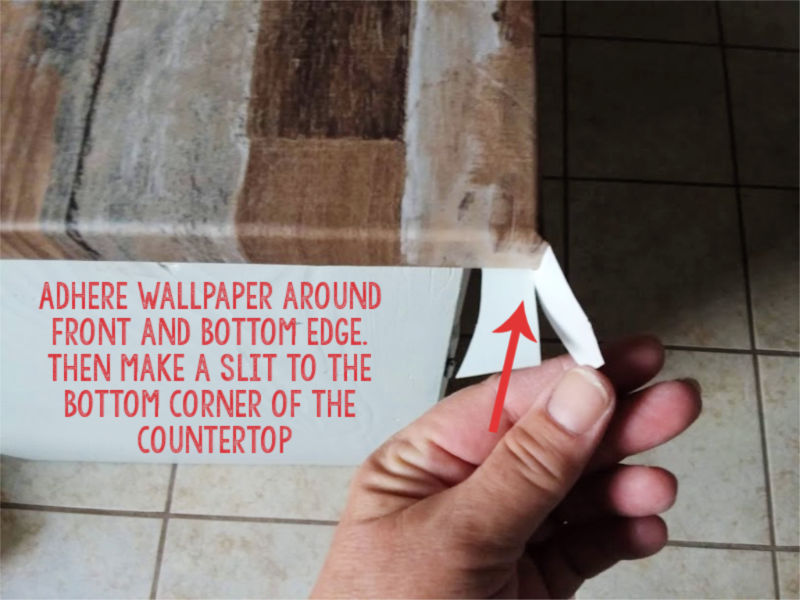
- Fold and attach the wallpaper around the front edge and underneath the front of the countertop.
- Next, using the scissors, make a slit in the excess along the bottom edge of the front lip of the countertop.
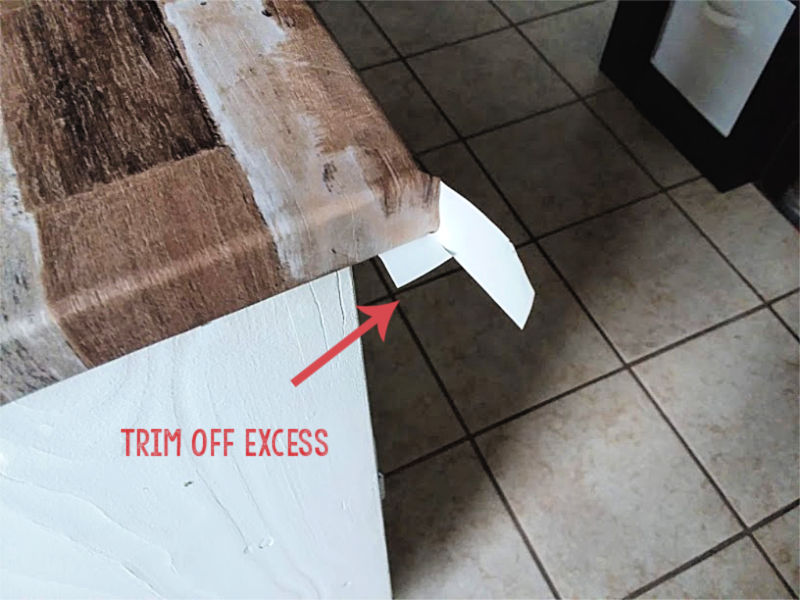
- Then trim the excess of the back piece down to about half an inch.
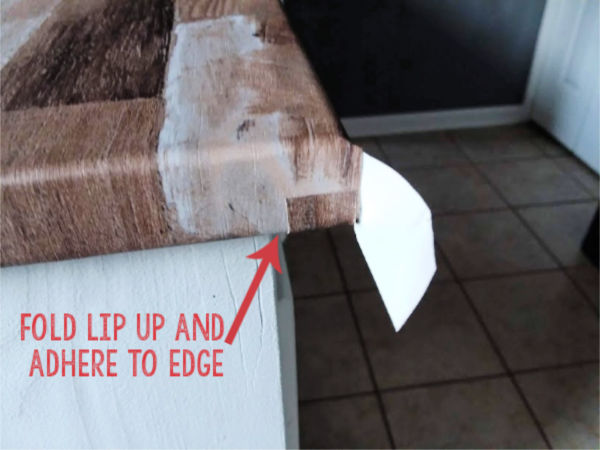
- Fold up that small half-inch piece onto the side of the countertop edge.

- Finally, fold the last piece over the small piece onto the side of the countertop edge.

- To soften the edges, roll the corners with the wallpaper smoothing tool. The corners felt a bit sharp to the touch. Using the smoothing tool to flatten down the adhesive to the top took the edge off, so to speak.
- Repeat steps for the other corner.
Lay the excess pieces along the backside of the countertop
Notes: some countertops have an edge that goes up in the back. The top in our example was flat, but the same principle of laying down an excess piece could apply. The difference might be in which piece you lay down first. Or your wallpaper is wide enough that you don’t have to piece-lay the covering.
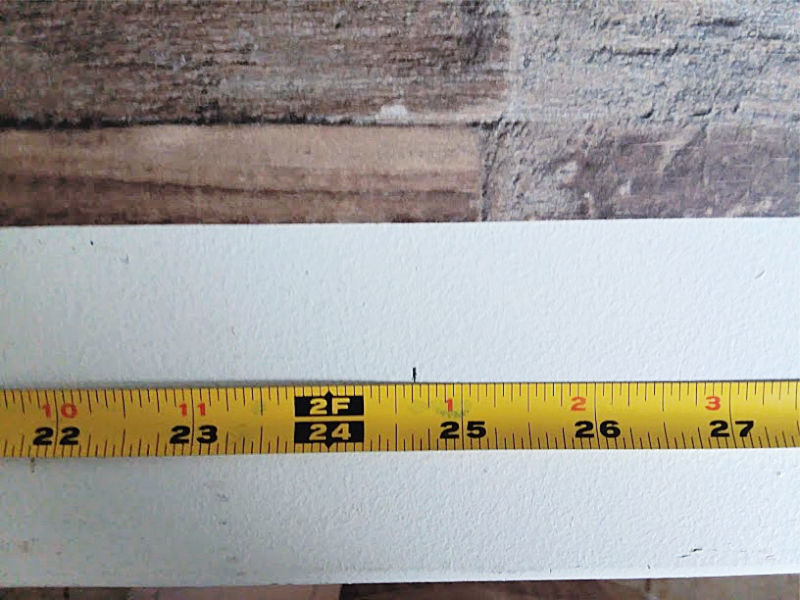
- Use a measuring tape to mark the center of the backside of the counter top from left to right.
- Peel away part of the backing for one of the wallpaper pieces and line it up to the center marking going from the center outward to the end.
- Once you like the placement, peel away the rest of the backing and smooth down. I also lined it up to the edge of the larger piece.
Optionally, the wallpaper could be overlapped, but because this paper is removable, I was able to readjust it to get a good line up. Another option would have been to lay the back pieces down first, and then overlap slightly onto the back pieces with the larger front piece.
- Repeat these steps from the other half of the backside of the top.
- Trim and fold the back edge and corners the same way as per the directions for the front.
- Use the smoothing tool to soften the sharpness of the edges.
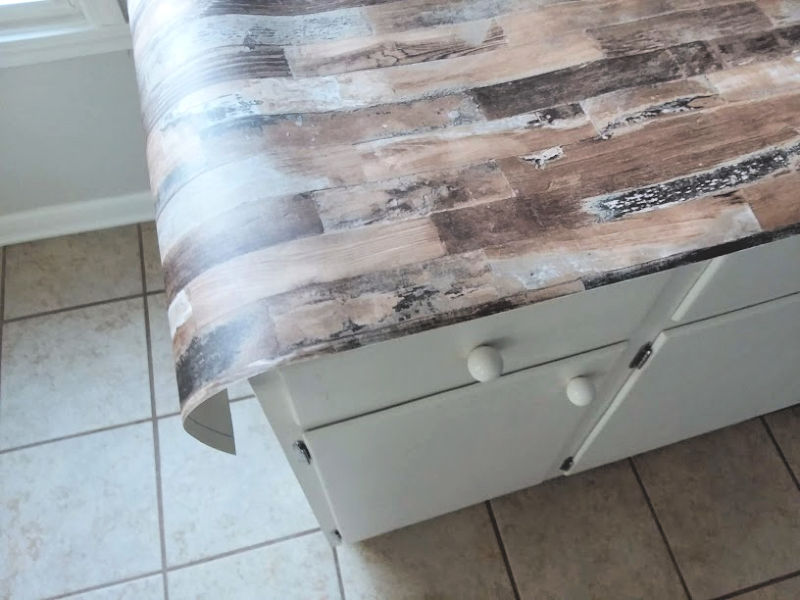
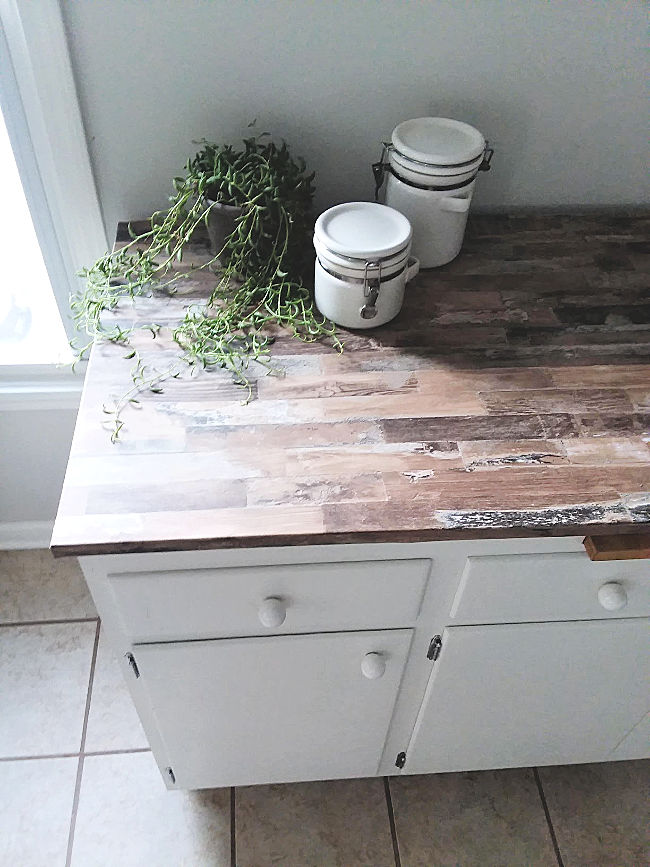
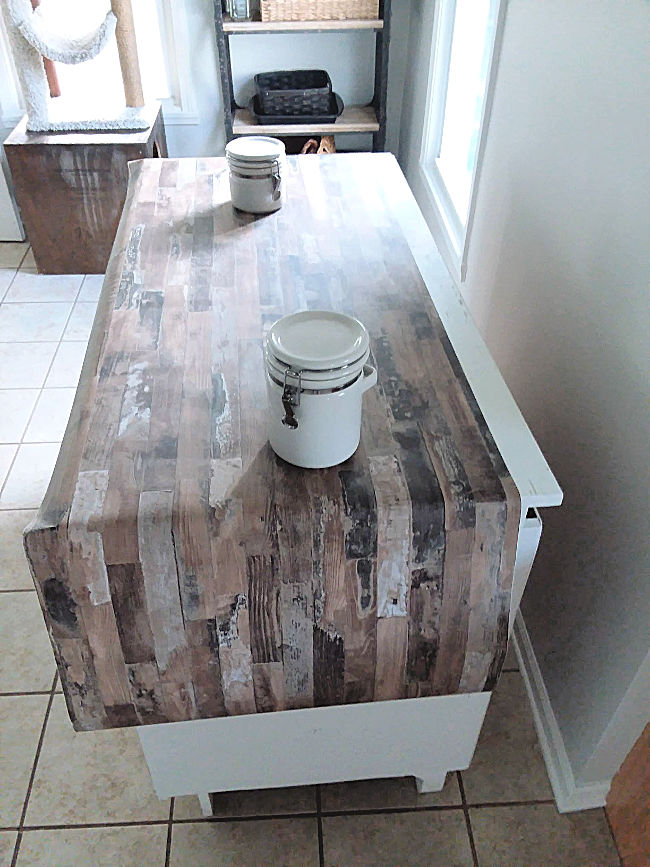
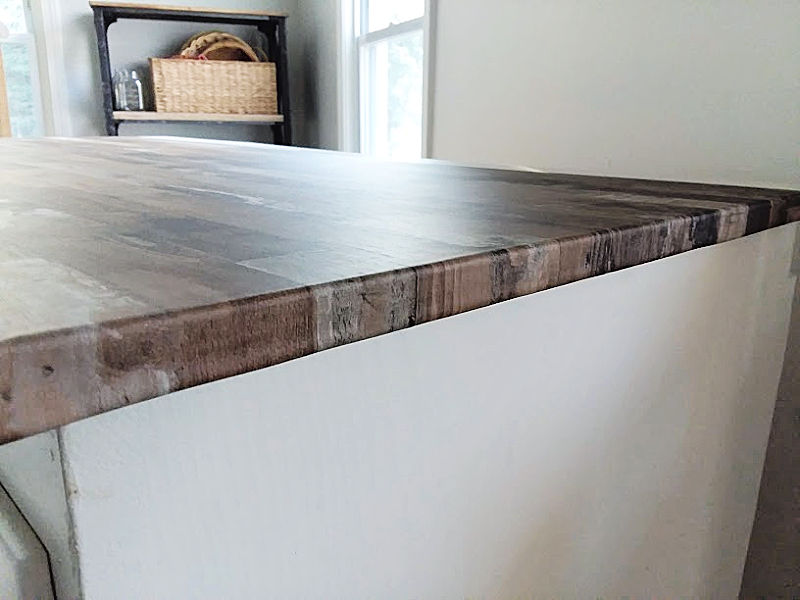
And look at that.
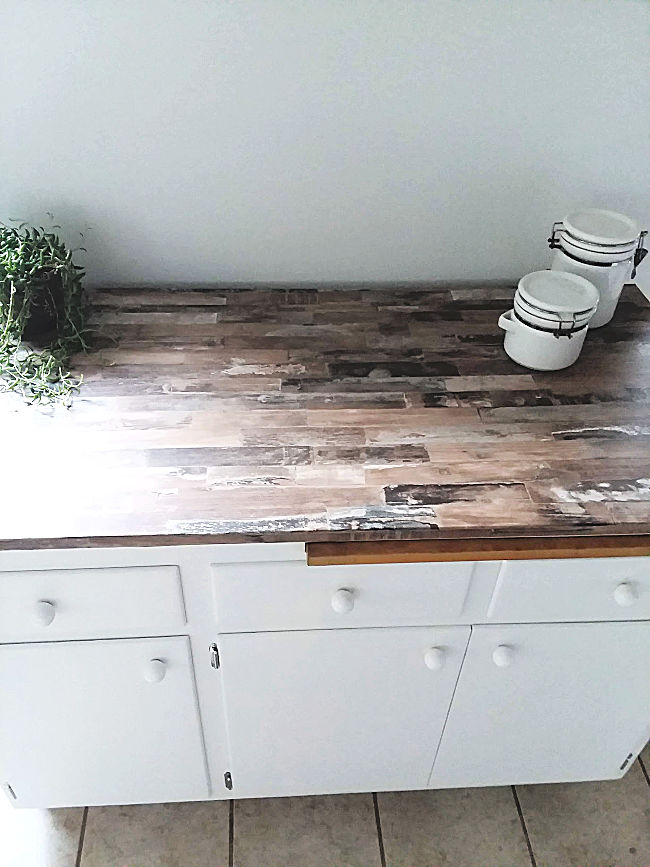
Now we have an updated countertop that appears to be real wood, at least at first glance.
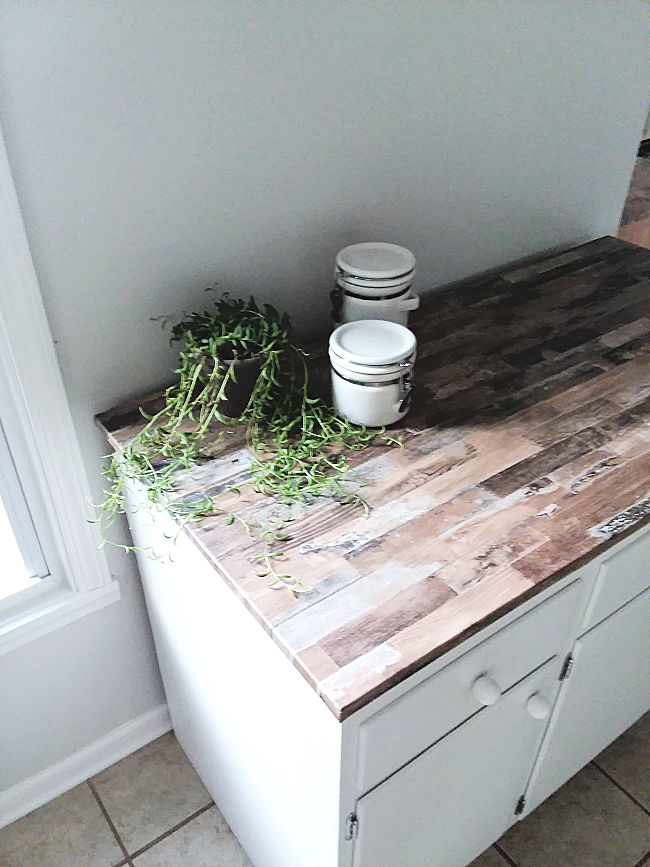 Closer inspection will give it away, but that’s okay in my book.
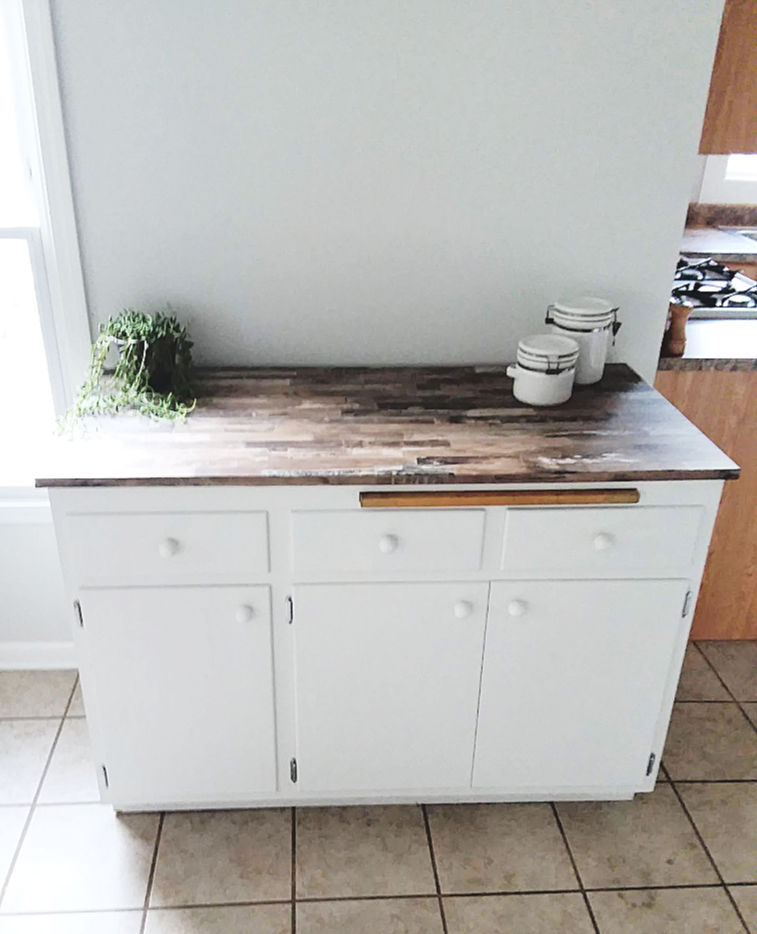
I completed this whole project myself, so I think it’s safe to say that covering a countertop with removable wallpaper is easy enough to do for one person.

And best of all, it was done on a shoestring budget (under $40.00) in about 2 hours time.
Like this idea! Pin or Share to find it later!
More DIY Project Ideas for the Kitchen
- 5 DIY Rustic Faux Counter Tops
- 20 Pantry Ideas for a Small Kitchen
- IKEA Rast Hack Potato Bin
- Tips for Open Kitchen Shelving Storage
Bliss says
Well huh. It looks real, and it looks better, a great update for sure! I have been seeing lots about the peel and stick walpapers, is it in stores or online?
Amy says
Both in-store and online. Of course online has more selections as we all know how that goes these days.
Diane says
Hello! I love the wallpaper . Where did you buy it from ?
Thank you
Amy says
Hey Diane,
I emailed you the link.
Felicia K. says
Hi. Great job. Could you please send me the link of where you purchased the wallpaper. Love the style. Thank you!
Amy says
Hey Felicia,
Here is the link to the wallpaper https://amzn.to/3kqKnla (affiliate). It does look like it is still available. Ours is holding up really well.
Good luck!
Amy
Linda Bierie says
Do you not have to apply a glaze or something overtop to prevent water from damaging it? Forgive me if you explained and I missed it.
Amy says
Hi Linda,
The Peel and Stick Wallpaper I used is waterproof, so I did not have to put any sealer over it. I have been cleaning it with a bit of Dawn dish soap and warm water, then wiping it dry. I would think as long as you choose a waterproof wallpaper, it should work for you as a budget friendly semi-permanent option.
Jess says
Have you ever tried to remove some? I am wondering if I did it how hard it would be when my lease is up to remove it? Thanks.
Amy says
Hi Jess,
I haven’t ever tried to remove the peel-and-stick paper, but this type of paper is also usually “removable” as well. Several things I can recommend are 1) Test a small section. Apply a strip. Wait a few days then try to remove it. If it is still easy to remove after several days, you should be okay. 2) Look for the word “removable” in the product description info details. 3) Read this article about peel and stick wallpaper (which includes how to prep the surface for best results): https://www.limitlesswalls.com/articles/peel-stick-wallpaper-come-off-easily/
Finally, since you are applying it to laminate countertops (I’m assuming) which are less porous than a painted wall, it will probably be even easier to remove, altogether.
I hope this helps. Let me know if you have any other questions, and good luck!!
Amy
Mikayla says
How many rolls did you use?
Amy says
Hi Mikayla,
I used one roll for this project. The roll wasn’t wide enough to cover the depth of the top in one piece, so I had to splice in the back section with a piece from the excess length. I hope that makes sense. Let me know if you have any other questions.
Thanks so much,
Amy
lisa deyo says
How well is this holding up? We want to do our countertops without spending a ton. And I really love the look. You did an amazing job. Thank you
Amy says
Hi Lisa,
Ours is holding up really well and I think it’s a great option for updating countertops on a budget, but I will say this method might only last a few years, so if you are in it to update for several years until you can buy new countertops (or re-apply new peel and stick wallpaper), you should be good to go. If you are looking for a longer-term method, consider: Daich Spreadstone, you can find it at Home Depot and Lowes.
I hope this answer helps. If you go the route with the wallpaper, you’ll love it I’m sure.
Thanks so much,
Amy
Leah says
Would this option be waterproof enough to use on actual kitchen counters around the sink and stove?
Amy says
Hi Leah,
I did not apply mine around a sink; however, I know that others have done this successfully. Here are two videos that may help you further: https://youtu.be/OH0XxY22EsA – and – this next video which shows how it held up 7 months later (still in very good shape) https://youtu.be/7MrXaE3ttfI
I hope this helps you. I’m very happy with mine.