I’ve got a before and after IKEA Shoe Cabinet hack to show you today as part of our living room update. The plan for this hack was to give it a faux built-in look and add hallway storage near out bathroom. If you’ve never considered how versatile these IKEA shoe cabinets can be, then I urge you to read Blue I Style’s post on 20 ways to use an Ikea Shoe Cabinet. Our shoe cabinet will be holding the overflow of bathroom necessities, while nestling inconspicuously against the hallway wall.
BEFORE:

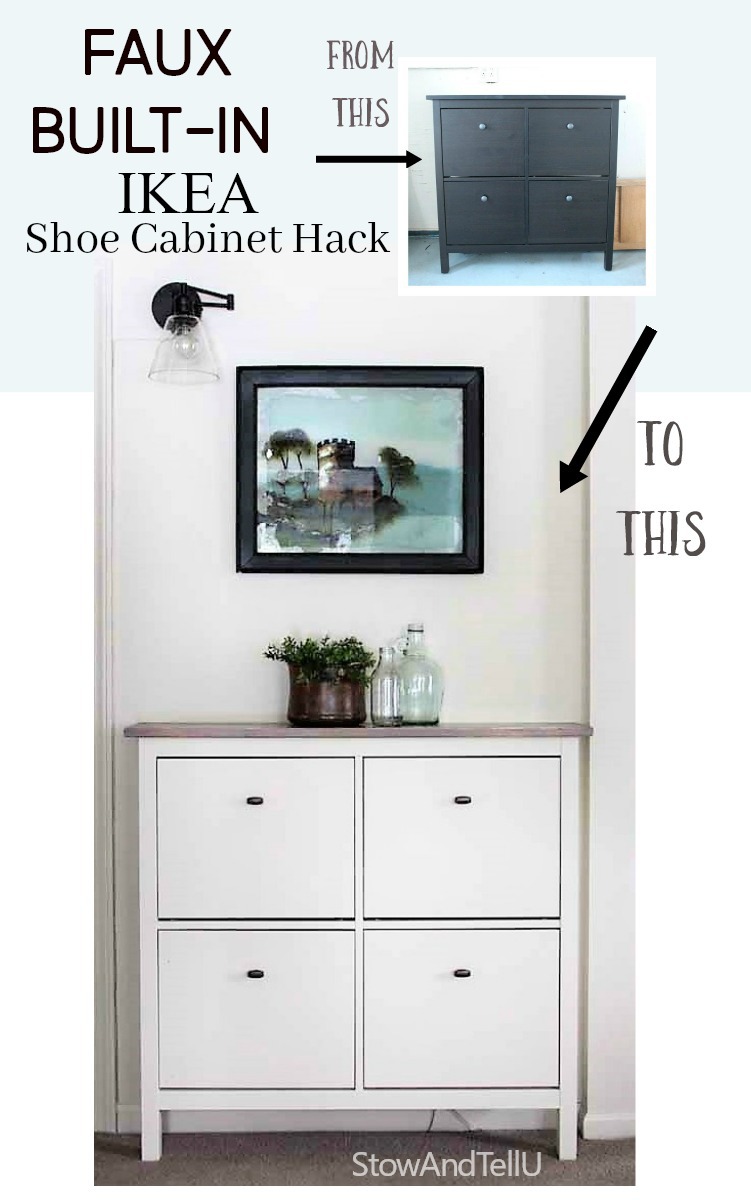
Ikea Hemnes Shoe cabinet in dark brown (before)
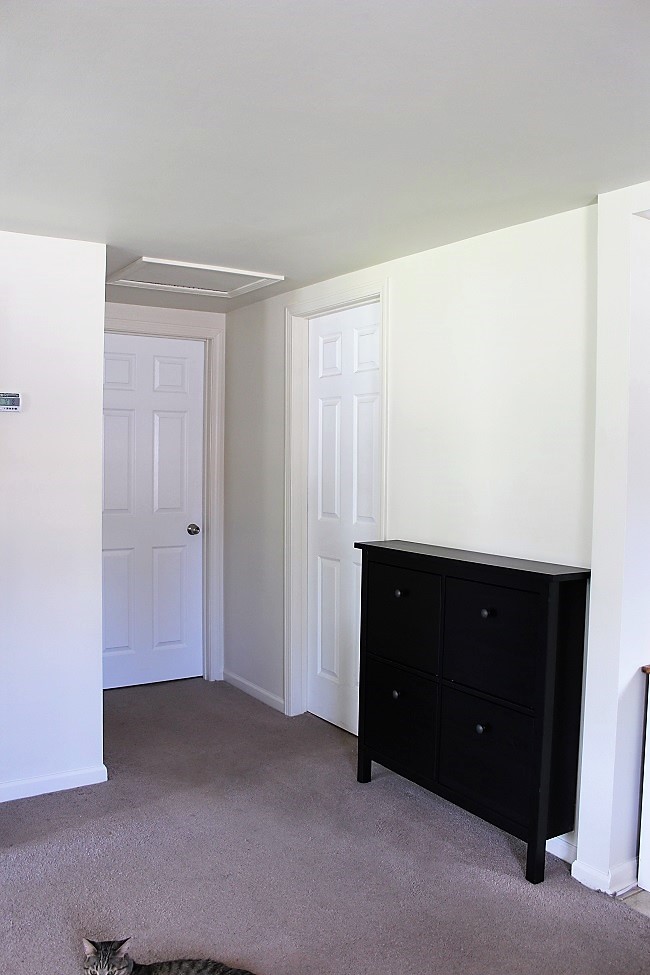
Let’s take a look at the BEFORE shot of the IKEA Hemnes shoe cabinet in the hallway. This piece was part of my thrifted space savers. And let’s also be brutally honest. Could this be any less stark and boring? (Excluding my cat, he doesn’t count xox.)
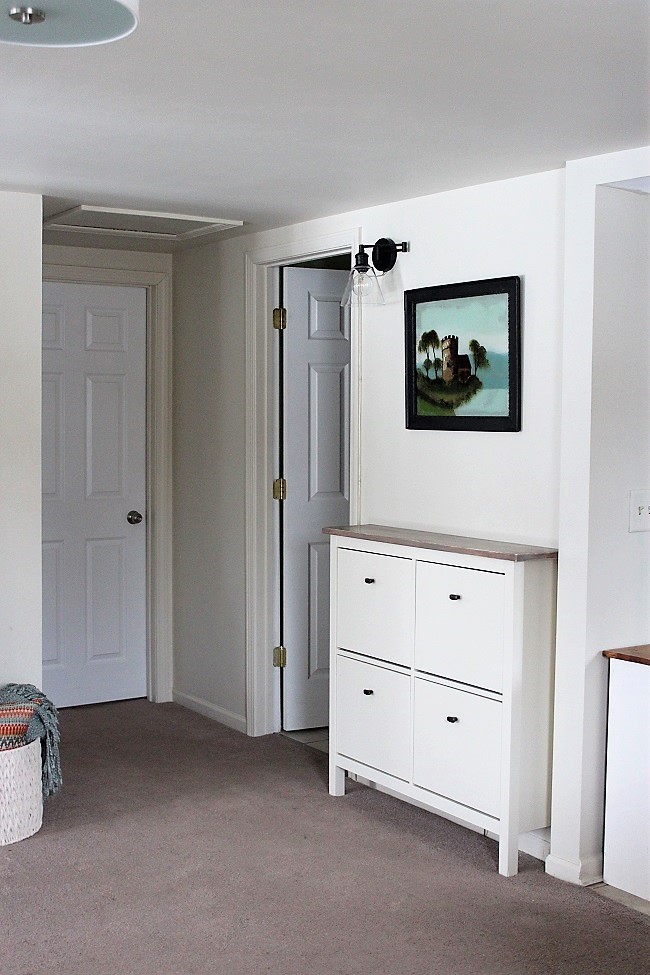
AFTER:
This post may contain affiliate links.
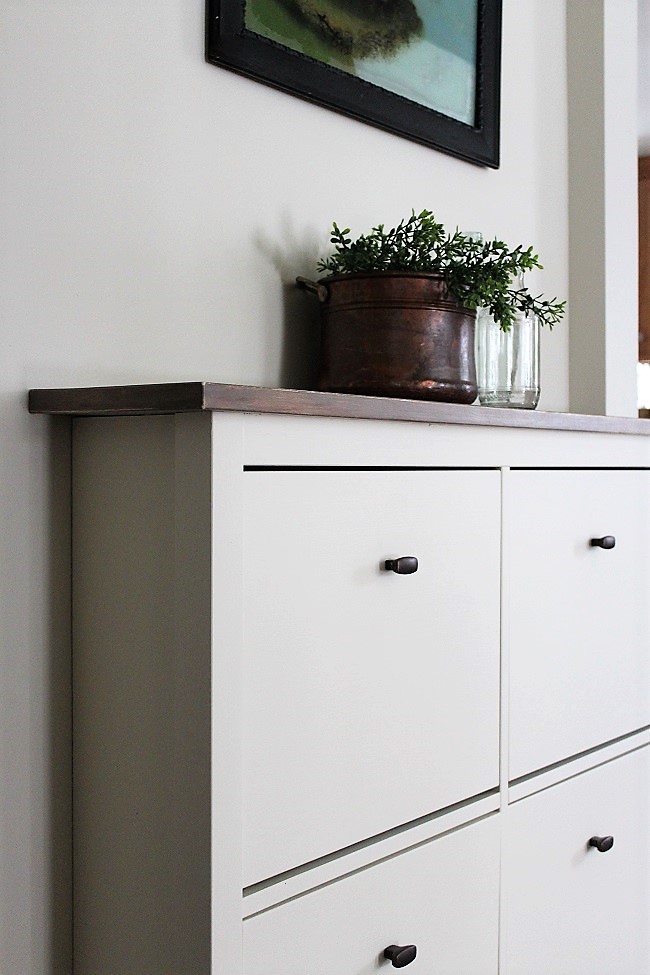
Ikea shoe cabinet hack as faux built-in hallway storage
Now, let’s look at the AFTER shot. What do you think? Better? I’ve got to say, I think it looks waaaay better. But notice, it’s not so much the cabinet that standsout out, it’s the artwork and wall lamp that catch your eye, right?
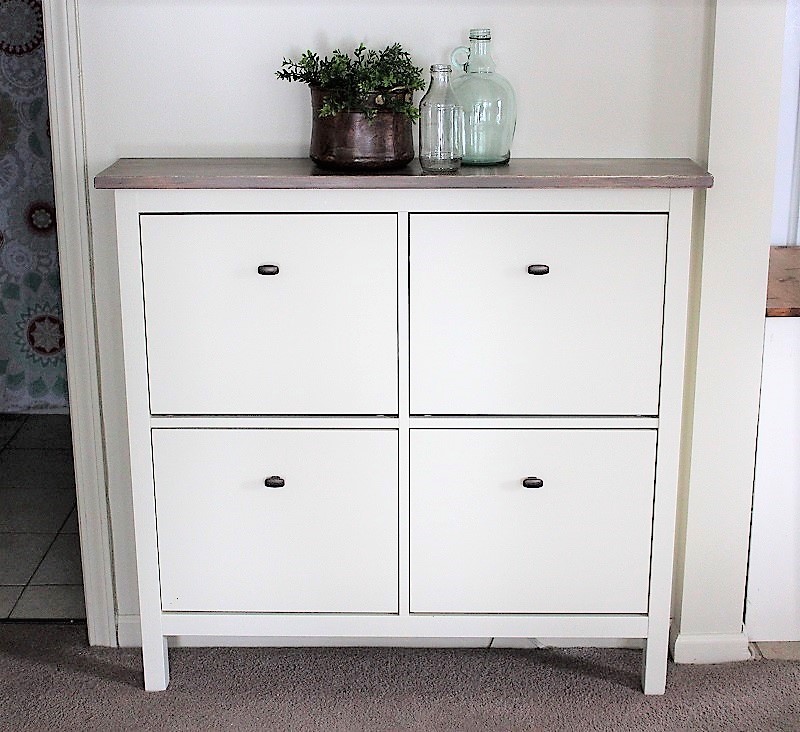
The approach I took on this IKEA hack was to paint the cabinet the same color as the wall. Except for the top. I gave that a faux-ish wood grain finish, just for some contrast. But my intention was that if I painted the cabinet the same color as the wall, trim and baseboards, then it would blend in with the wall and have more of a built-in appearance.
I noticed examples of built-in shelving often showed the shelving to be painted the same paint color as the wall. The inspiration room I choose for our living room, shown in this post, is one of those examples, and I think that it does create a more spacious look. The shelving isn’t as interesting as some of the other features in the room, so by painting them the same color as the wall paint, the more interesting features in the room stand out because they have less to compete with.
If you like IKEA hacks, you may also like this IKEA Rast hack potato bin
This post contains affiliate links, see full disclosure, here.
Ikea Hack and Painting over Laminate supplies and references
Ikea Hemnes Shoe Cabinet (I found this one for $25 on Craiglist)
Zinsser BIN Primer
DecorArt Satin Enamel in color Linen (this was the color closest to my wall color.)
Pittsburgh Paint Paramount Satin finish in color Antique White (my wall color.)
4 replacement hardware knobs (Hickory Hardware – Eclipse T Knob in Copper finish 3/4” x 1-1/2”)
Chalk paint in dark brown, taupe and gray for top of the shoe cabinet
220 grit sandpaper
TSP cleaner
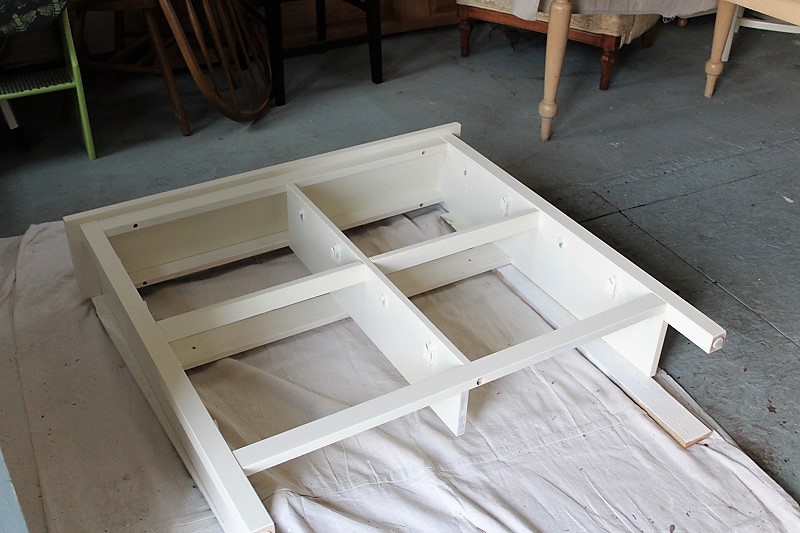
The IKEA Hemnes shoe cabinet is laminate, so I did my best to read up and follow directions on how to paint laminate furniture.
The following two posts were very helpful for painting over laminate:
If you are going to paint over laminate, I highly recommending reading these two posts.
2 Ways to Paint Laminate Furniture
How to paint IKEA Laminate Furniture
The basic steps for painting over laminate:
- Clean
- Sand
- Prime
- Paint
- Top coat
My tip: Make sure to let the primer, paint and top coat cure for the required time. I gave the paint 7 days to cure and I gave topcoat another 7 days to cure after it was applied.
Painting furniture the same color as the wall for a built-in look
When I said I painted the cabinet the same color as the wall, what I meant was that I almost painted the cabinet the same color as the wall.
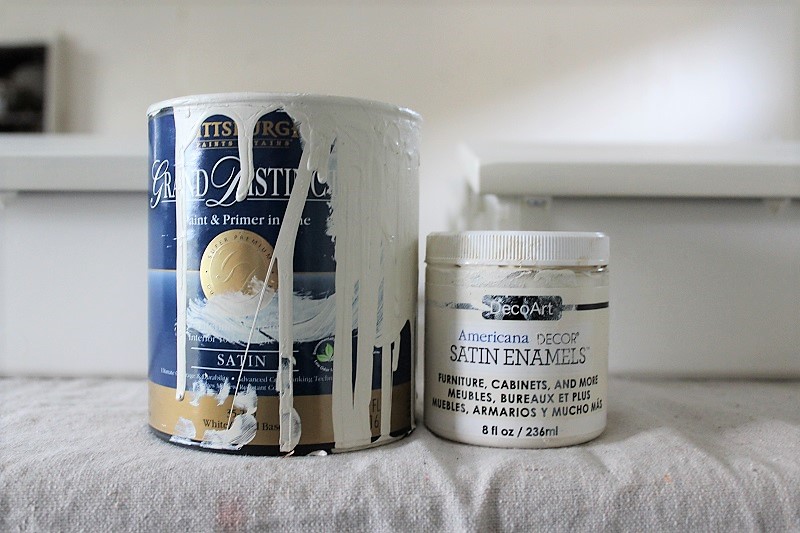
What I did was combine a 50/50 mixture of my wall paint color: PPG Antique White with DecoArt Satin Enamel in color Linen (the closest color I could find to the wall paint color. This process worked well, and the reason I did it was that I had heard good things about using the DecoArt Satin Enamels on furniture. I would say it ended up being off by a shade, but not much more than that. In addition, I would think that making a diy chalk paint recipe with the wall paint color, would have worked, too.
As I mentioned, a top coat is important. I coated the entire piece with 3 coats of DecoArt Soft Touch Varnish. By far the easiest and my favorite top coat for a matte or low sheen look.
BEFORE from another angle:
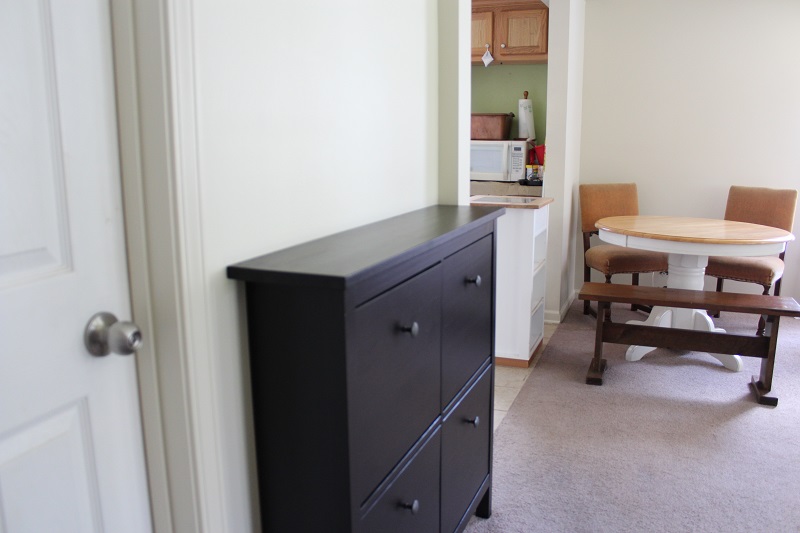
Here is a before shot from the bedrooms
AFTER from the same angle:

The kitchen isn’t update,yet, but you can see how much nicer this well flow once the dining furniture is painted and the kitchen walls and cabinets are painted a more neutral color in the kitchen.
Low profile takes up less space
The reason I chose the Hemnes shoe cabinet was because if it’s extremely low profile. Measuring just under 8 inches in depth, it makes for a very versatile storage cabinet for a small home or narrow walkway. At the same time, it’s a rather basic looking piece that you might not want to feature as a focal point.
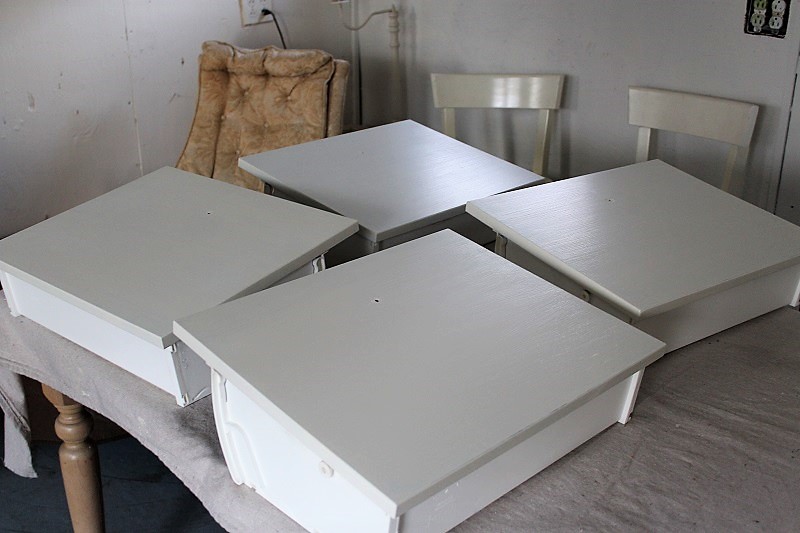
Another thing I learned was that even though the cabinet was already put together, it was very easy to remove the shoe cabinet drawers for painting.
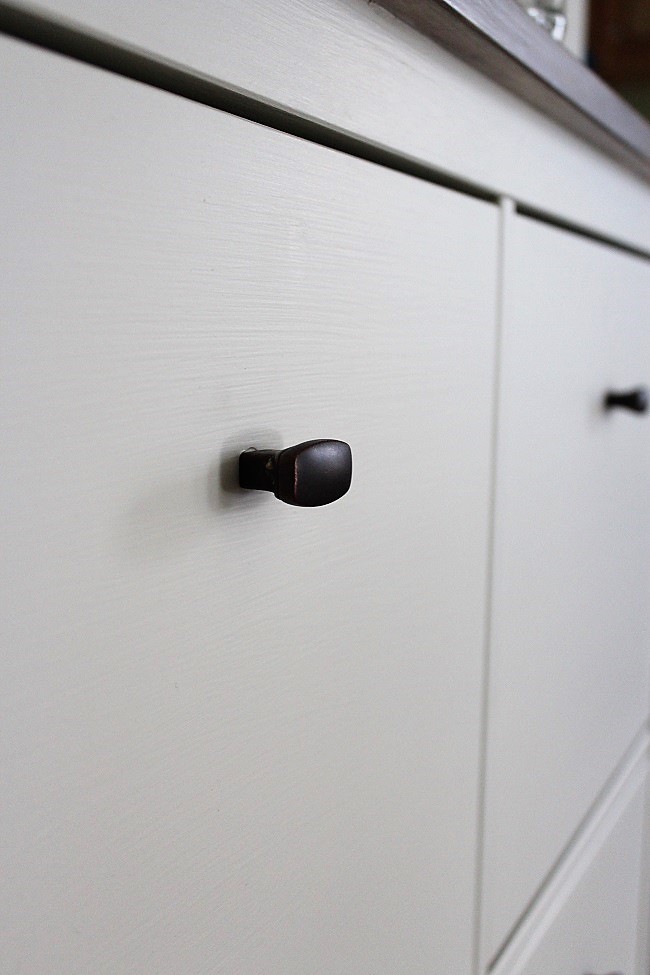
And it was easy enough to change out the drawer knobs with these pretty copper T knobs.
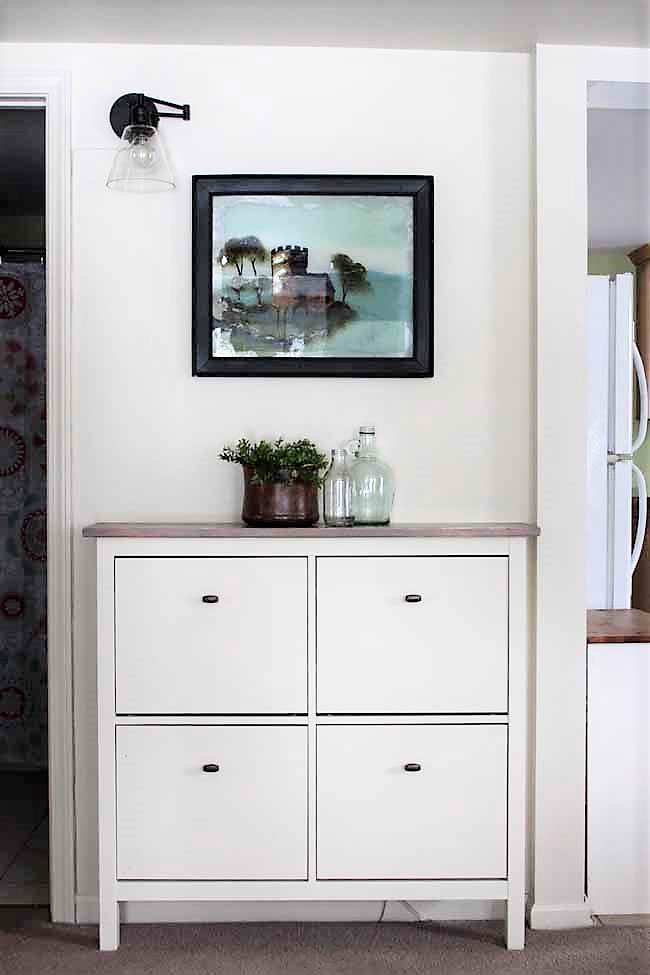
With the cabinet painted to blend in with the wall for a fake built-in look, the artwork and new wall lamp really stand out in this hallway.
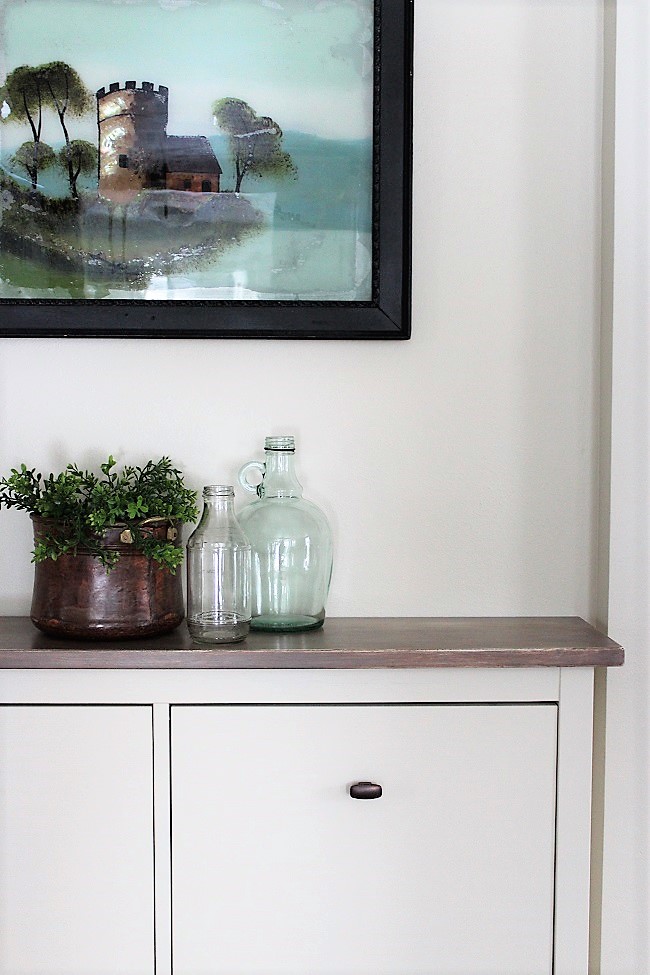
Since the artwork, an antique reverse paint on glass (that is in need of some repair,) was a gift from my best friend, I’m glad I have finally found the perfect place to display it.
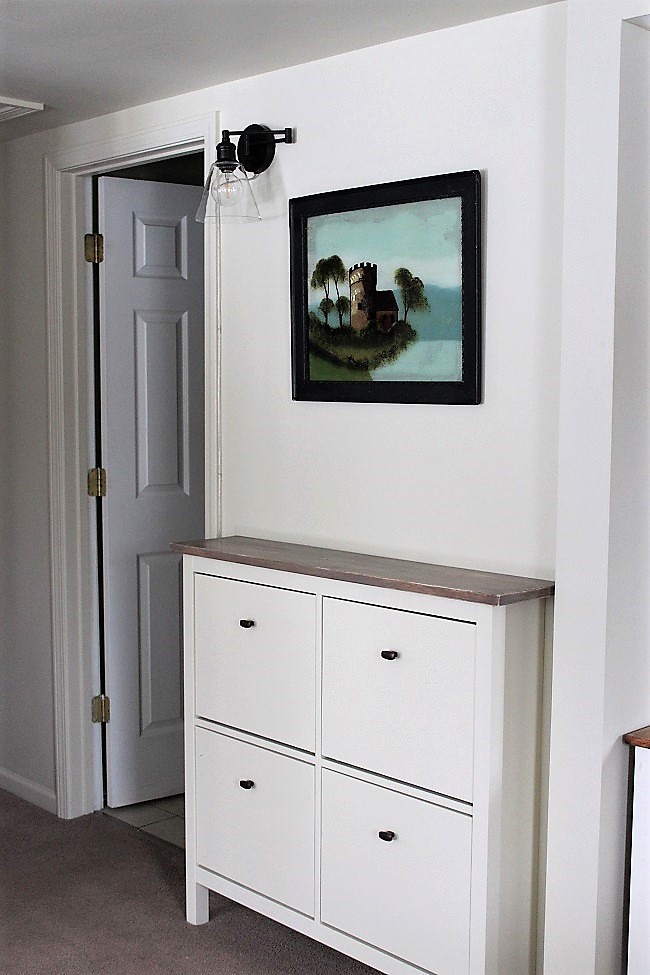
As you may be able to tell, the wall, trim and ceiling have been painted the same color. My last step in this hallway is to paint the doors the same paint color, as well. Hopefully creating even less of a distraction. My end goal for the entire living room /dining room combined is to create the least amount of competition for focal attention so that the room will be a calming place to hang out and relax.
Thanks so much for stopping by ~ Amy
Leanna Forsythe says
Great makeover, I love these shoe cabinets, they are one of Ikeas best products and you gave it a whole new feel.
Amy says
I agree, they really are great cabinets! Thanks so much, Leanna
Xabier says
Great job…!!!
And from Spain have one question about the top and the color of the chalk paint…
Can you tell me what color it is?
Brand?
Thanks for your help
Xabier
Amy says
Hi Xabier,
For the top of this piece, I used a weather wood or barn wood paint technique to do this. The base color was also the linen color, same as the rest of the cabinet. Over that, I painted a blend of dark gray, 2 different colors of brown and a few dabs of white (all chalk paint.) You can do this with most any brand of chalk paint, it’s really the technique that will make it look weathered, and the colors that will make it appears as a certain type of weathered wood.
See this tutorial: https://stowandtellu.com/how-to-make-a-faux-woodgrain-chalkboard-surface/, and also see the two suggested links for painting weathered wood techniques from other bloggers. These links are listed at the bottom of that post. This should give you more info on how to get a weathered wood look.
A lot of it is trial and error and getting familiar with using this technique, so practice on scrap wood first for best results.
Let me know if you have more questions. I’d be glad to try and answer them.
Thanks so much, Amy