I believe that it is only after you have redecorated a room that you ask yourself, how did I ever live with it the way it was before? Of course this probably isn’t true for everyone, or every room. But in the case of my entryway stairway, that statement couldn’t be hitting closer to home with each swipe of my paint roller.
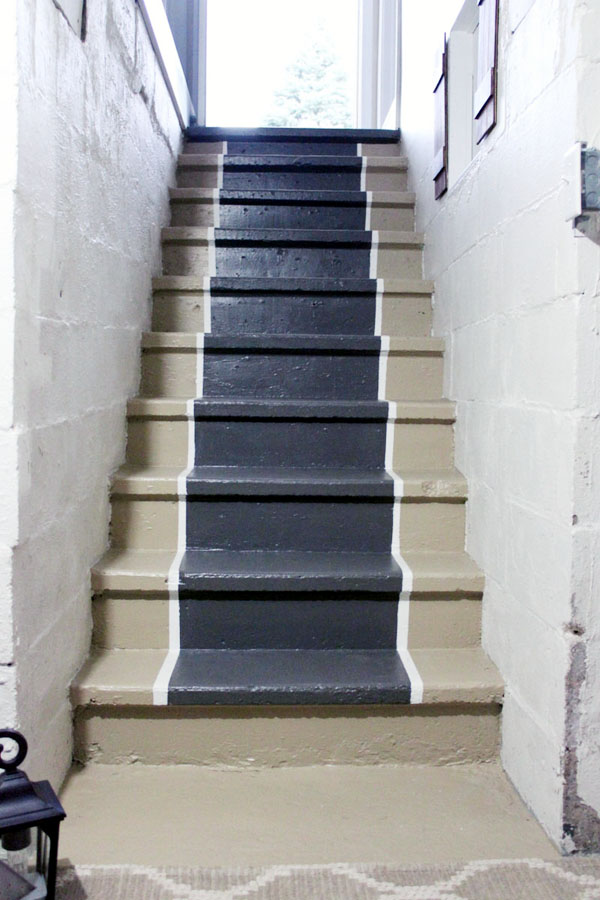
Stairway painting progress which includes a DIY painted stair runner with an edge in trimmed out in another color
Welcome to week#2 and the painting phase of project entryway stairway makeover in the $100 Room Challenge.
In week#1 of the challenge, all of the participants showed off the room they want to update on a $100 budget. There were a variety of rooms, decorating styles and creative ideas shared last week for getting more bang for your buck when you want to re-do a room while trying not to spend more than $100.
This week, we will all be sharing our first week of progress, and once again you will find a link-up of all the participants at the bottom of this post.
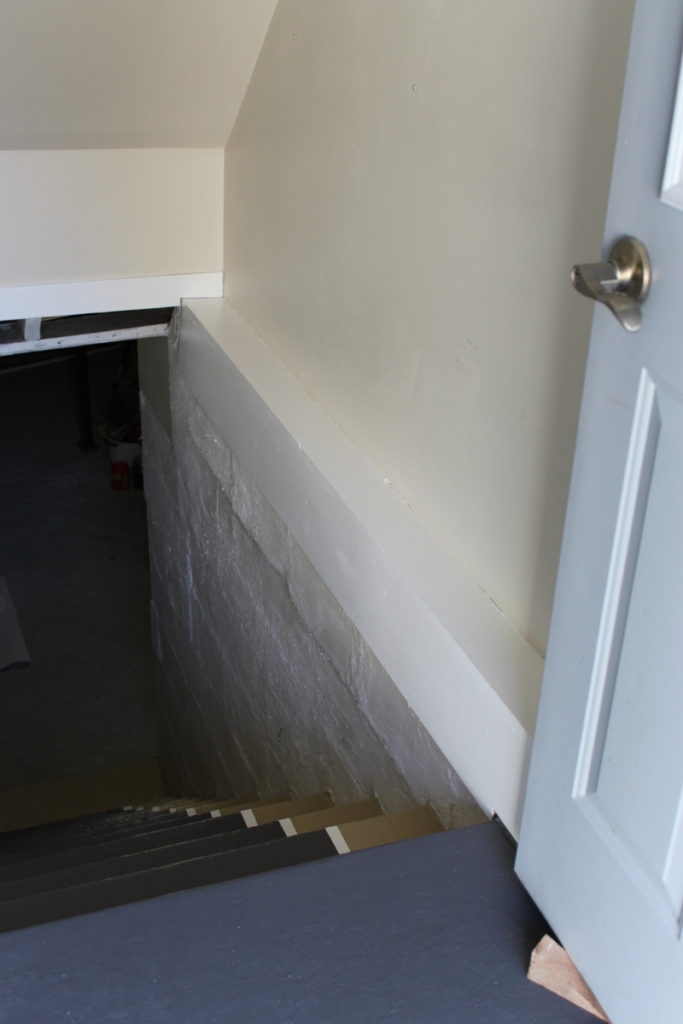
Covering the scraggly drywall edge
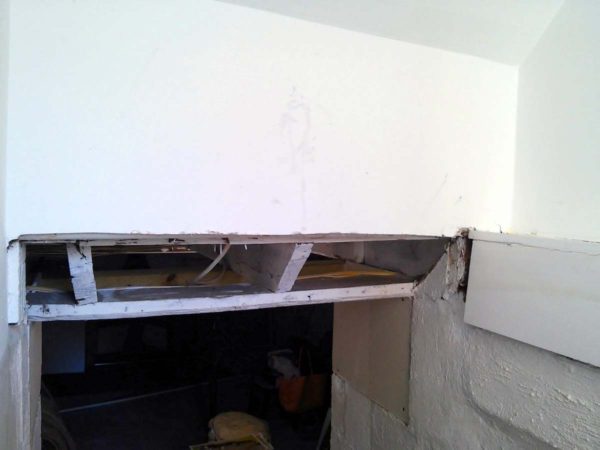
BEFORE
While I had spiffed up the walls of the entryway last spring, I did not paint them. And because we have so many other more important tasks to work on, I probably could have just left it for a while, but for that jagged piece of drywall that cried “this place looks like a dump,” every time I walked in the house.
Note: the wood going across the top threshold was not done correctly and will eventually be corrected, but until them, it does still show, even after the drywall repair.
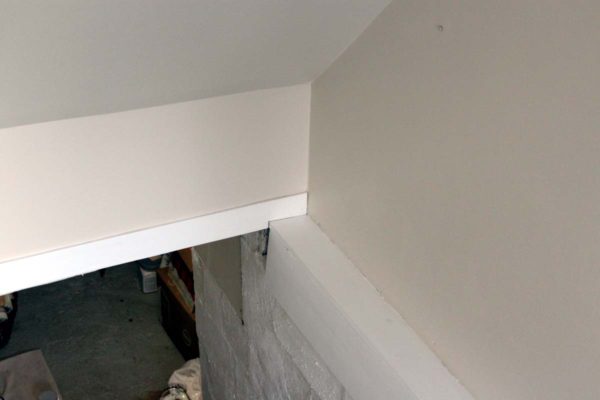
AFTER
I asked Ken to cut a piece of wood from our wood pile that would fit over the drywall edge to cover it up until he gets to working on the basement, which is still a few years down the road.
In my opinion, with that one fairly easy upgrade, we now have a more finished look instead of the scraggly-drywall, “home owner was too lazy to finish a project” look.
Painting the entryway walls
The next step was painting the entryway walls and trim. To save a few dollars I used Dutch Boy Dura Clean tinted to Benjamin Moore color: White Sand. While I think that BM paint is better quality, I couldn’t justify the price for this area since it’s connected to the currently unfinished basement.
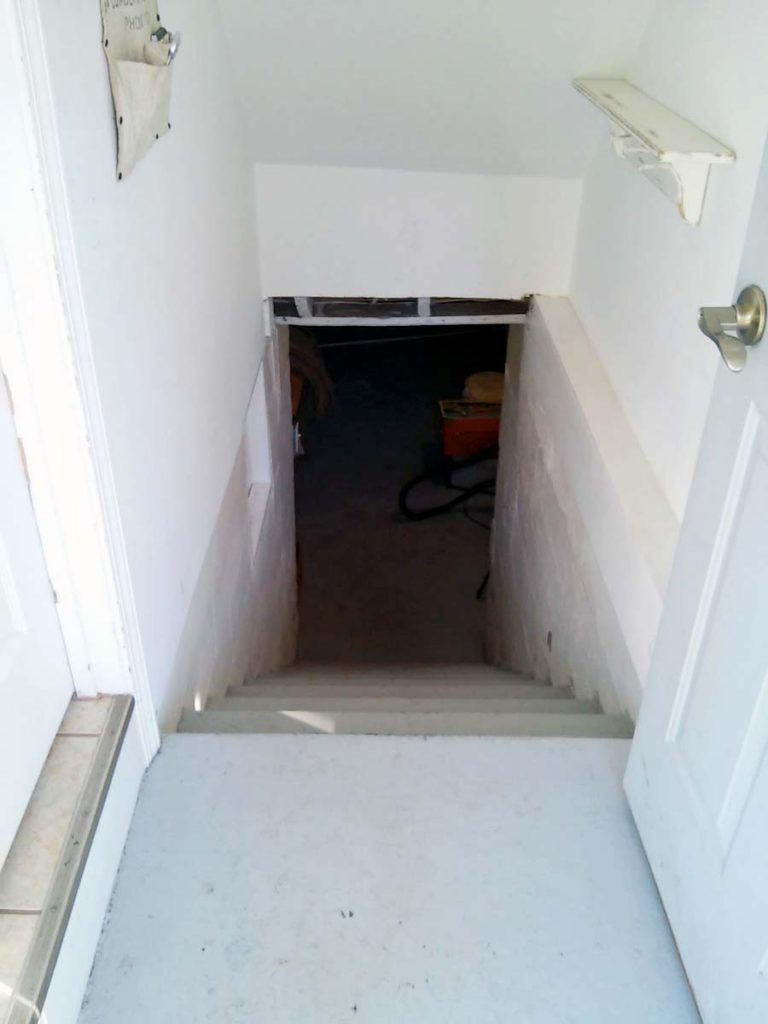
Here is the entryway before the new paint.
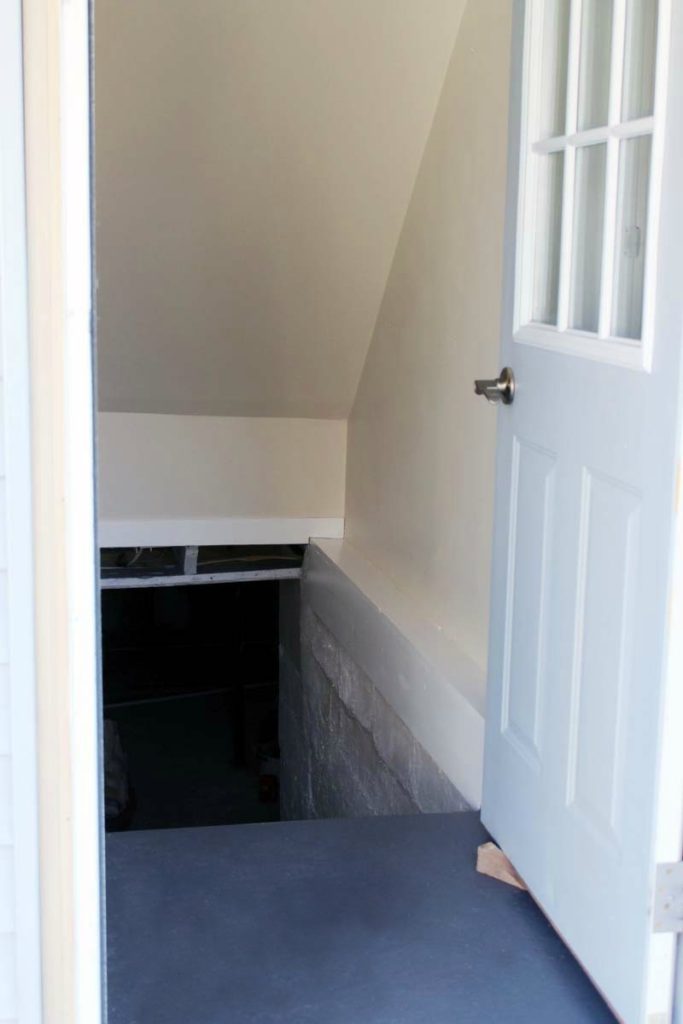 Here is the same space after.
I painted the trim and the drywall areas and the cement block walls all the way down to the basement floor. What do you think? Better?
How to add a painted edge to a painted stair runner
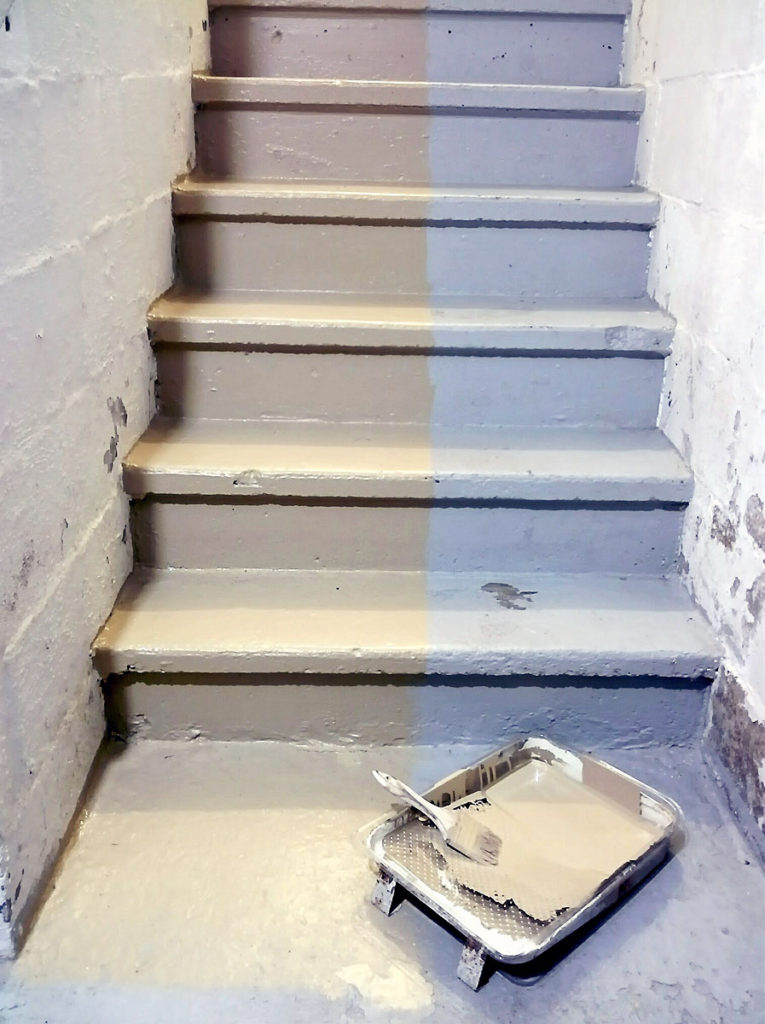
When this house was built in 1948, this entryway was not closed in, but an open stairwell down to an exterior basement door. This stairway is solid concrete and none too fancy.
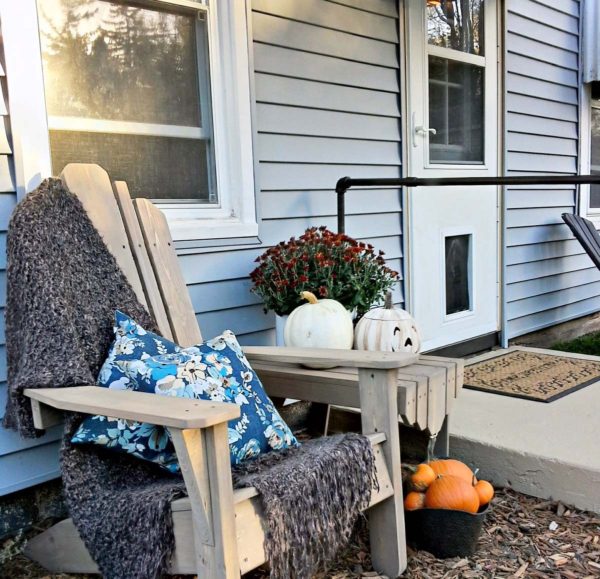
Last fall I painted our porch stoop. That project is what made me want to carry the painting into the entry.
I had plenty of leftover paint from the porch, so to paint the stair runner inside, I carried the same paint color into the entry and right down the stairs.
Find a time saving tip for painting stairs, HERE.
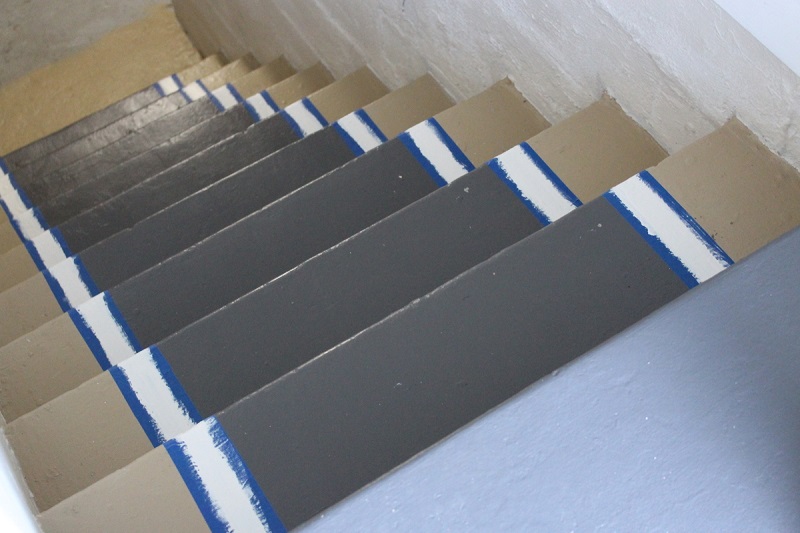
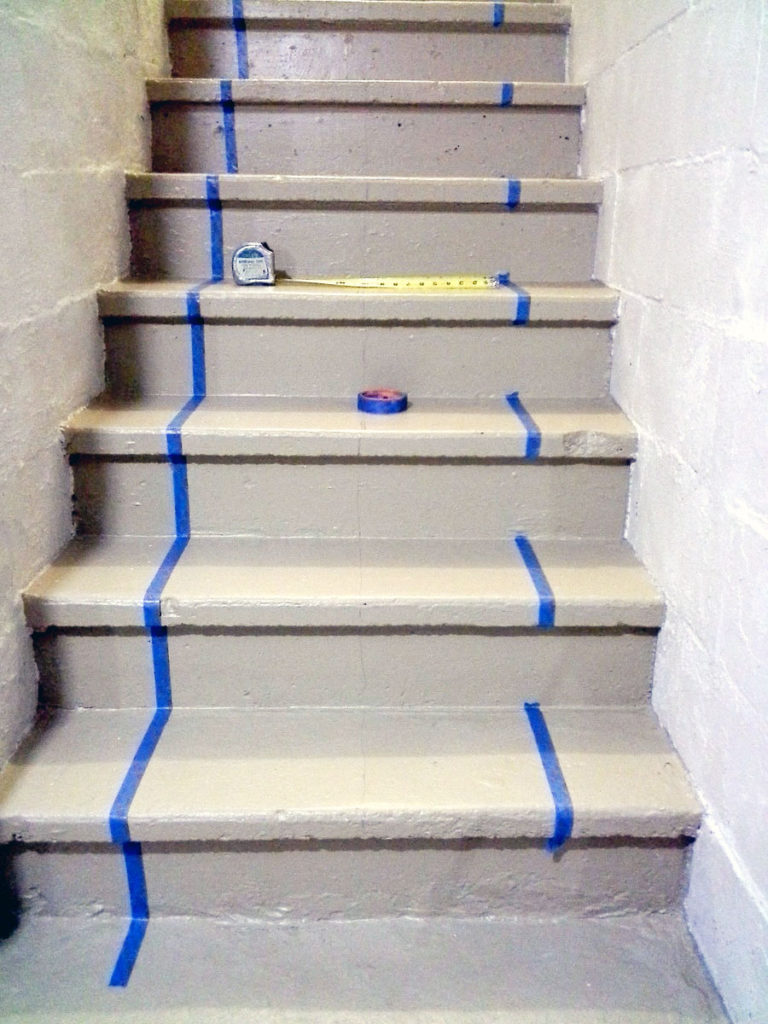 Next, I taped the stairs off to with a strip of tape going down both the left and right side of the stairs (see tips taping the stairs further down). Then I painted the gray paint down the center of the stairs and allowed it to dry for about 24 hours.

The next step was adding a double tape line on both the left and right side of the gray painted center. I laid a line of painters tape just inside the gray area on each side. Allowing about 1/2″ of the gray paint to show on the edge. Then I laid a line of the painters tape just outside of the edge of the gray paint. Allowing about 1/2″ of the taupe paint to show.
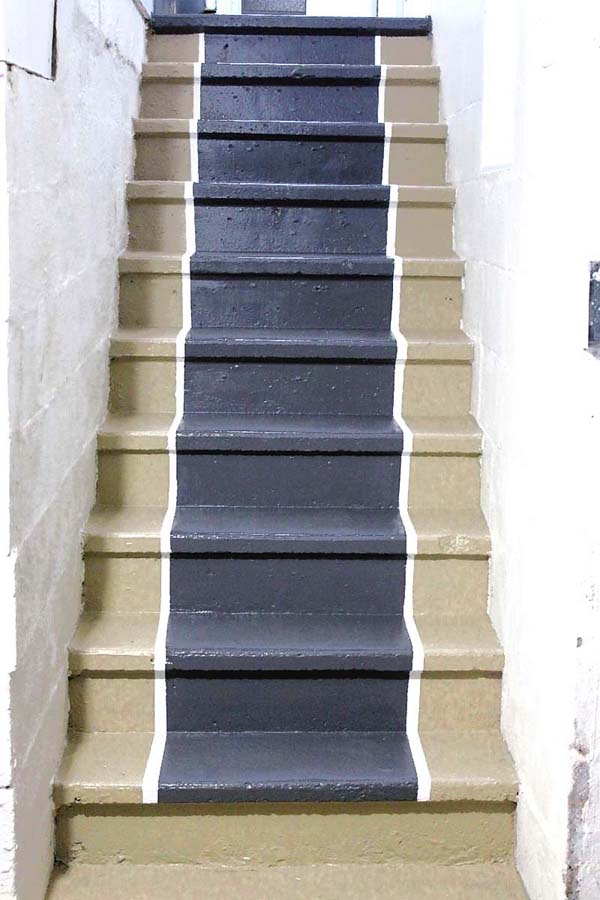
This created about a 1″ strip of paintable area on both sides. With a foam paint brush, I painted 3 coats of white paint along the two edge strips. Allowing each coat to dry for a few hours. After I painted the last coat, I allowed about 15 minutes of drying time, and then pulled all the tape up. There were a few areas that needed touch up but for the most part, it was straight forward.
I followed a few tutorials on painting stair runners that I found online.
If there are 3 tips I can share from my own experience they would be:
- Apply the tape in 8″ to 10″ pieces at a time. This makes it way easier to move a small piece of tape that is crooked and so forth, rather than having to pull up much longer pieces. Less waste. Saves time. Saves frustration.
- Leave time for touch up painting. While you hope that your paint won’t bleed through the tape, splash or smudge. And you hope that your lines are even enough to flow, I found that with a few touch ups here and there, the overall job looked better after the touch-ups.
- Finally, you don’t have to be an expert to tape off a stair runner. And the impact of a decorative stair runner stands our more than the small imperfections that you are worried will stick out like sore thumbs.
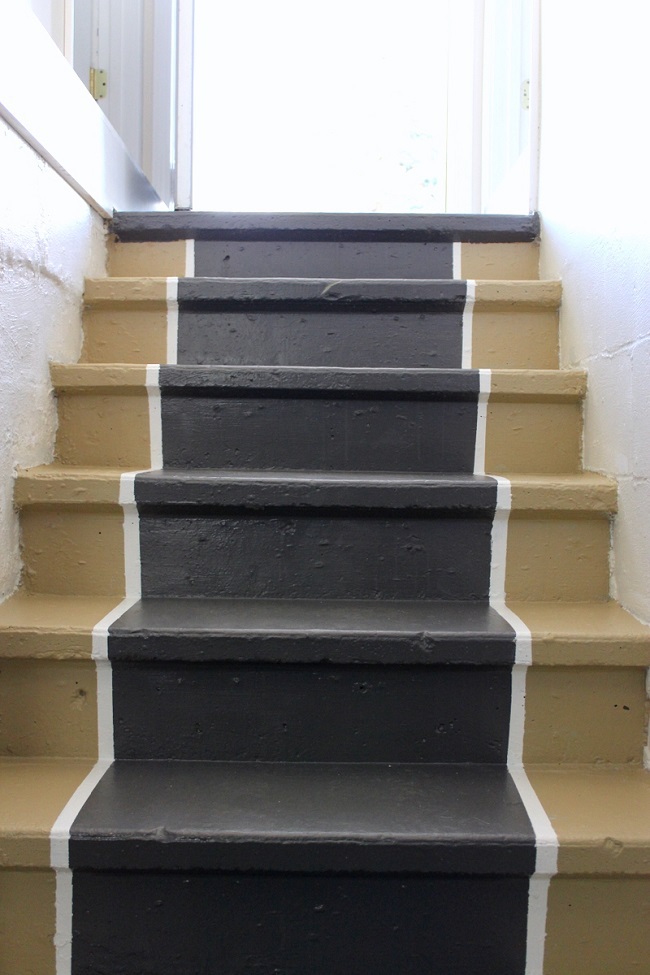
New painted stair runner with paint-trimmed edge
 There’s a small possibility I will change this up a little because I’m not sure if it looks too busy for the area, but for now we really like it.
Ain’t it amazing what paint can do?
Cost and materials so far:
Piece of wood and nails for drywall repair —-$0.00 (We already had the materials)
Wall paint ——$20.86 (includes sales price and $2.58 rebate)
White paint for trim and stair runner— $0.00 (I already had the paint)
Floor paint tan —-$0.00 (I already had the paint)
Floor paint dark gray —$13.99 (Dutch Boy Porch and Paint – BM color: Iron Mountain)
Total to date: —————-$ 34.85
Do you like this idea? Pin or save on Facebook for later reference —->>>
week 2 (this post)
Making faux shutters out of plywood: week 3
See the full reveal of the Entryway Stairway Makeover
Thanks so much for stopping by.
See our small sun porch makeover done for $800 – which includes small sun porch makeover done for $800
Scroll on down to see what all the others are up to in week#2 of the $100 Room Challenge —->
Anne says
That looks amazing! Great job Amy!!
Kerstin says
Too bad I can’t show a picture, but I did upgraded our kitchen with some paint on the kitchen
cabinets. We both love the way our kitchen looks now. But I did do some research before I
started. You can upload a picture on the Benjamin Moore web side. There is the option to
change colours, to get a better idea which one to choose. Very helpful, as I was concerned when
finished with painting it would look overloaded. Than I took cabinet doors off, spray painted the hinges
and screws. Sanding is a MUST! One couple even primed the cabinets for three times (sanding in
between those steps). I put one coat of primer on, but let the paint ALWAYS dry very good. After
the one coat primer the paint came one, two coats in my case. The paint was from the local Home and Hardware Store and it is special for “Kitchen Cabinets”. It brightened the kitchen so much up. Lot of work as we have 24 cabinet doors, plus drawers. But it was worth it. Now I already plan to do some other painting projects in our house. Also would like to mention that you should compare prices, between the painting material. Chalk paint is very expensive and I would only recommend it for small projects.
chris says
paint is amazing ain’t it ha ha, i love your stair runner and especially the white stripe so that the stair is easier to see, the space looks awesome so far xx
Patti says
I really like the painted runner on your steps. A great inexpensive way to get a nice bang for your buck.
ashley@biggerthanthethreeofus says
Major progress!! The painted stairs is so cool.
Amy says
Thanks Ashley 🙂
Maria says
Very impressive paint job on stairs, that really hard to do. Great eye and steady hand, Look forward to next week.
Maria
Amy says
I’m not know for a steady hand, but the concrete stairs are so craggy and uneven, it probably only helps make it look more even, LOL. Thanks Maria!
Maureen says
What a difference! I really like the painted runner. Such a great way to add big impact for little cost!
Amy says
Yes, this is way cheaper that a carpeted stair runner, for sure!
Colleen says
The steps look so good! That whole space is going to look amazing!
Eliesa @ Pinterest Addict says
I love how the addition of paint made those steps go from blah to beautiful! Ahhh… the power of paint. Nice job on fixing the ceiling situation.
Amy says
I couldn’t stand that ceiling piece any longer, ugh!! Thanks 🙂
Natalie @ A Turtle's Life for Me says
I love that painted stair runner! Seriously, it makes such a difference! I don’t think it’s too busy at all and might copy it down the road for our basement steps! It looks amazing!
Amy says
Oh, I really appreciate you commenting on that. It helps to get other opinions. Thanks Natalie.
feral turtle says
Paint is such a game changer. Looks amazing so far and you still have 60+ to spend!
Amy says
I hope I can pull this off. Thanks Karen xo
Sharleen says
good job on the stairs. love what you have done. thanks for the tips. 😀
Deborah says
Will you come do my stairs for me?
Amy says
You bet, haha. I’m glad I tried it because it’s not as intimidating as I thought it would be. Thanks Deborah.
Jillian says
That’s some fancy paint work! Nice job.
Zografia | Bisozozo says
Paint can work wonders, and sure did in your entryway! Great job so far!
Kristen says
I like that painted stair runner! Cool idea for cement steps!
Erin @ Lemons, Lavender, & Laundry says
Isn’t paint amazing! I absolutely love what you did to the stairs. Such a great idea!!!
Tracy says
Your painted runner looks so cool! I love it!
Kathy says
The painted runner is genius!
Angie @ Postcards from the Ridge says
It’s looking great so far. I love the wall color and the painted runner is genius. And you’re so right about wondering why we live with things we don’t love for as long as we do!