Whether you have an unfinished or finished basement with vinyl flooring, consider the budget friendly option of paint and read these detailed tips for a painted vinyl floor.
There was almost no bigger argument in our home than when it came to what to do with our vinyl basement floor that was in really, and I mean REALLY bad shape. I want to thank, My Repurposed Life for her tutorial on painting linoleum, because that is what it took to convince Ken, that this could actually be done successfully to help complete our unfinished basement makeover.
This post contains affiliate links. Read our full disclosure policy.
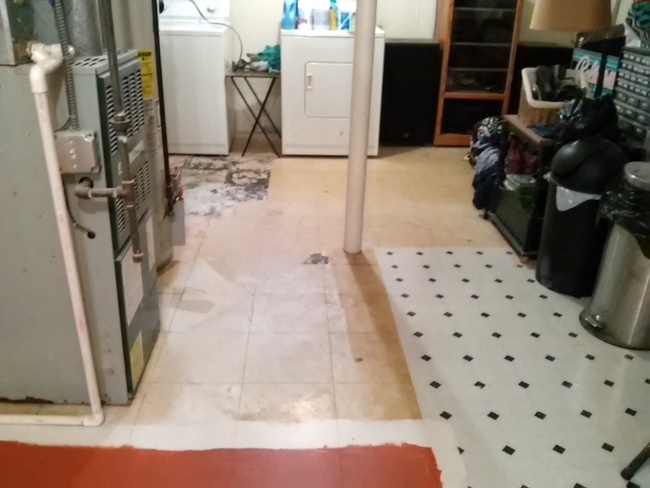
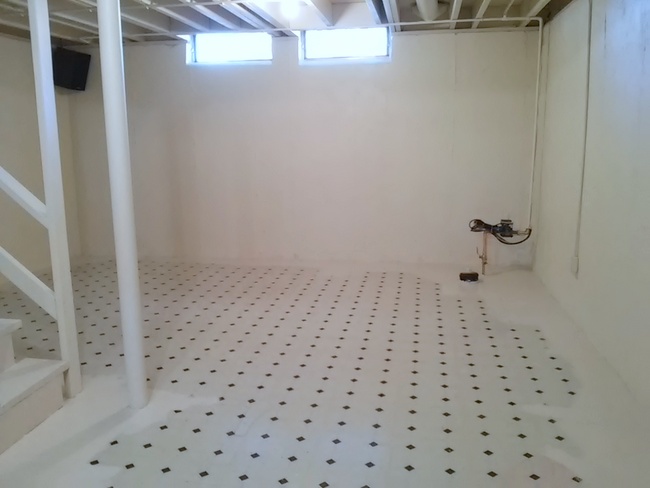
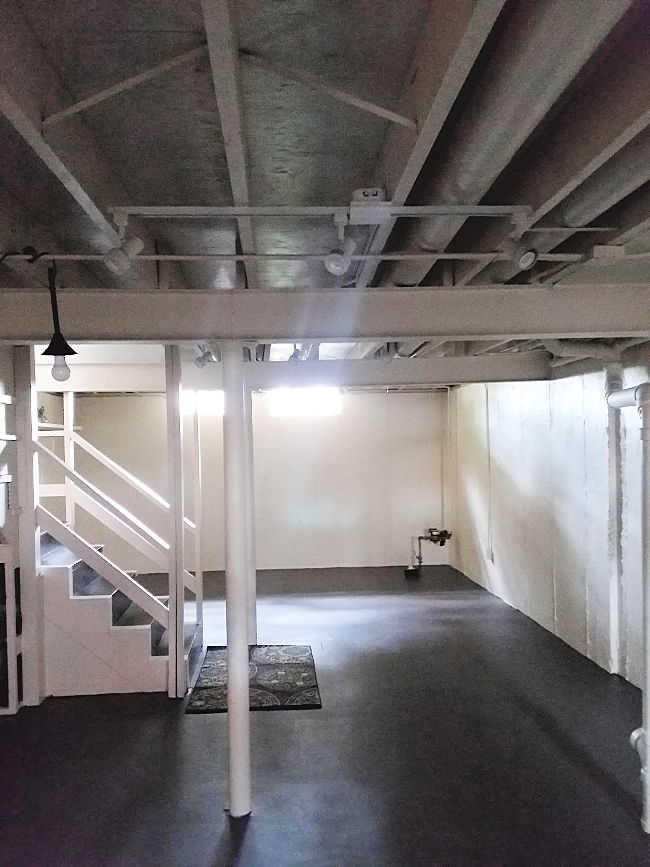
Unfinished basement with two different layers of vinyl flooring
Now, our basement floor was not only in bad shape, but add to that the fact that there were two layers of vinyl on the floor, or maybe I should say 1 and 3/4 layers of vinyl of the floor because the previous owners didn’t lay the second layer of vinyl down on the entire basement floor. They left part of the floor as is with the old flooring (which had loose tiles that had to be replaced.)
Ken was convinced we should pull up all the tile and start from scratch. Looking at this floor, who wouldn’t agree, right?
But I showed him the cost savings between buying all new flooring, even at the cheapest of price vs. painting the floor: approximately $150 vs $600 for 1200 sq ft of floor. That was the first chink in his armor. He also found the tutorial from My Repurposed Life online, by doing his own search, and finally conceded.
I consider this painted vinyl floor my BEST salvage project to date! Compared to the unfinished basement ceiling painting project, painting this floor wonkadoo vinyl floor took a lot less preparation and time to complete.
Note: This post includes two painted phases.
- Phase 1 done in 2013 – the flooring was painted an orange color
- Phase 2 done in 2019 – the flooring was painted a brownish-gray color
Basement Floor Re-painted/Update 2019 – Paint color: SW Manor House
Additionally, since this post was first published, we re-painted the floor to update the color from Copper Penny orange to SW Manor House, a dark gray-brown. the floor did have scratch and missing paint, but it took quite a few years for it to get that worn out. Needless to say, we’ve learned quite a few lessons from the first paint job to the second paint job, so I’ve update this post with some helpful tops to share.
13 Tips for a painted vinyl basement floor
The main reasons you would paint over a vinyl floor are one, the fact that it’s extremely cost effective in comparison to other flooring options. And two, painting a floor is way easier than most any other flooring do-it-yourself process. Here are 13 tips to help you choose paint, find the right products and get a good idea of what’s all involved in painting your vinyl floor.
1) Check your basement for water leaks and dampness
Assess the floor and basement area for leaks or dampness. If you find any issues, consider addressing those first before painting the floor, as any water problems will deteriorate the floor paint sooner, rather than later.
2) Do Replace any damaged vinyl tiles before painting
If removing vinyl tiles is not an option before painting, replacing any damaged tiles is the next best thing to do before painting.
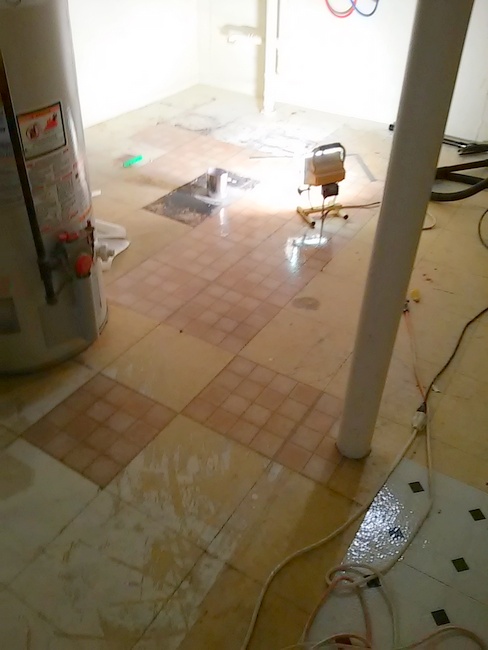
Because there was some damaged tiles in the laundry area, we did rip up some of the old, old tile, and laid down new pieces, along with a small cement repair on the basement drain. Note: we used replacement tiles that were the same thickness, so that they would be as close to the same level as the original, older tile. Please also note, that this did not fix the problem of having two different tile layers, it only repaired some of the damaged ones in the area with the golden tiles.
3) Consider painting half of the basement floor space at a time
Like the ceiling, we painted 1/2 the basement floor at a time. Moving everything that needed to stay in the basement to one side of the space. Completing the whole painting and drying process for the empty area. Then moving everything very carefully onto the painted area. And completing the whole painting and drying process in repeat fashion.
4) Clean the floor several times before painting with a good degreaser
Don’t just clean the floor once. Just like when you are hand washing dishes, some of them need a little extra elbow grease. Vacuum and wash the floor two to four times, or more if needed. Use hot water and a new mop. Keep handy scrub brushes, toothbrushes and other cleaning tools to get off all the gook and to get into the nooks and crannies along the walls and in corners. We scrubbed the floors down with a product called: Krud Kutter.
5) Sand the floor before painting with a pole sander
The idea of sanding a floor may have you running for the hills, but don’t go there just yet. You can sand the floor in just a few hours with a hand-held pole sander. This process isn’t like sanding down wood on furniture, it’s really more of a way to create some etching in the flooring that the primer and paint can grab on to and take hold. If you know what they layout is for your basement focus more intently on sanding the areas that will have more traffic. Spend less time in areas that will not be walked upon, like where you might place storage shelving fore example. Note: Wear a mask while you are sanding. Follow up the sanding step by vacuuming up all the sanding dust.
6) Apply a flooring deglosser before painting
Using a flooring deglosser is going to magnify the effects of the sanding. You won’t regret doing this step. There are a variety of floor deglossing products. I would recommend pouring some of the product to an area and then using a sponge mop to spread the deglosser (aka, wipe it on), squeegee the sponge mop, then run the mop over the area again to wipe it off. Allow it to dry, per the label instructions and you’ll be ready to start priming the floor. Krud Kutter Gloss-Off is one option that is fast drying and non-toxic. But do make sure to wear protective clothing and eye wear, as well as fans and open windows for cross ventilation.
7) Use an Adhesion or High Bonding Primer
There are many primers on the market, and while I cannot guarantee any result, I can tell you that primers have come a long way. These days there are several primer options that have extreme bonding and adhesion properties, that will adhere to PVC, vinyl, fiberglass and so much more. Many of these are water based for easy clean up, if done right away. And some are even LOW VOC, which means less fumes. Although proper ventilation is still always a good idea. Anyway, applying one of these primers before painting the floor will give you that much more chance of success.
8) Tint the primer toward your floor color, if possible
Some primers, unlike paint have strong bonding agents and should not be diluted, but they often can be tinted slightly, or as they paint store person might say, “toward” your paint color. Why this benefits you is that when you apply the floor paint in the stunning color of your choice, the primer will already have some of that color in it and so the paint will look like it should with fewer coats. If you choose a tintable primer, ask the paint store to tint it “toward” your floor paint color and you’ll see what I mean when you go to paint the floor. Note: if the primer is not tintable, that is okay too, it may just take another coat of paint to get the full paint color effect. See the recommended products list for primers that we suggest using.
9) Use the correct type of paint
While there isn’t a specific paint for vinyl floors that I know of, there are specific types of paint for floors. To paint over vinyl or linoleum, find a paint that is recommended for painting over wood floors, rather than directly onto cement.
10) Paint into the wall’s edges
Let paint fill in all nooks and crannies and spots where the floor touches the wall. this helps with sealing the old and drafty little holes that lead to nowhere but the earth beneath the flooring.
11) Dry time. Cure time
If nothing else, let the floor paint dry a good 24-48 hours before walking on it. And if possible, use the floor gently while it cures, which is about 20-30 days. It’s okay to walk on it, but treat it gingerly, so the paint can reach it’s fully cured state,
12) Keep touch up primer and paint nearby because touch ups and scratches are normal
Look, while there are some types of flooring that don’t get scratched or worn out. Most affordable and budget friendly flooring is going to get wear and tear. Such is the case with a painted vinyl floor, or painted any type of floor for that matter. Once you have completed your floor project, hopefully you will have a small amount of the primer and the paint left. Seal up the lids and label them. Tuck them nearby so you have them handy in case you do need to do a touch up from a scratch.
13) Warm the space up by adding area rugs or carpet squares
A painted basement floor of any kind can still give off a cold feeling. One way to warm the space up a bit is to add some area rugs or install carpet squares to designated areas.
Recommended products for painting a vinyl basement floor

You Will Need:
- Primer-Sealer – You want an all-surface type primer
- Zinsser Extreme Adhesion Primer – Tintable, Water-Based-Low VOC
- Zinsser Bulls Eye 1-2-3 Primer – Tintable, Water-Based, Mold resistant.
- Kilz Adhesion Primer – White, Ideal for PVC and vinyl, Water-Based
- Floor paint – You want a paint that clearly states, “for Floors”
- Valspar Porch and Floor Paint
- Behr Porch and Floor Paint
- Kilz Porch and Floor Paint
- No Skid Additive (This is optional and does not have to be used throughout. It can be sprinkled onto the drying paint on stairs, high traffic or slippery areas of the flooring.)
- Clear Sealer – One that is suitable for floors
- Behr Low Lustre Sealer is an acrylic non-yellow option, but other options would include polyurethane type floor sealers. This can also be applied to the floor with a roller.
- Paint Roller and Cover
- 18″ Roller and Cover for large expanses (1200 sq. ft and over)
- 12″ Paint roller and cover (standard) for smaller areas (Under 1200 sq. ft.)
- 1/2″ to 3/4″ Paint roller cover nap thickness. ( The thicker nap will hold a lot of paint and give you better coverage. Additionally, vinyl floor tile can have some texture to its surface, so the larger nap will help distribute the paint all around.)
- 1/4″ or 3/8″ nap roller to apply the sealer.
- Paint roller extension pole
- Utility vacuum – ie: a Shop-Vac
- 48″ Pole Sander
- 100 grit Drywall sanding sheets
- Degreasing cleaner
- Deglossing solution
Floor Paint colors used during phase 1 (in 2013):
- Primer – Behr Multi-Surface Primer Sealer tinted toward the floor paint color.
- Paint – Glidden Porch and Floor Paint in color Behr Copper Penny, plus the No Skid Additive mixed in at the store.
Floor Paint colors used during phase 2 (in 2019):
- Primer – Zinsser Bulls Eye 1-2-3 – Tinted toward the floor paint color
- Paint – Behr Porch and Floor Paint – Color matched to SW Manor House
BEFORE and AFTER photos and details of the priming and painting process

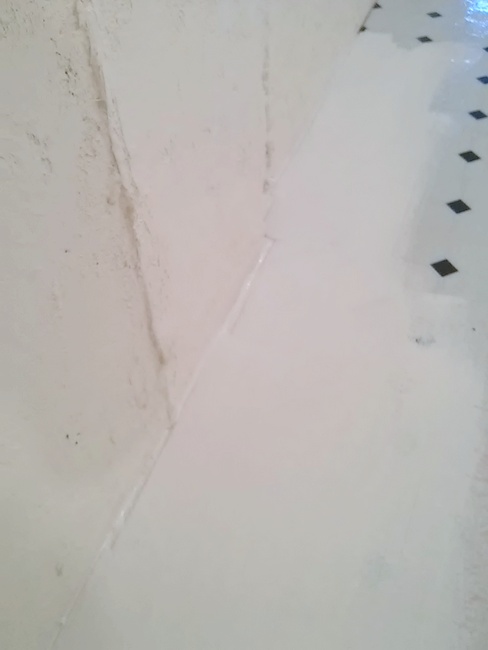
Flooring with two layers of vinyl tile. The previous tile layer is showing through near the edge of the wall.
After the floors were cleaned, I used a thick paint brush to edge our the floor with the primer.
There were a lot of nooks and crannies where the floor meets the wall, so I really went to town filling in those nooks and crannies with the paint. (In my mind’s eye, they were gaping holes into the unknown, but that’s beside the point, see scary basement, here.)
Next, I used a paint roller with the extension pole and rolled on the primer. This part was easy. I did two coats, letting each coat dry.
Once the primer was dry to specifications, I edged our the floor with the floor paint and then I rolled the paint on in the same fashion as the primer. I did 2-3 coats of paint until I had full, even coverage. The sealer was rolled on after 24 hour dry time.
If possible let paint and sealer cure over several days, preferably 20 days before moving furniture back on. We didn’t do this, so we got a few scratches right off. We touched those up and the floor has been holding up ever since.
The no-skid additive makes the floor very unslippery, for sure, but I have found that it also absorbs some of the ware of the foot traffic. As a matter of fact, we have no foot traffic marks to speak of, at all.
Ken was concerned that it would be a trip hazard where the two layers of vinyl tile came together, but that hasn’t been the case. The primer and paint have worked like a sealer on the whole floor and this area is no exception. The progression from one to the other is almost unnoticeable now from a “walking across the floor” stand point.
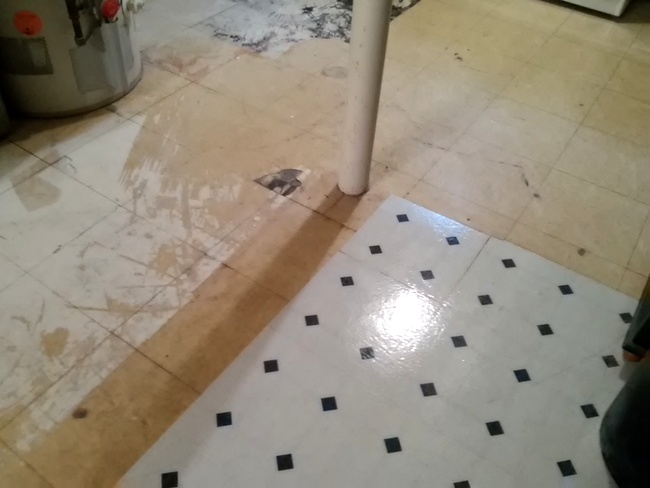
Two layers of vinyl tile – BEFORE

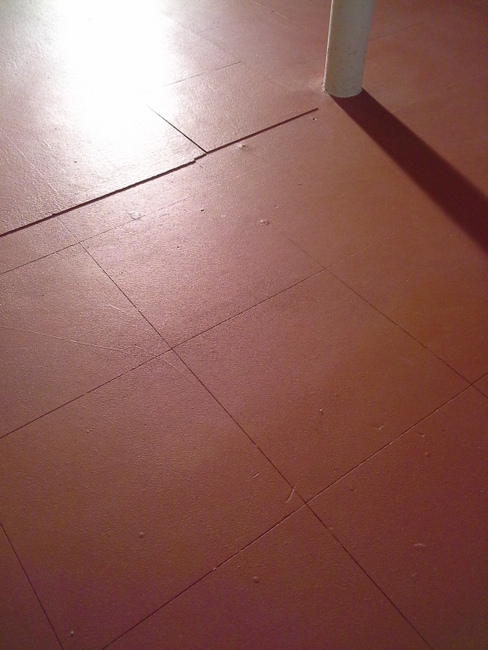
Two layers of vinyl tile – AFTER painting (photo taken from opposite angle)
Laundry area after the missing tile was replaced and the floor was primed. You’d never know a repair was done, would you?
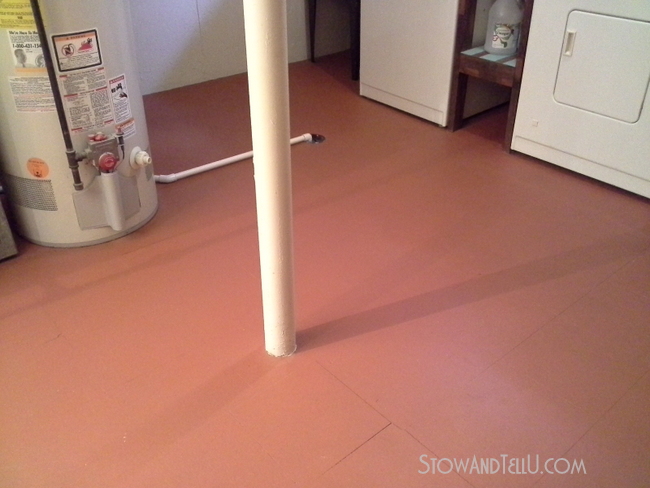
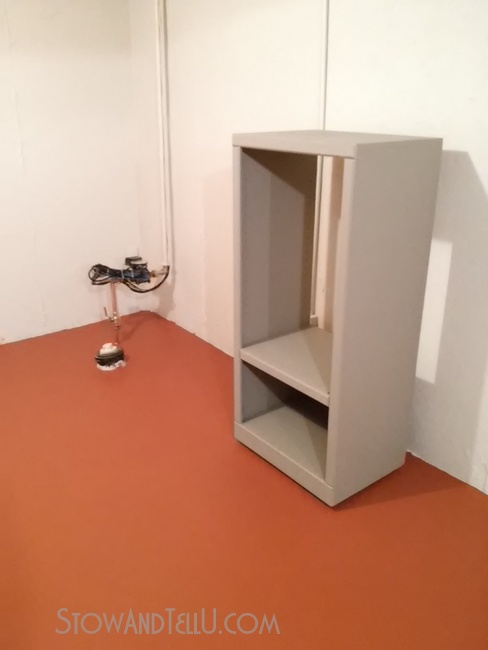
Laundry area after the floor was painted and new drain pipe was added.
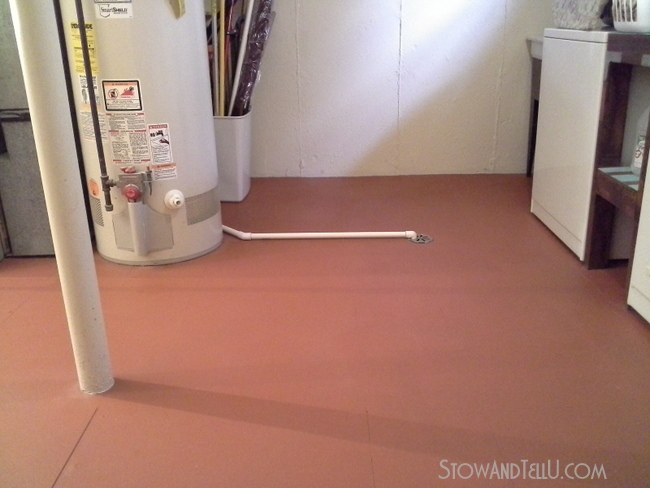
Laundry area after painting,
Moving right along, see how painting the floor in two sections can work out really well.

Before – during cleaning the 2nd half of the basement.
You can see on the left side of photo that part of the floor has already been painted.

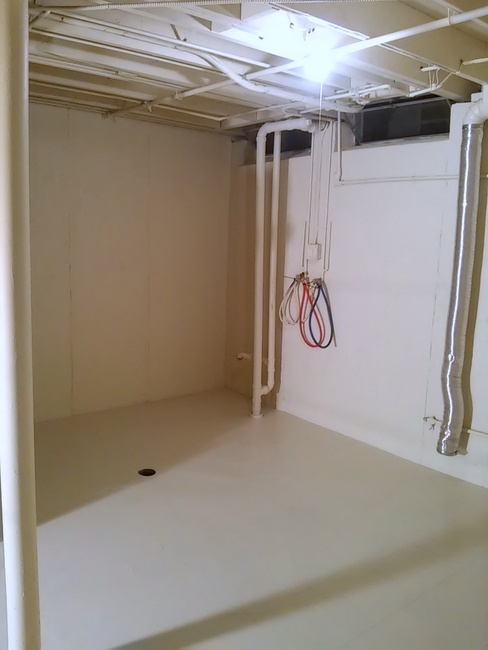
During – this was after the 2nd half of the floor had been primed.
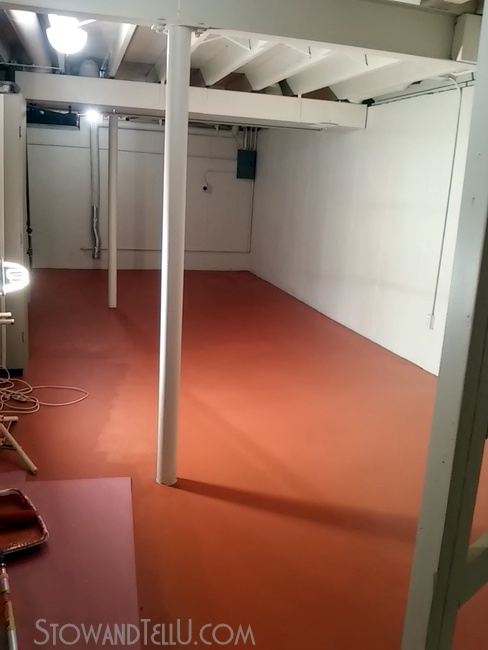
After first coat of paint was applied to the same area of floor in the basement.
We did 2 thick coats and once the paint fully dried, it was completely opaque.
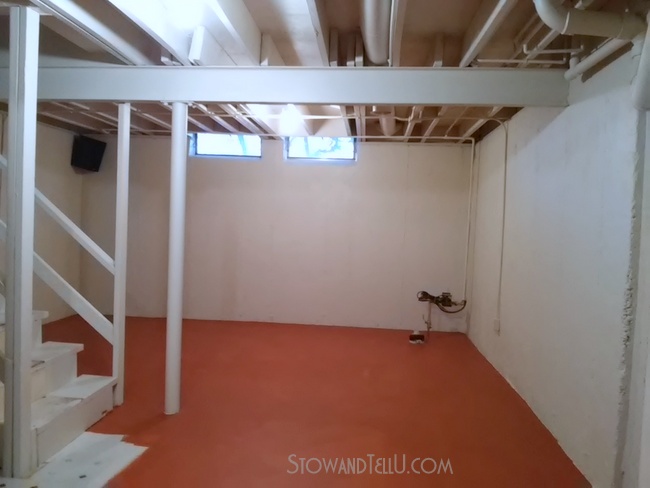
Basement floor reveal 2013
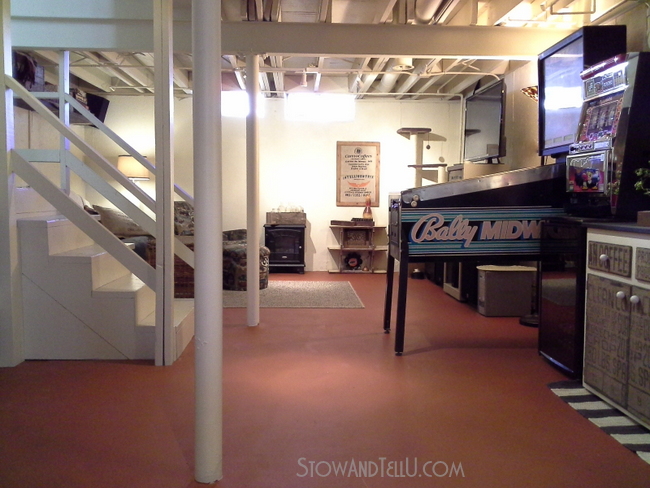
Painting this vinyl basement floor was the very best option for us, considering that we are planning to move and possibly rest this home. It has made our basement so much more cozy, and I can really relax down in this basement knowing our cost was only several cans of primer and paint.
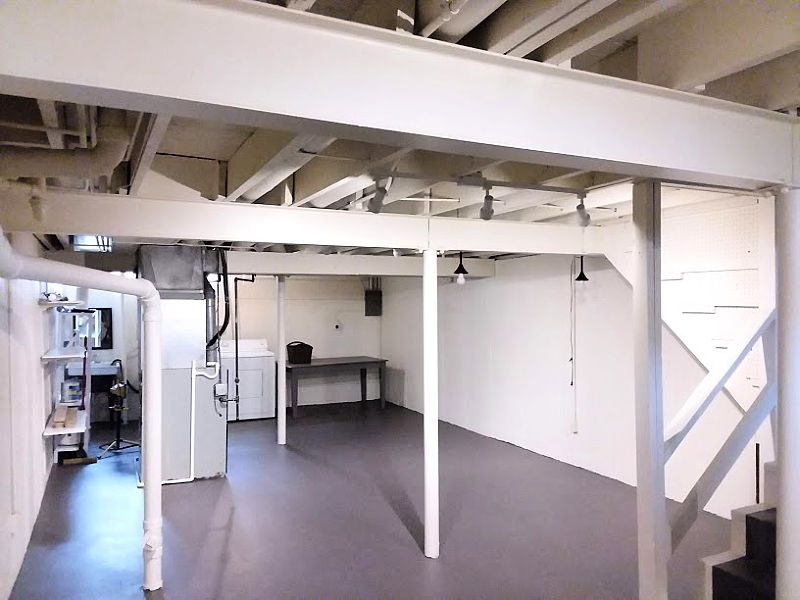
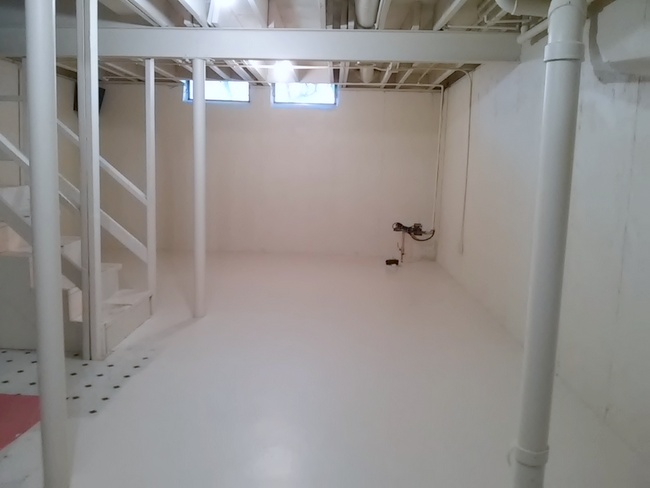
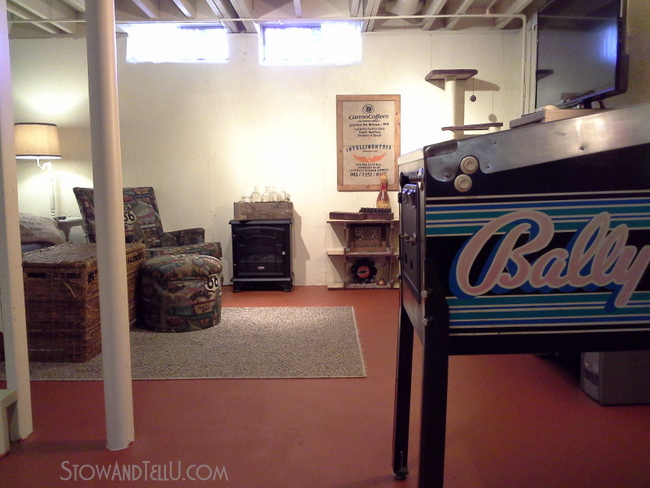
Basement floor reveal 2019
Raise your hand if you believe that paint can solve almost any DIY problem? ~ Amy
Other Basement Projects you may like
- Painted Unfinished Basement Ceiling
- How to Add Texture to Unfinished Concrete Basement walls
- A Super Quick Tip for Painting Basement Stairs
- 7 Amazing Painted Flooring Ideas for Basements
- Coffee Sack Decoupaged Furniture Cabinet
Post updated 1/19/2020
Linking up at:
Anne says
Good for you! My floor unfortunately has not held up well – mostly due to Max who likes to play Indy 500 in the bathroom. Scratches everywhere! if not for him, it would still look awesome.
Happy Saturday!
gail says
Amy,
Y’all did a great job on your floor! Thanks for linking to My Repurposed Life, and for your comment on my site.
gail
ps still love my painted vinyl floor
Tania says
Wow, that looks so great! I laughed when I read the scary basement post. My last house had a laundry room in the otherwise finished basement that creeped me out when I bought the house. I painted the whole thing, ceiling beams, pipes, and all and it helped SO MUCH! I’m sure you’re very happy with yours now too!
Tania
Heather C says
What a difference and don’t you love that it didn’t cost you an arm and a leg. I don’t have a basement but my friend does, I’m going to send her your post because she doesn’t go down into her basement “it’s scary” according to her, but you have made yours liveable.
chris aka monkey says
amy love love that color what an improvement,y’all have done an awesome job down there xx
Sherry says
It looks amazing Amy! You guys have done a great job making the basement into a space that you can enjoy. One hundred times better! Plus thrifty! I love it!
Sharleen says
Thanks Amy. I will need to get my husband to read that tutorial too. One day I need to paint our vinyl floors too. I need all the encourement I can get. Not me thought but hubby will. Just the thought of it
Heather says
I’m so glad to see this is an option!! It looks really great.
Tuula @ The Thrifty Rebel says
Both my hands are raised Amy! And also clapping for your awesome makeover. It deserves an ovation. I saw Gail’s fabulous painted vinyl kitchen floor makeover too, and will one day do that to my own I’m sure. You did an awesome job!
Doreen@househoneys says
You really rocked this project Amy! It looks so clean and open now, you must be THRILLED!!
Feral Turtle says
I am just amazed at this Amy. Who would have thought you could paint a vinyl floor!! I still have to paint the rest of my floor where the hot water tanks and hubbys kegerator are so I might pick up some of this paint. I love that you went with a color other than grey. I might have to think of a color too…..what goes good with beer? LOL Cheers.
Dee says
This is amazing, Amy! You’re one of my features at Snickerdoodle this week, so thank you so much for sharing with us! 🙂