Now that the basement has been officially painted from floor to ceiling, and my son has made his way safely to Dubai; Ken and I have been trying to make some sense as to how we want to put the basement back together. You know the dilemma. What stays? What else needs to go? Where should this and that go?… and so on.
We did have a collection of mix matched baskets that seemed a waste to get rid of simply because they’re a tad grungy, dated and not at all alike. So I figured, hey, that’s what paint is for, right?
In this case I used chalkboard paint.
This post may contain affiliate links which won’t change your price but will share some commission. See full disclosure, here.
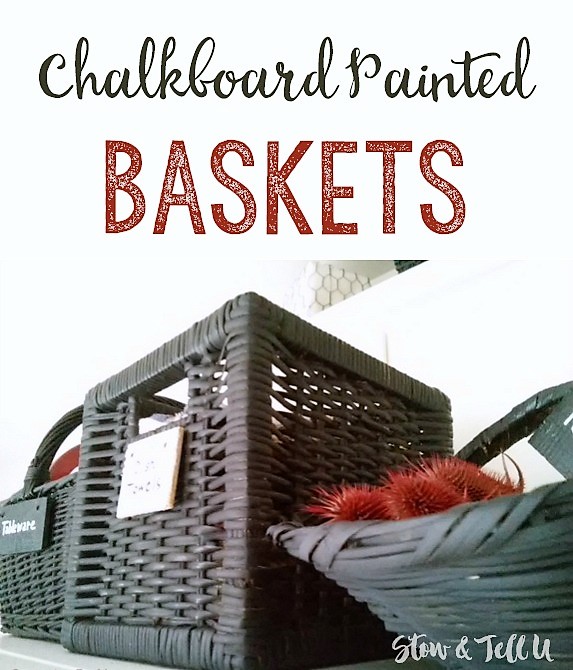
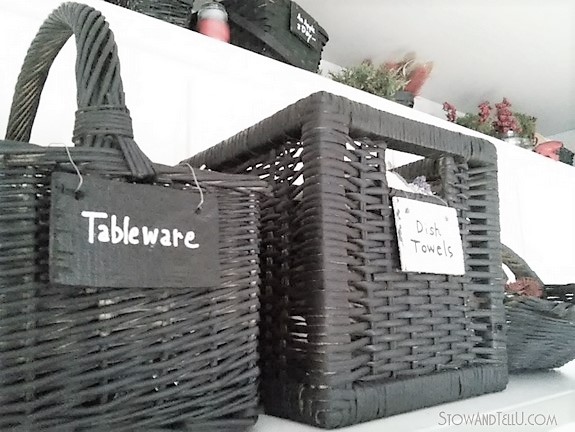
Chalkboard painted baskets
This project was easy and the supplies needed were few:
Supplies
Baskets
Chalkboard spray paint – or – Brush-on chalkboard paint and paint brush
Matt clear coat varnish – I like this one because it’s super easy to use.
Craft wire or cord – if your tags do not come with cord already
Wood labels or gift tags Labels of your choice – These tags come with cord.
Craft size bottle of chalkboard paint (optional to touch up any missed spots if you use the spray paint method.)
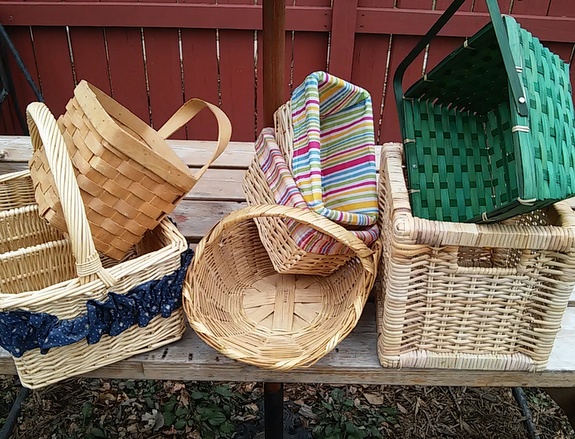
This is the group of mix-matched baskets.

Follow these steps
I put down a drop cloth outside and started by spraying the tops first. Let dry, then turned them over and sprayed the bottoms.
I had 7 baskets and was a little short on spray paint, so I used a bottle of craft sized chalkboard paint and a paint brush to complete the project.
I didn’t do this next step, but I strongly recommend it: Give all the baskets a top coat with a clear, matte finish, like this easy to apply varnish, to protect the paint from scrapes and such.
Alternatively, I could have used black flat spray paint (which is probably cheaper); and then brushed on some chalkboard paint. I could also have added a coat of paste wax for protection.
For another alternative, I could have just sprayed the baskets with black, flat spray paint and called it a day, because I’m not sure one could tell the difference, anyway.
These are just some options, but I do like the look I ended up with using the chalkboard paint.
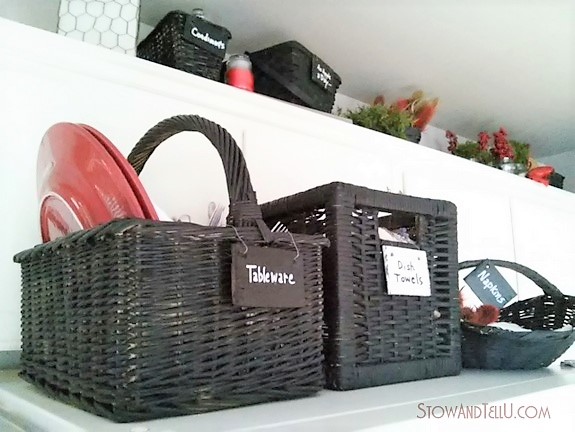
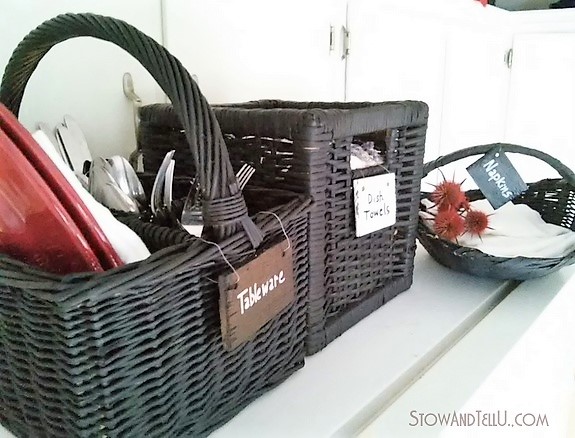
I painted wooden tags with the paint, as well, and attached the tags with craft wire. But there are plenty of pre-made tags that come with cord or string to hang on the basket easy enough.
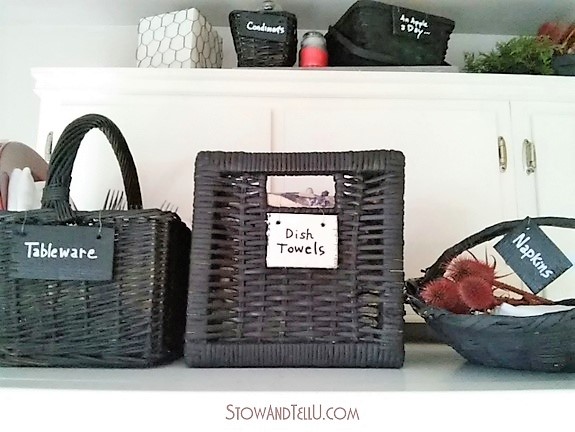
How cute or handsome would these be in a bachelor pad, or a vintage pink and black bedroom, or used on a party table to keep the serving supplies organized??

Add basket tags
I did make my own wooden tags for these baskets, I must brag confess.
I cut the wood myself (for the first time) with the table saw… and I still have all my phalanges. Thanks be to goodness!!
I gave these baskets a table setting/serving type of theme for the purpose of this post, but most likely these painted baskets will find their way into our basement to help us organize something, anything, everything, LOL.
Remember to topcoat
If you happen to paint your baskets with chalk or chalkboard paint, do remember give the finish a topcoat with this easy to apply water-based varnish or your own favorite top coat. You can also read about how I used this varnish to topcoat a set of dining chairs, here.
Thanks for stopping by ~ Amy
Other Kitchen Storage and Organizing Ideas
- How to Fake a Kitchen Pantry in Your Small Home
- 5 Tips for Organizing a Kitchen Storage Rack
- DIY Divided Wicker Basket
- BBQ Sauce Bottle Cap Fridge Magnets
- Super Easy Paint Stick Fridge Magnets
What Else Can You Paint with Chalkboard Paint?
- Chalkboard Painted Mini 6-Drawer Organizer (and Message Center)
- Side Cabinet with a Chalkboard Painted Counter Top
- Faux Stone Chalkboard Painted Kitchen Counter Tops
- Simple DIY Sign: Chalkboard Painted Shoe Box Lids
- How to Make Your Own Chalkboard Painted Gift Boxes
Don’t forget to pin or share on Facebook for later reference —>
Cheryl in Wisconsin says
Black baskets just look classy, period. Nice!
SheilaG@PlumDoodles says
The baskets look great. Table saws scare me. So glad you still have all your digits. 😉
sharleen says
They look great. And I love your hand made labels too thanks for sharing xxx .
chris aka monkey says
amy they look great..it is amazing how paint can change things these look like you collected them over time…if i haven’t said it already merry Christmas to you and yours xx
Danni@SiloHillFarm says
Well those look really cute! Your basement is going to be so cool when it’s all finished….and apparently well-organized too! Way to go on cutting your own tags and keeping all your digits!
Tuula @ The Thrifty Rebel says
Those baskets look fabulous! I love the tags.
Feral Turtle says
I love this idea Amy. I pinned it too. What a way to make everything look more matched and organized. Love the black color choice!
Sherry says
Great job Amy! Painting them all the same color was perfect. A great way to save tired baskets. Very thrifty my friend!
Doreen@Househoneys says
The black looks great Amy, and this is a really great way to unify everything.
Glad to hear your son is settled. Merry Christmas!
Heather says
I have a hundred million teeny little baskets…I’m thinking I should spray paint them and turn them into something. Thanks for the inspiration.